

Overview
The Escalations action lets your AI agent hand a conversation to a human. When triggered, it creates a ticket in the helpdesk platform you choose, including the customer’s details and the conversation so your team can pick up where the AI agent left off.Best for:
Issues the AI agent can’t resolve and that don’t need an answer this second: anything your team can work as a ticket and follow up on.
- “I want to speak to a human”
- “Connect me to support”
- “This didn’t solve my issue”
- “I need help with my billing”
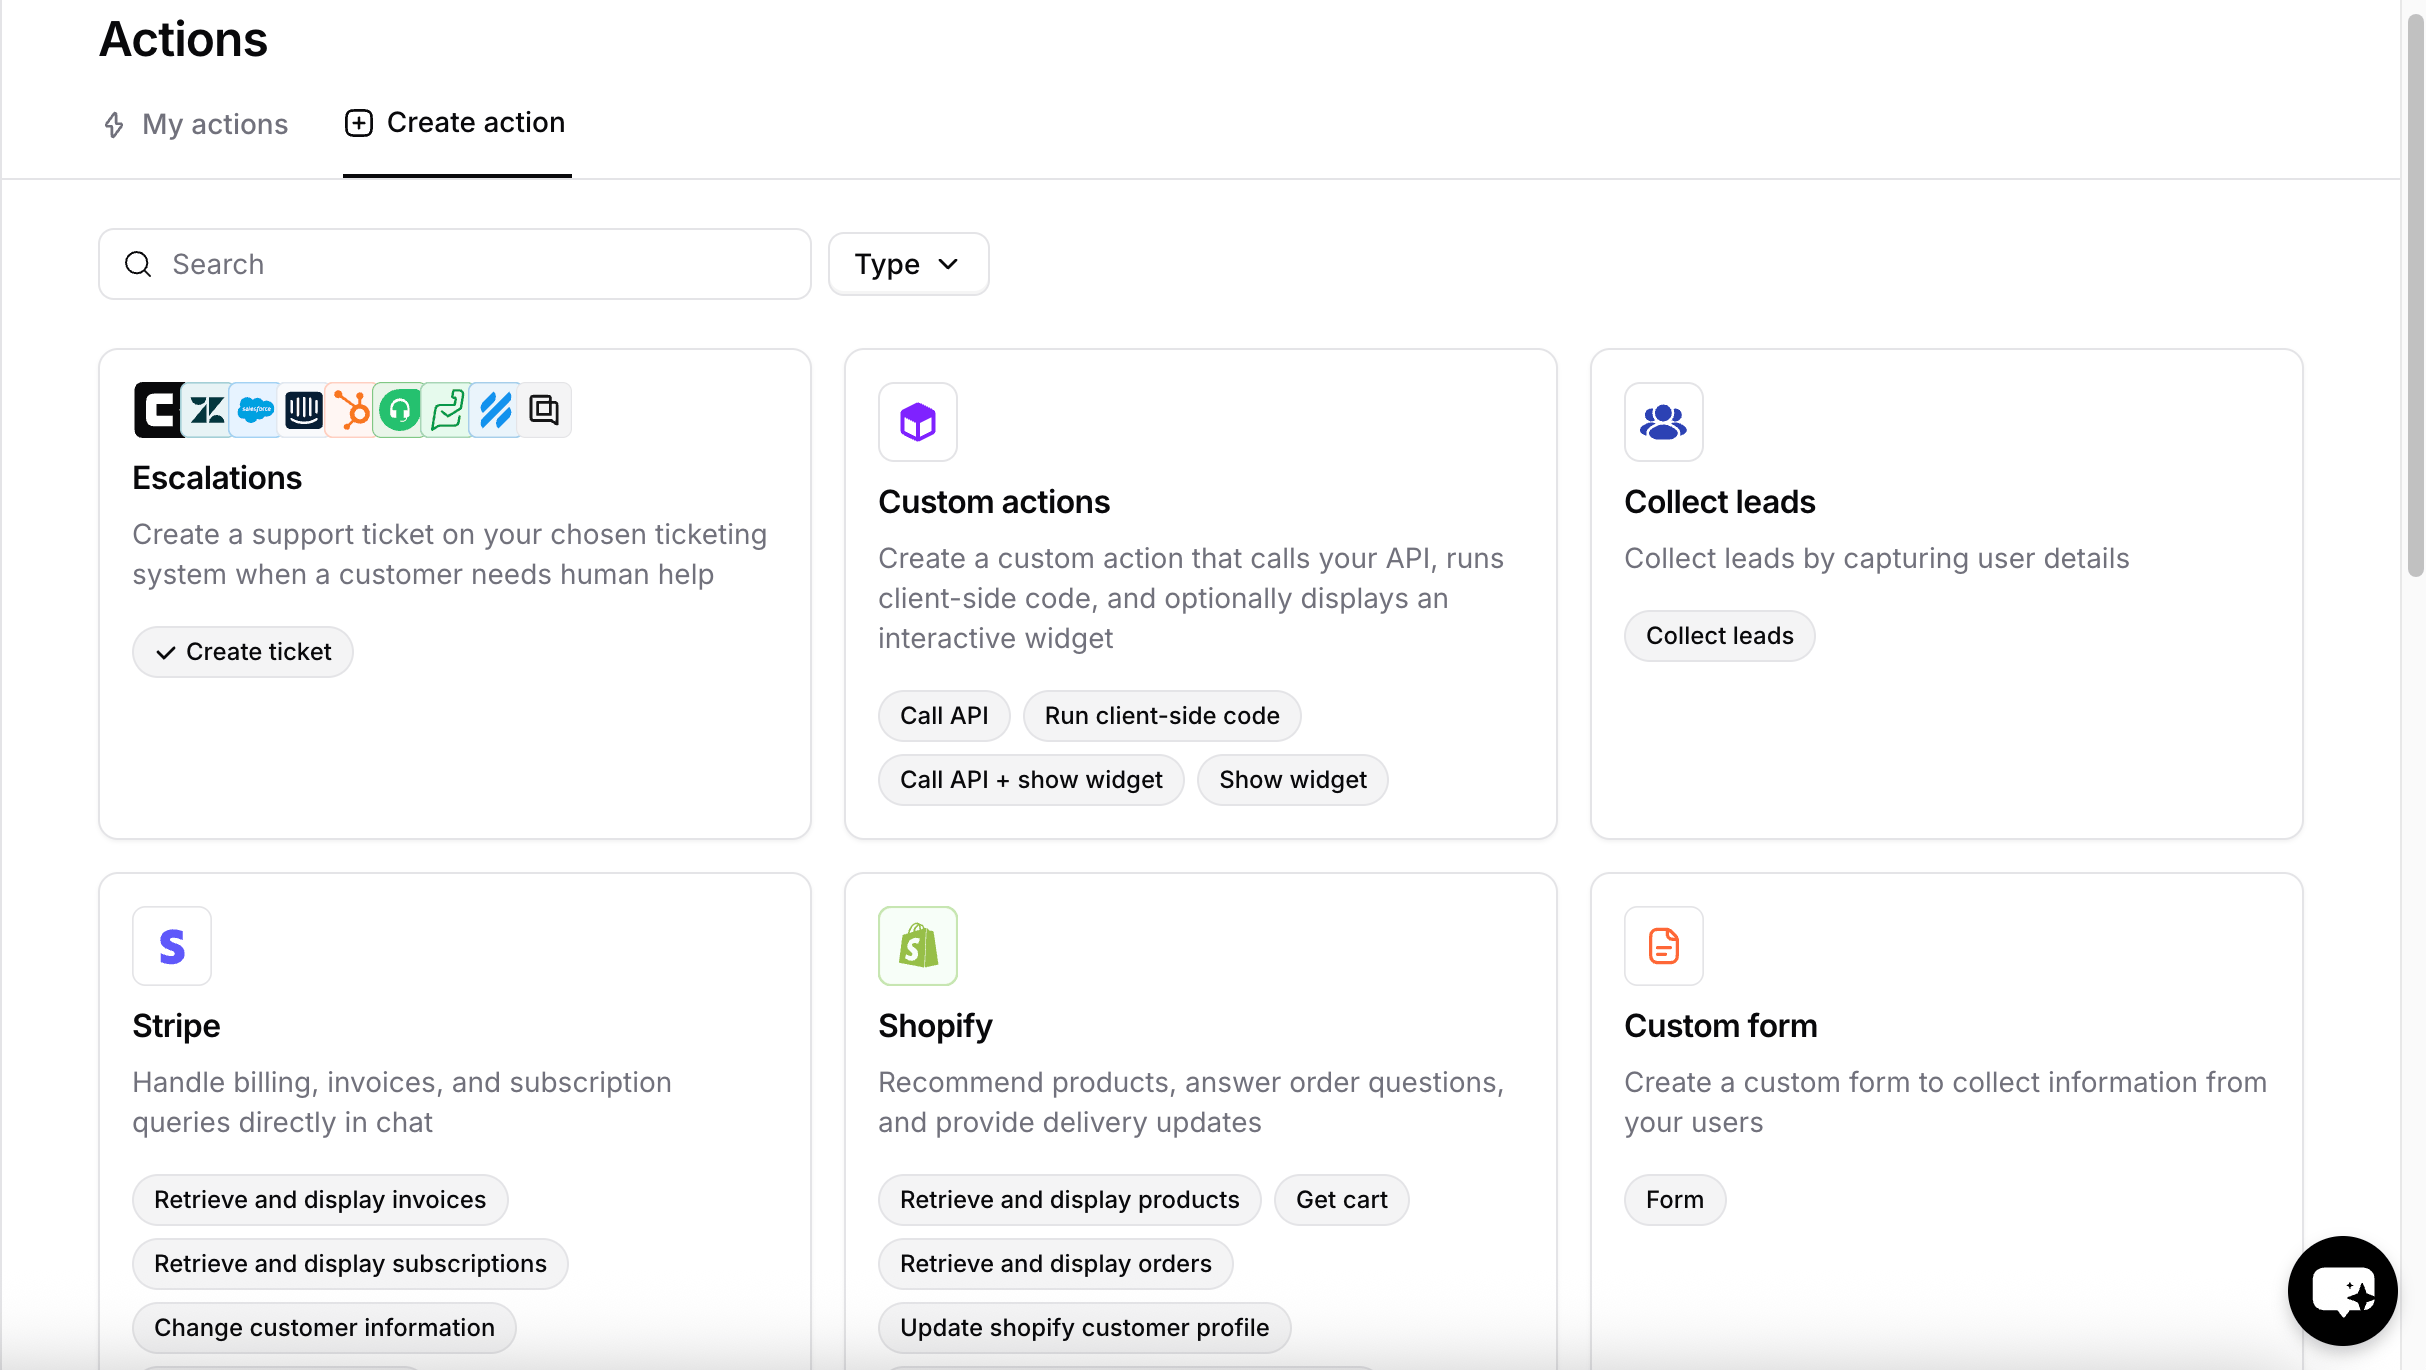
Escalations open a ticket for asynchronous follow-up. If you’d rather route the customer to a human in real time, use Chatbase live chat instead.
Before you start
The action can only create tickets in a platform you have already set up. Only connected platforms appear in the Ticket Platform dropdown when you create the action.- To use Chatbase Helpdesk, click Helpdesk inbox in the sidebar and enable it from there.
- To use a third-party platform, go to Integrations in the sidebar and connect it.
How to create the action
1
Navigate to Actions
Go to your Chatbase dashboard and select your AI agent. Click Build > Actions in the left sidebar.
2
Create the Action
Click Create action, then select Create ticket under Escalations.
3
Configure General Settings
Action name: A descriptive name that helps the AI agent understand when to trigger the action, such as To restrict the action to procedure steps only, turn on Only use in procedures. When it’s on, the When to use field is hidden, because the AI agent no longer decides when to call the action.
create_ticket, create_ticket_refunds, or create_ticket_whatsapp.Ticket Platform: The platform where tickets are created. The options in the next section depend on this choice.When to use: Explain clearly when the AI agent should create a ticket. The field comes prefilled with a default you can edit, and Reset restores it:4
Configure details collection
This section changes based on the ticket platform you picked. See Details collection by platform below.
5
Add Tags
With Chatbase as the ticket platform, the Tags section lets the AI agent tag each ticket it creates. See Tags below, or click Skip to leave it empty.
6
Choose Channels
Use Channels to control where the action is available. Toggle the action on or off for each configured channel, such as Chat bubble, Help page, or WhatsApp, then click Save. Some channels may be incompatible with the action and won’t be available for selection.
7
Enable and Test
Click Save & enable to make the action available to your AI agent, then test it.
Details collection by platform
Chatbase Helpdesk
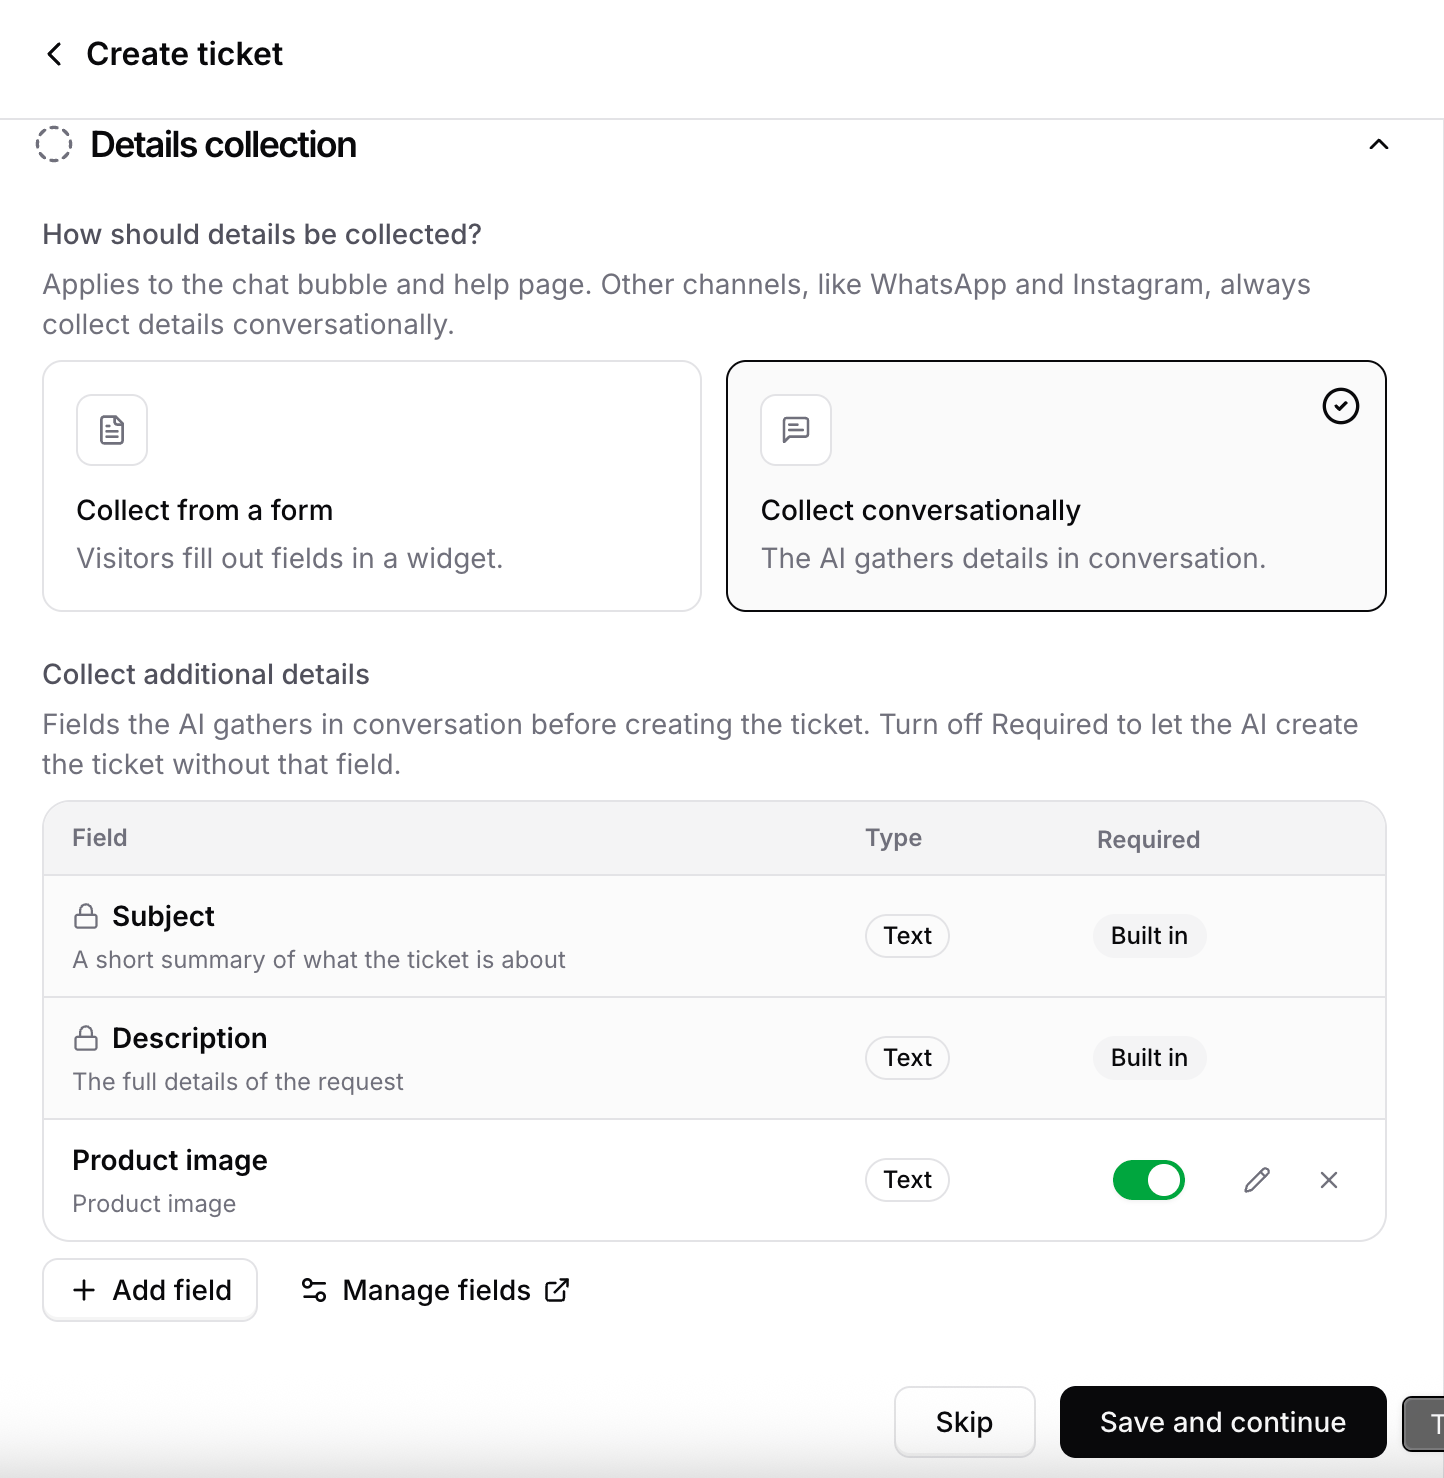
When the ticket platform is Chatbase, you choose how the AI agent collects the customer’s details before opening the ticket. How should details be collected? This setting applies to the chat bubble and Help page. Other channels, such as WhatsApp and Instagram, always collect details conversationally.
Collect additional details: The fields the AI agent gathers before creating the ticket. Subject and Description are built in and always collected. Click Add field to add your own, each with a name, a type, and a description that tells the AI agent what to ask for. Use the pencil icon to edit a field or the X to remove it from this action.
The AI agent must collect every required field before it opens the ticket. Turn off Required to let the AI agent create the ticket even if the customer never provides that field.
Tags
The Tags section lets the AI agent label each ticket it creates with tags from your tag list. It sits between Details collection and Channels. Click Add tag and pick a tag. Then describe when it applies in the When should the AI use this tag? box, for exampleThe customer reports a damaged or missing item. Every tag needs a description, up to 200 characters.
The AI agent weighs each description on its own and adds every tag that fits, so a ticket can get several tags or none. Tags are added as the ticket is created, before any triggers run, so a trigger that checks for a tag already sees them.
If the tag you need doesn’t exist yet, type its name and click Create “name”. Typing the exact name of an archived tag offers Restore “name” instead. Both need permission to manage tags. Without it, ask an admin to add the tag in Settings → Helpdesk → Tags.
Changes to the tag list carry over to the action:
- Renaming a tag updates the action too. You don’t need to edit it.
- Archiving a tag stops the AI agent from applying it. The tag stays on the action with an archived badge until you restore it or remove it from the action.
Zendesk
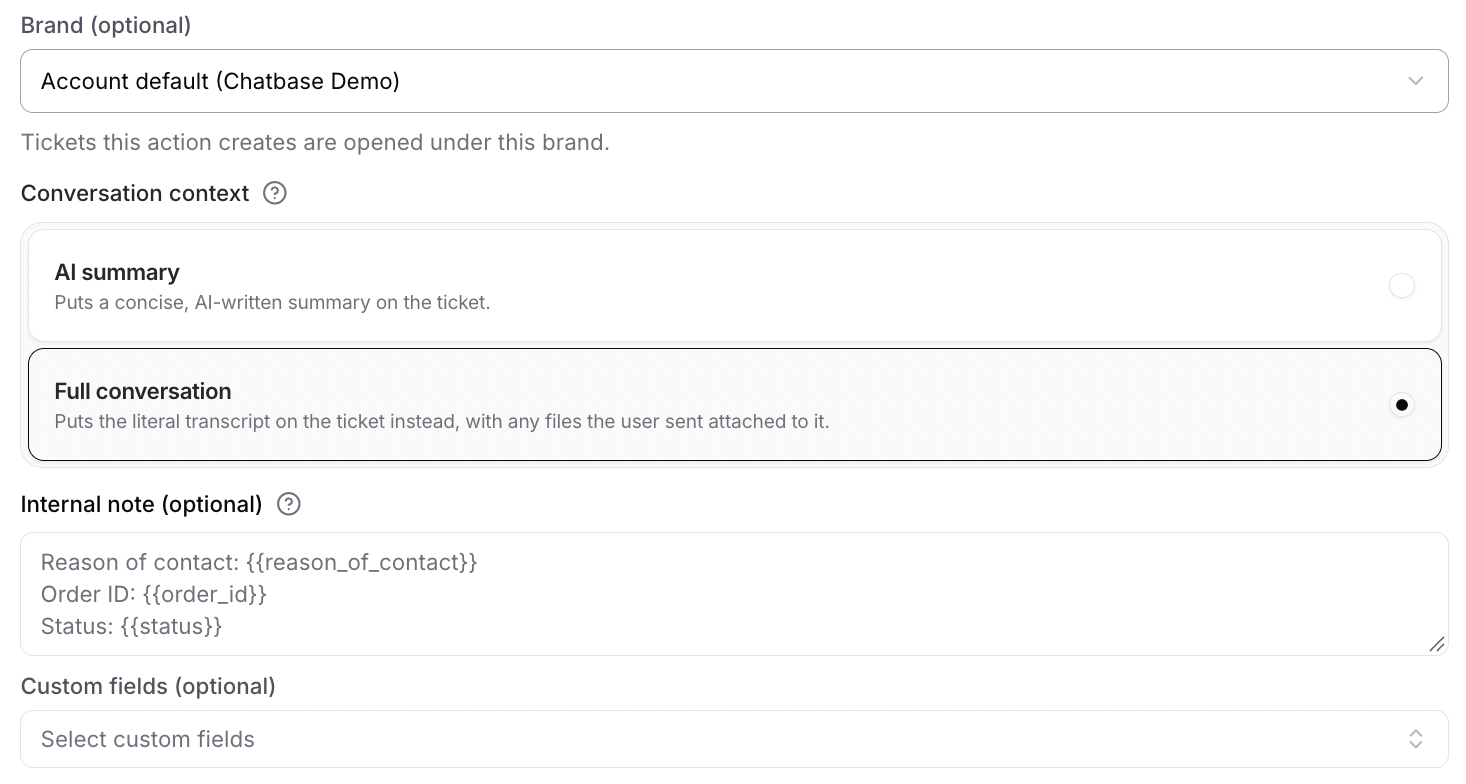
When the ticket platform is Zendesk, you control what goes on the ticket. Brand: The Zendesk brand the ticket will be created under. Select Default to use the brand’s default value at the time the ticket is created. Conversation context: What the ticket contains.
Internal note (optional): A private note added to the ticket for your team. Use variables in double curly braces to have the AI agent fill in details from the conversation. For example:
Other platforms
Salesforce, Intercom, Zoho Desk, Freshdesk, HubSpot, Help Scout, Gorgias, and Odoo have no platform-specific options. Complete the General and Channels sections and the AI agent creates the ticket with the customer’s details and an AI-written summary of the conversation.How it works
When the action triggers, the AI agent:- Collects any details it still needs from the customer.
- Creates a ticket in the selected platform.
- Includes the customer’s information and the conversation on the ticket.
Test the action by asking your AI agent to speak to a human, and confirm a ticket appears in your chosen platform with the details and conversation attached.
Email handover with Zendesk
On the Email channel with Zendesk as the ticket platform, the AI agent handles the email thread on its own until the customer asks to speak to a human. Creating the ticket then hands the conversation over to your team, and the AI agent stops replying to the thread until the ticket is resolved.
What this means in practice:
- Your team’s Zendesk replies reach the customer in the same email thread. There is no separate thread and no ticket notification for the customer to follow.
- Customer replies during the handover go to the Zendesk ticket, not to the AI agent.
- Resolving the ticket hands the thread back. Once the ticket is Solved or Closed, the AI agent answers the customer’s next email as usual.
This applies to the Email channel with Zendesk only. With any other ticket platform, and on any other channel, the AI agent keeps replying after it creates the ticket.
Email handover is on by default for every AI agent and cannot be turned off.
Limitations
- The full transcript is only available for Zendesk. Every other platform receives an AI-written summary of the conversation.
- The form collection mode applies to the chat bubble and Help page only. Other channels always collect details conversationally.
- Tags are available on Chatbase Helpdesk only. Other ticket platforms don’t show the Tags section.
- An action holds up to 5 tags. Add tag greys out at the limit. Remove a tag to make room for another.
Best Practices
Clear Escalation Criteria
Spell out when the AI agent should escalate and when it should keep trying, so customers aren’t handed off prematurely or left stuck.
One Action per Context
Create separate actions for different contexts, such as
create_ticket_refunds and create_ticket_whatsapp, when they need different rules or fields.Collect What Your Team Needs
Add the fields your team would otherwise have to ask for, so the ticket arrives ready to work.
Require Sparingly
Every required field is another thing the AI agent must extract before it can open the ticket. Mark the rest optional.