

1
Create & Train Your AI Agent
Set up a new AI agent and train it using your website or documents
2
Test & Optimize
Use the Playground to test responses and fine-tune performance
3
Deploy to your Website
Add your AI agent to your website with a simple embed code
Before you start
You’ll need an active Chatbase account to follow this guide. Sign up here if you haven’t already.
Step 1: Create & train your AI agent
Navigate to your dashboard
After signing into your Chatbase account, go to your main dashboard. Click the New AI Agent button to get started.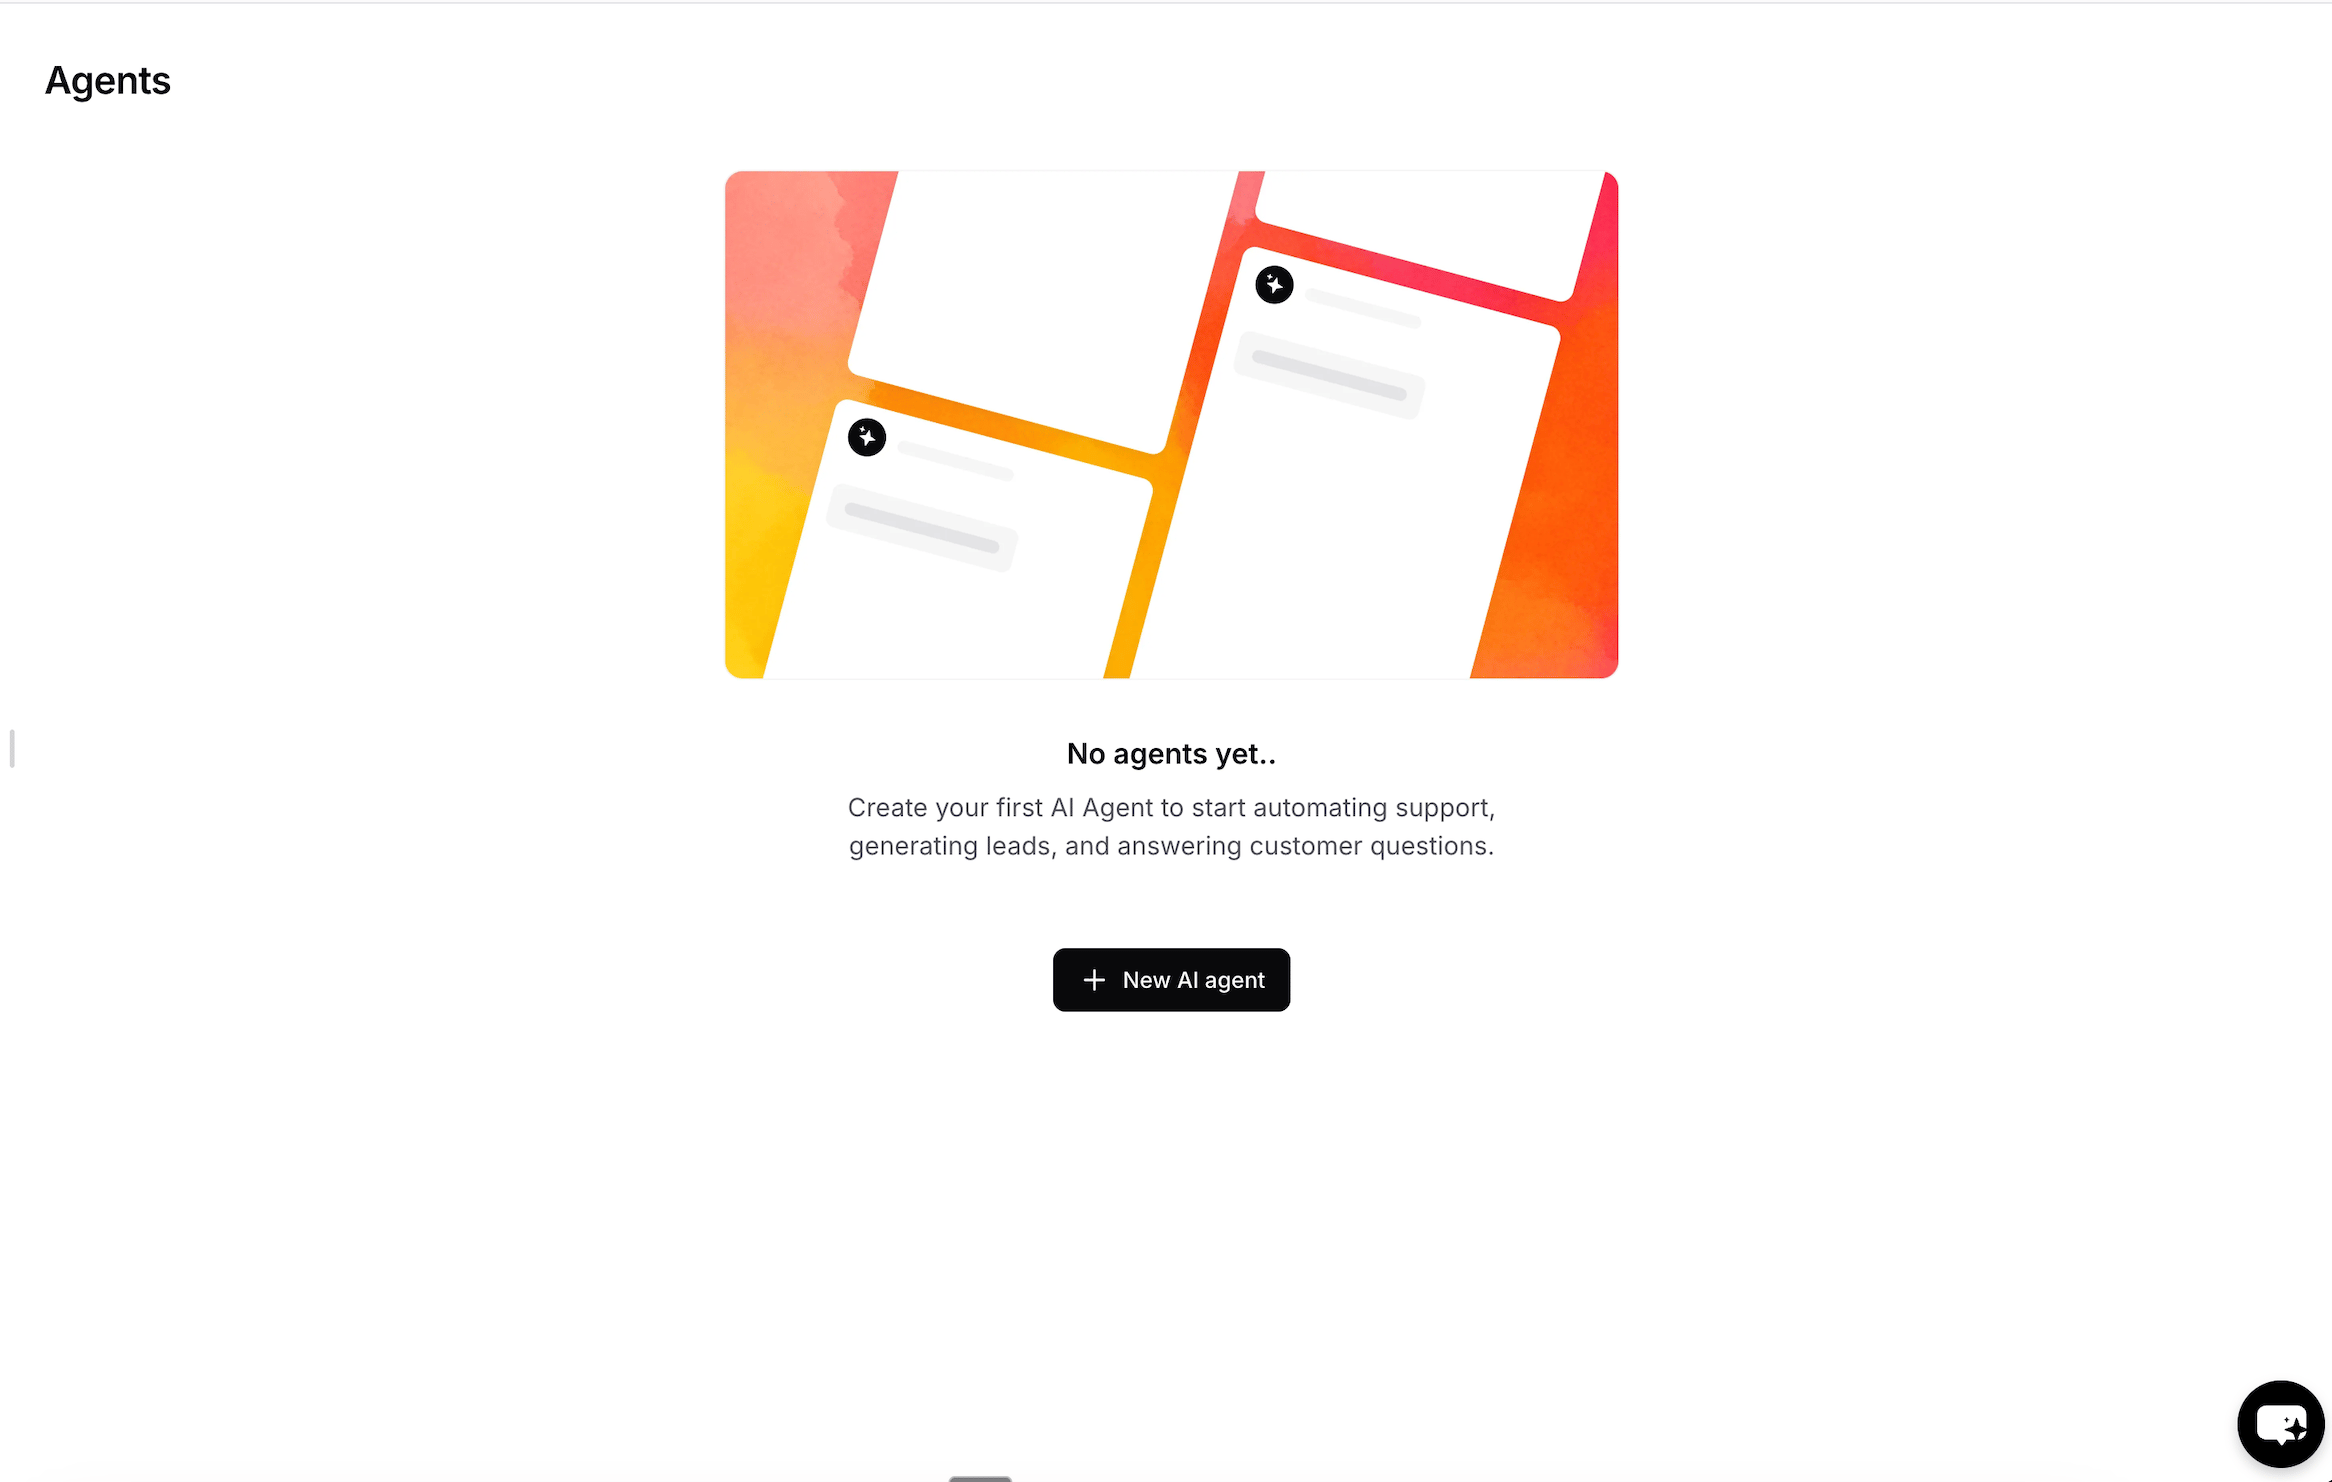
Choose your training data
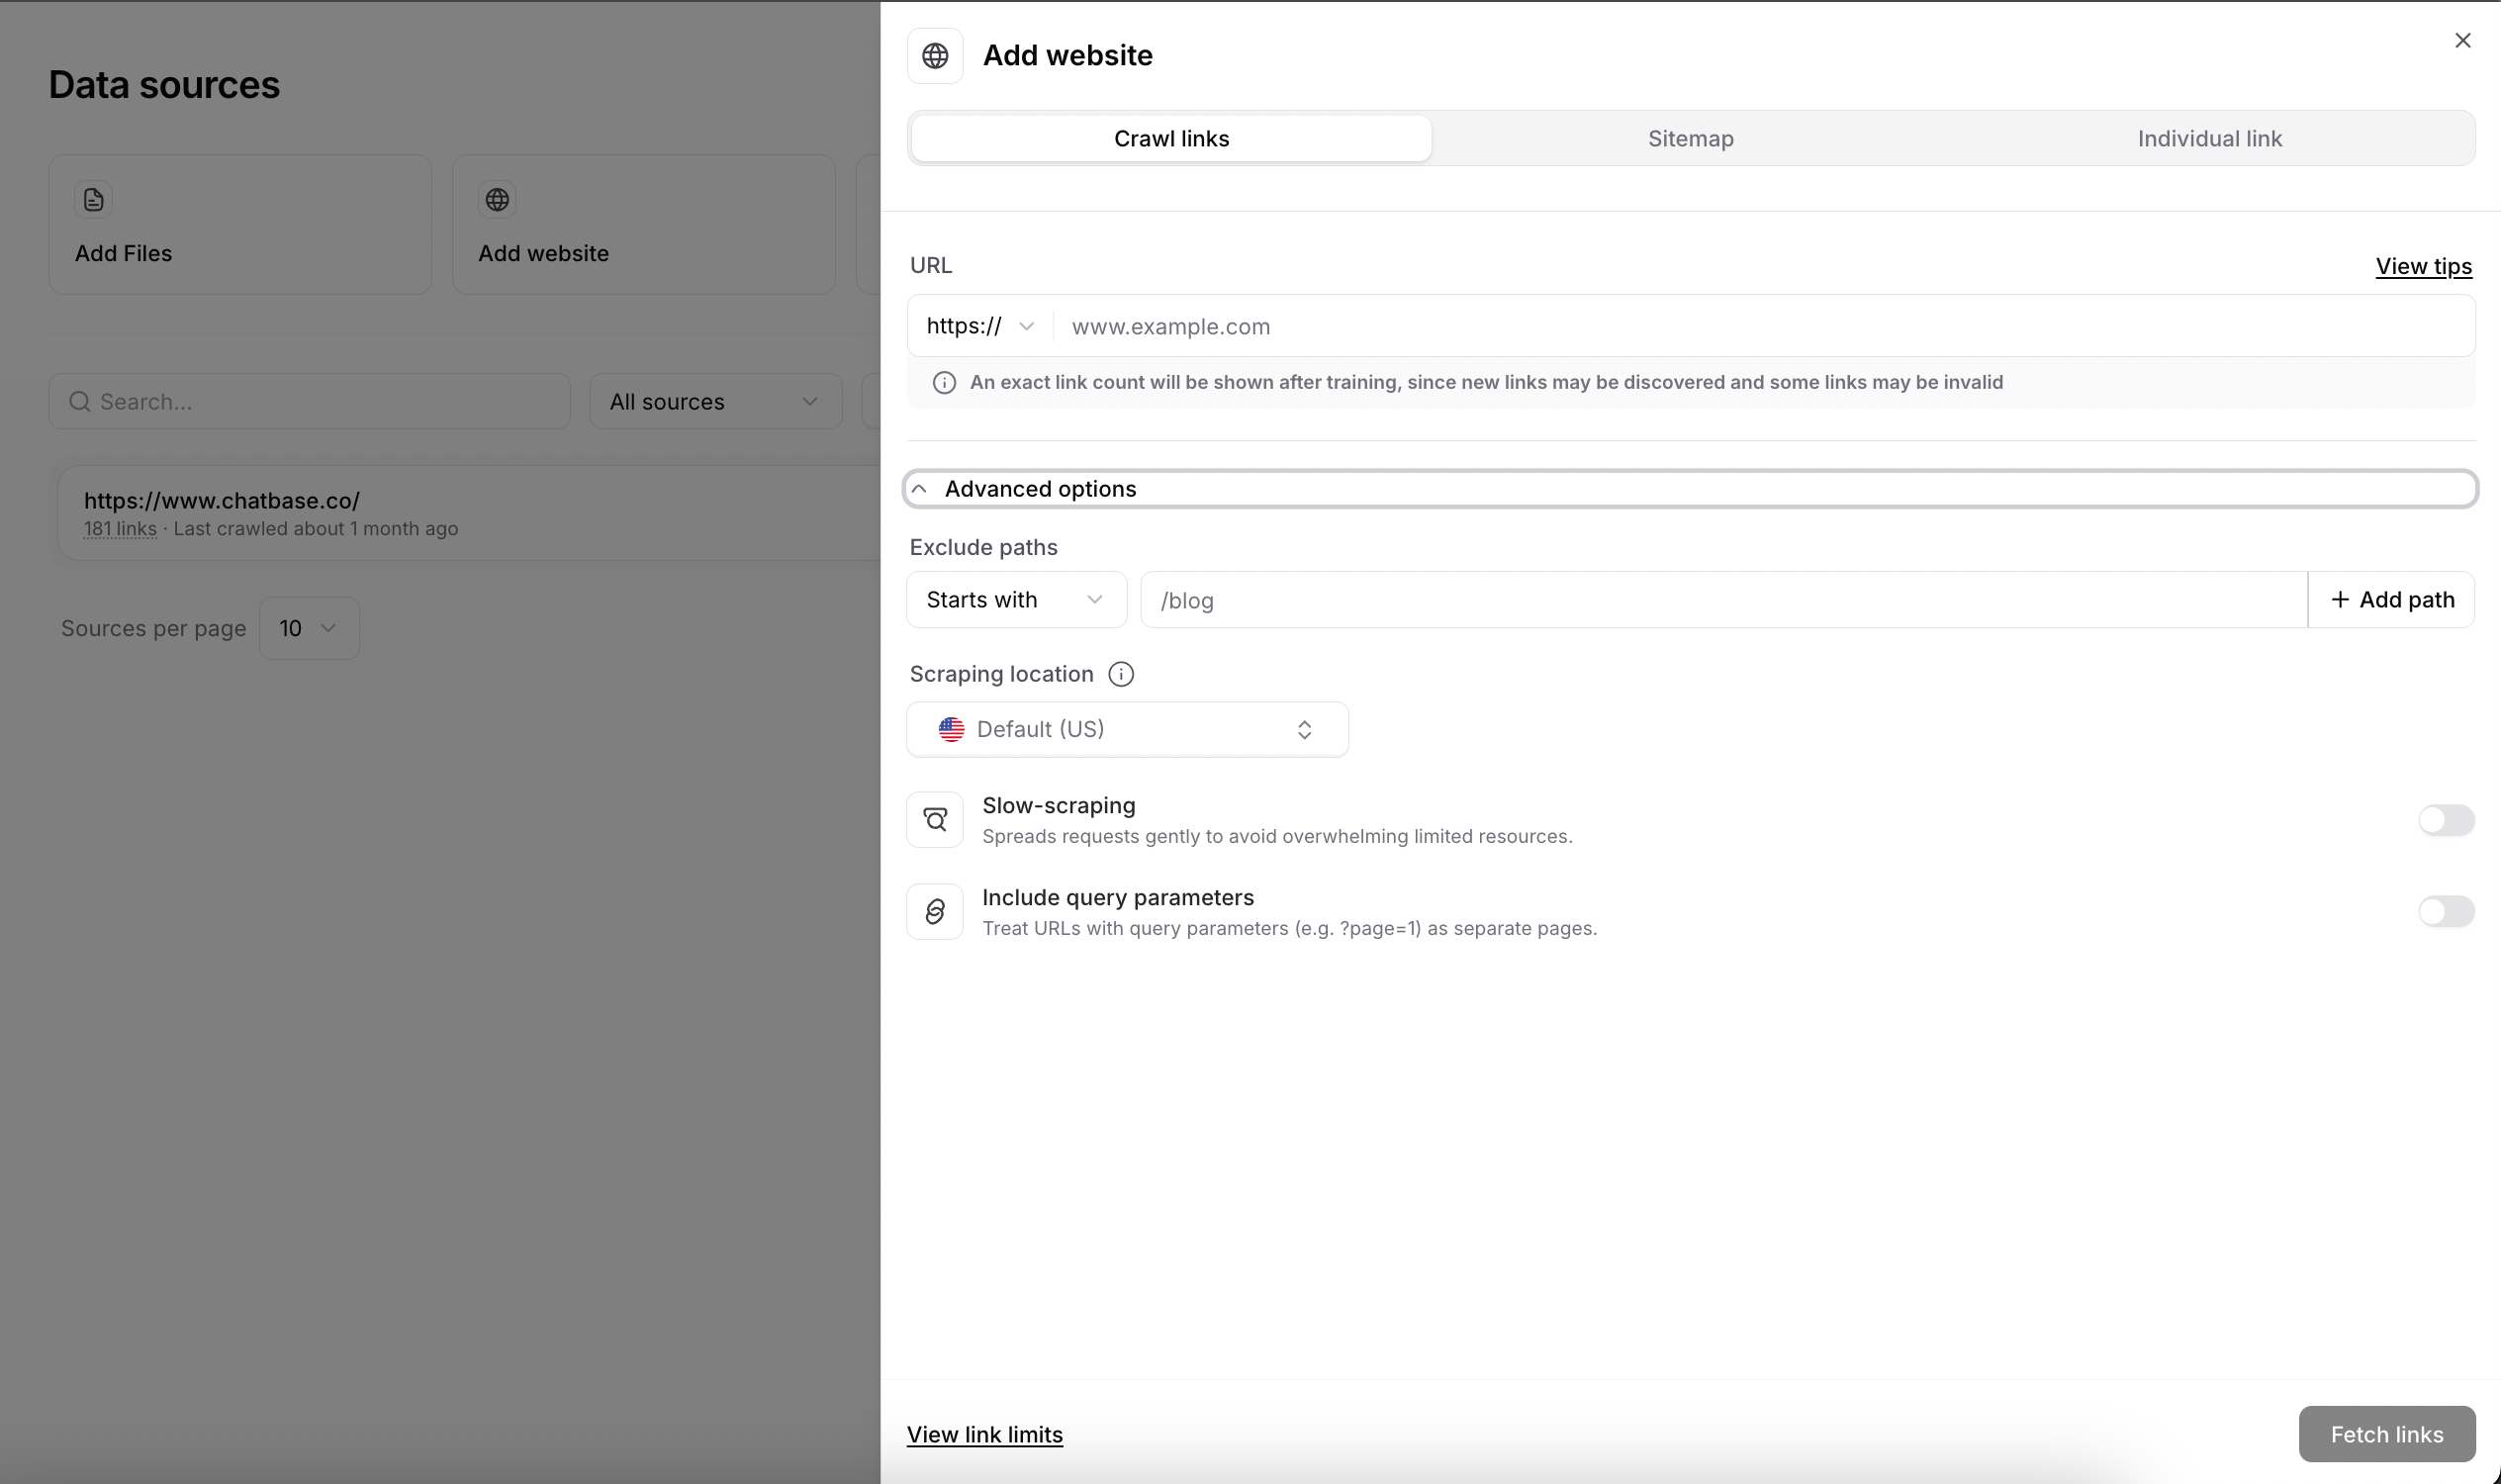
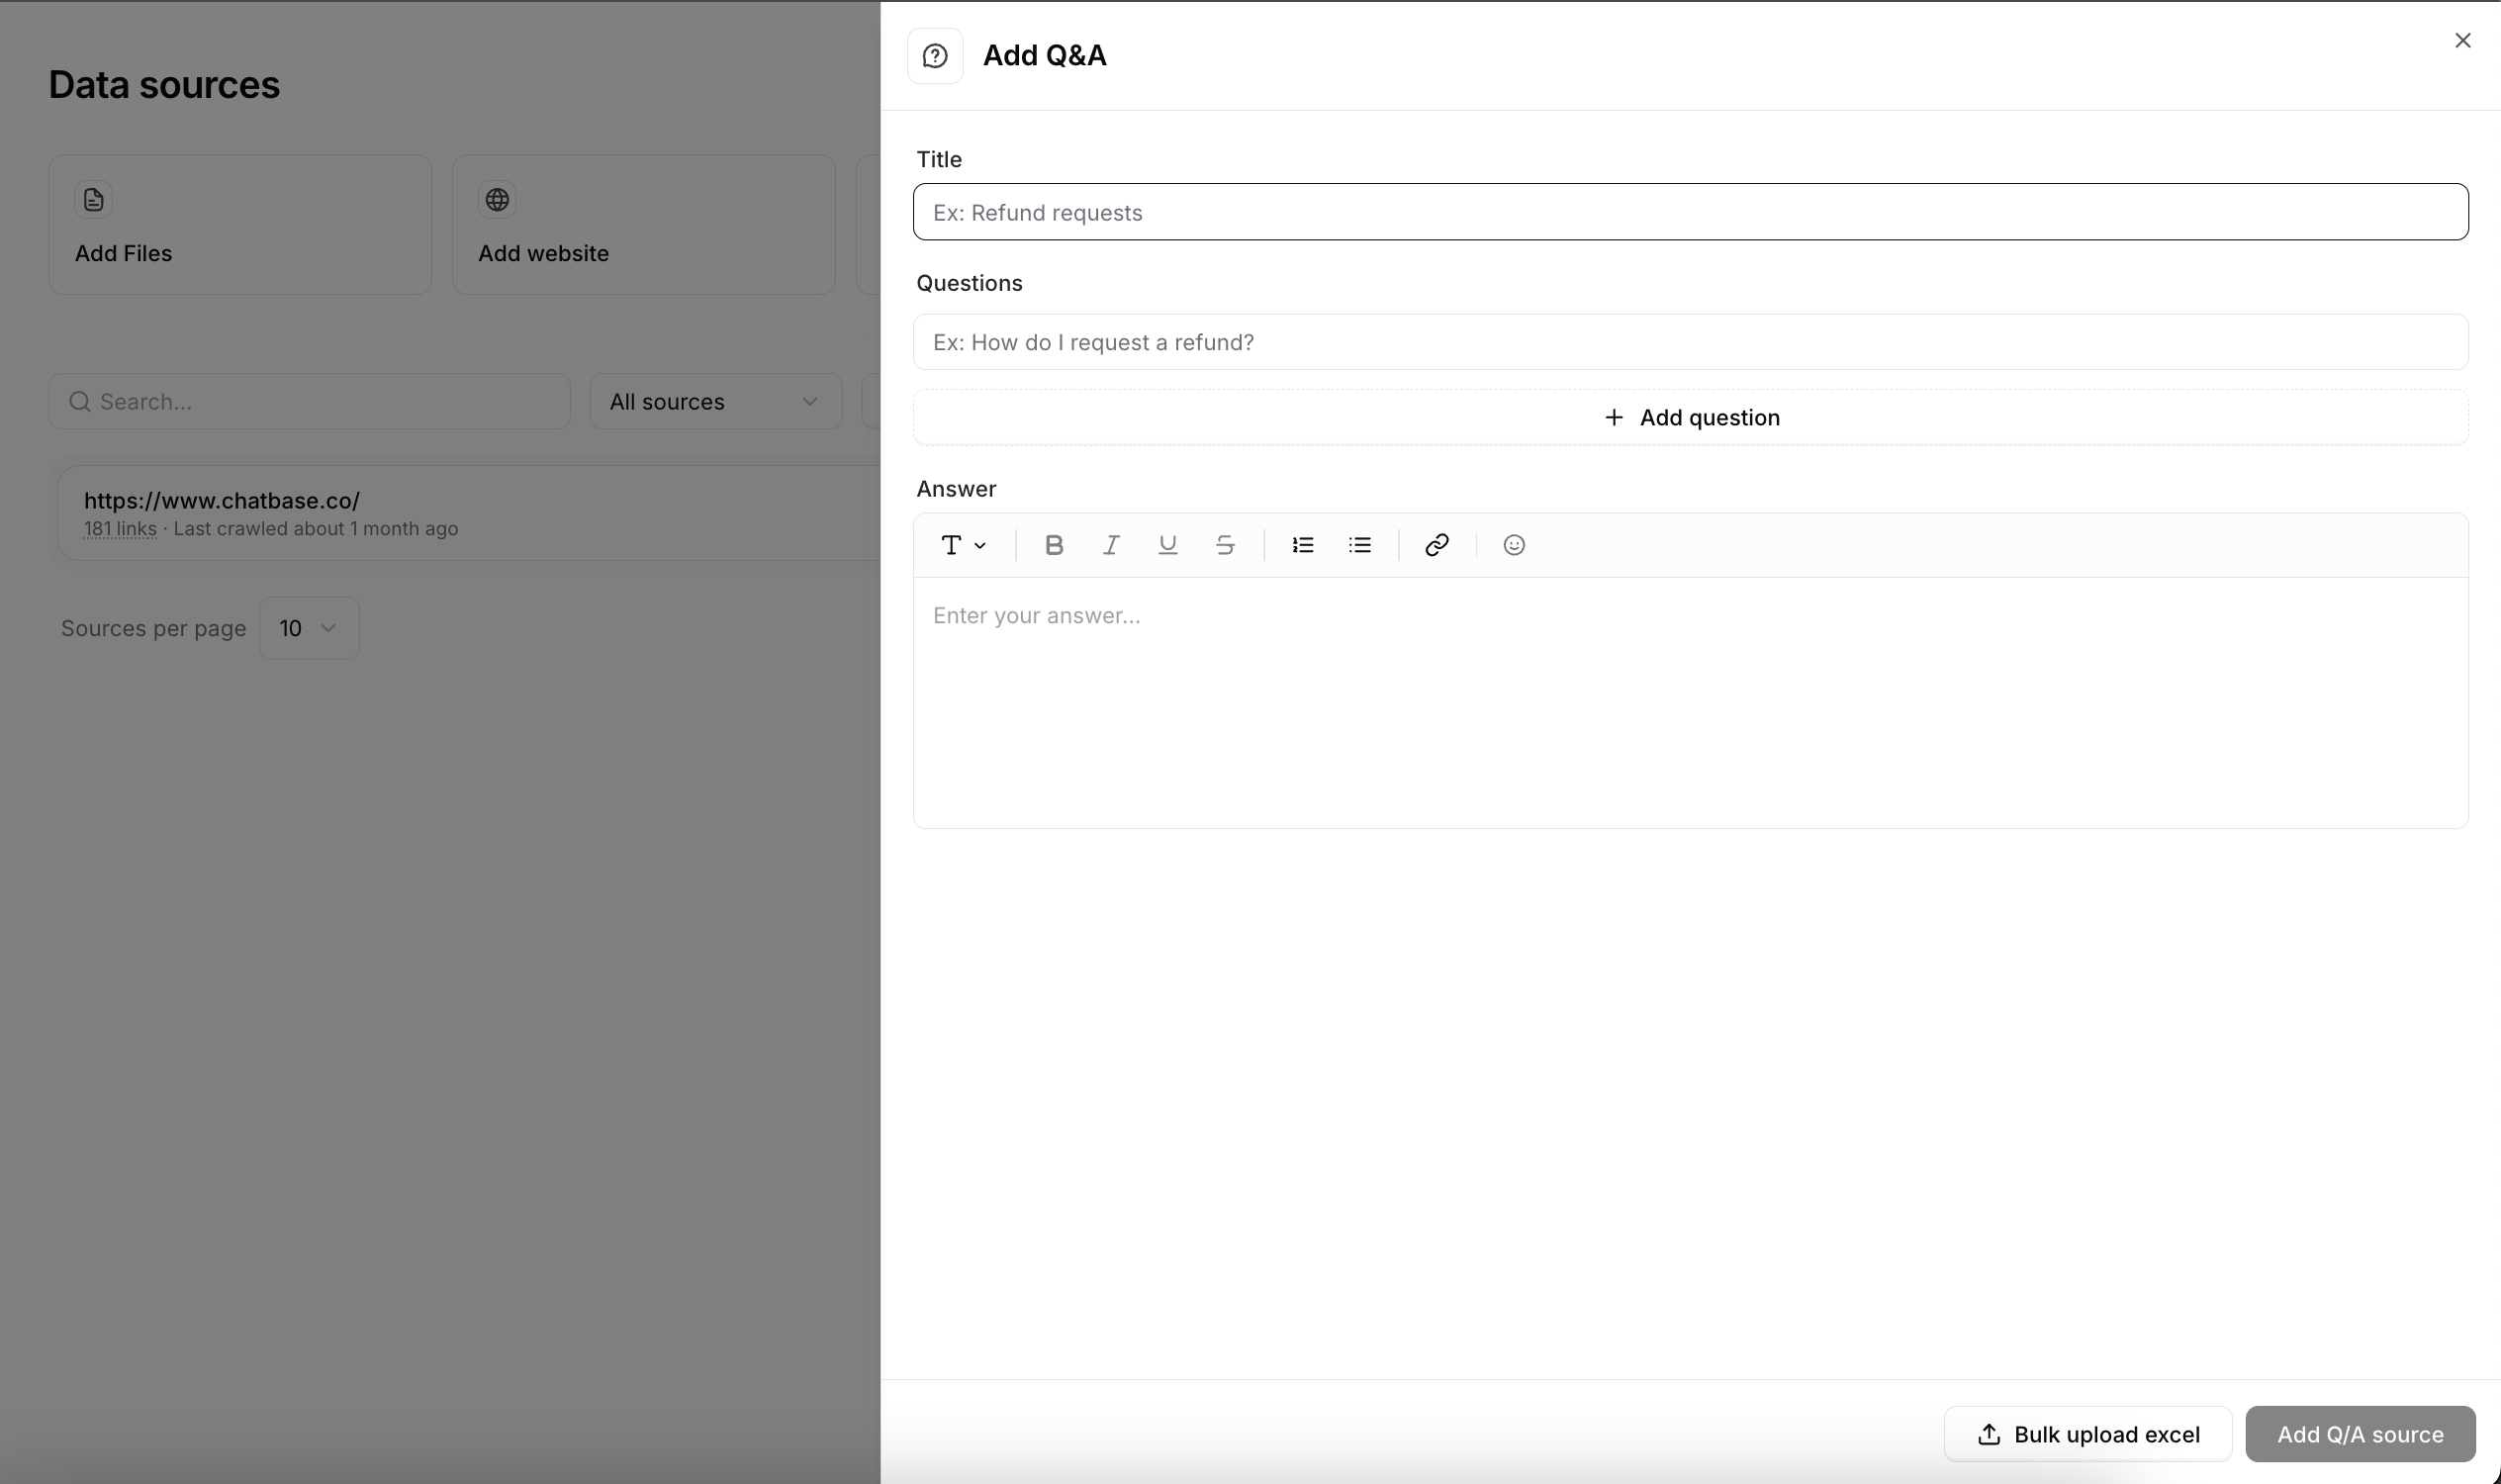
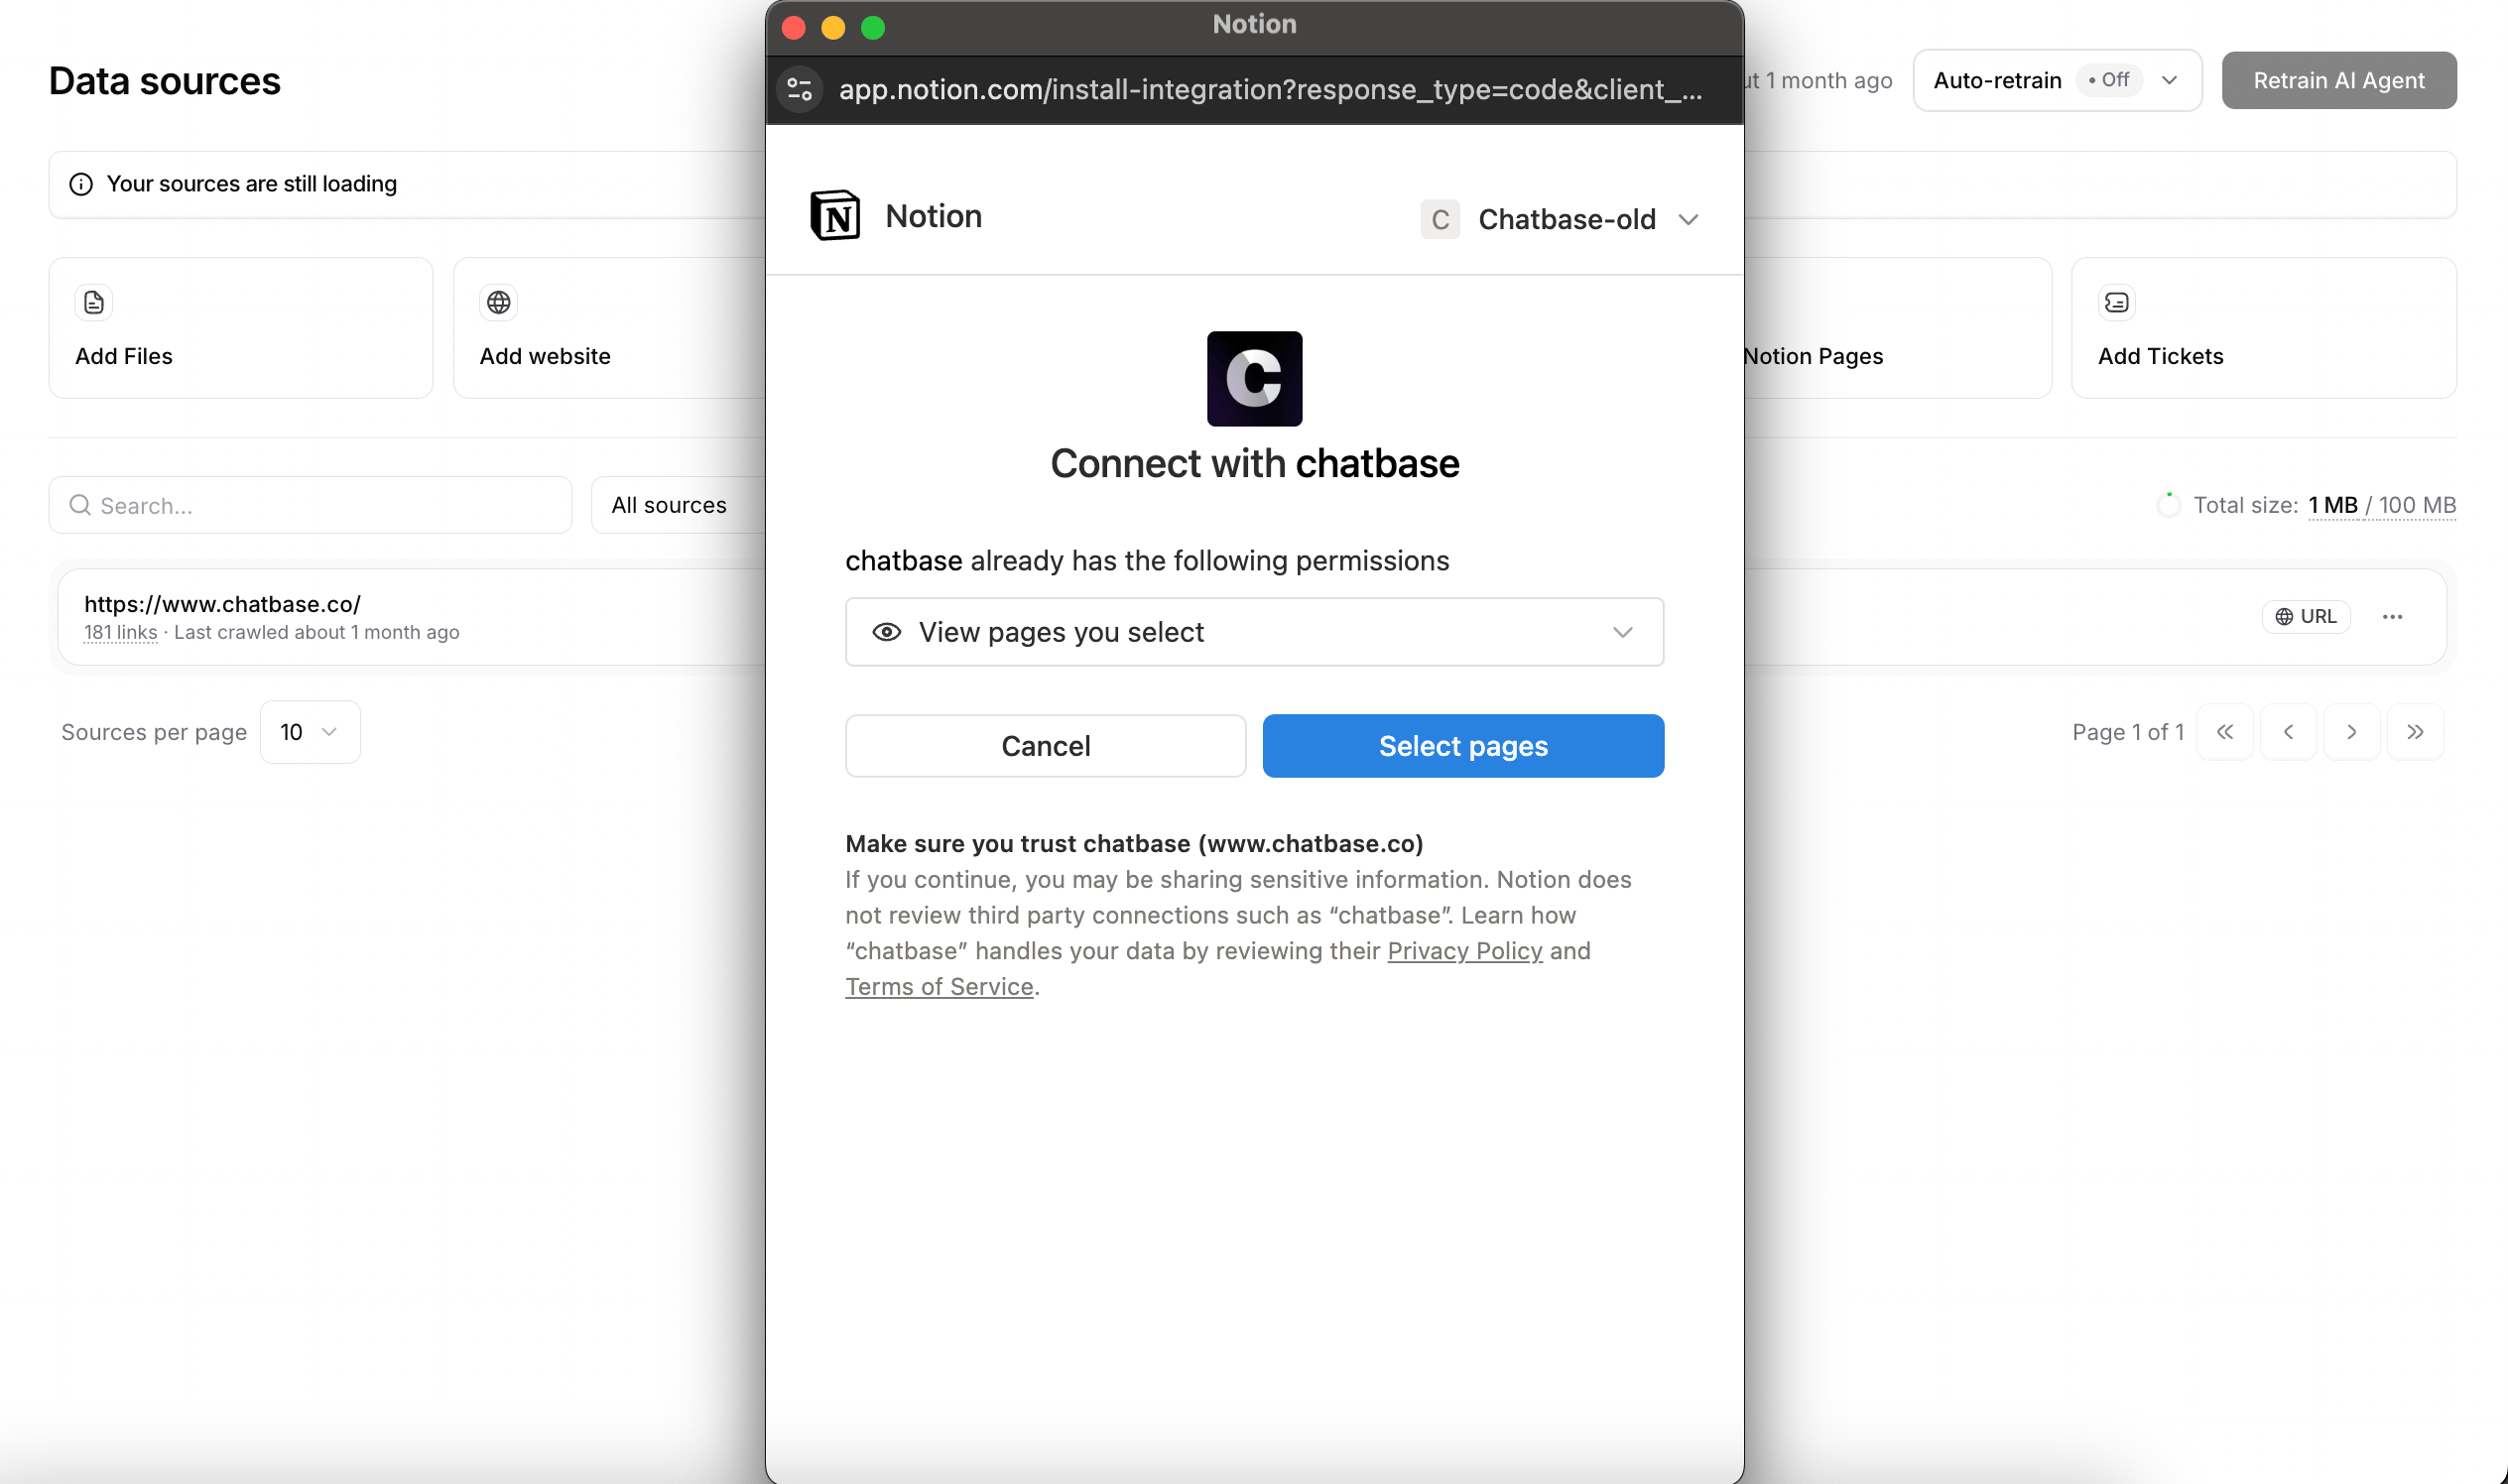
The first screen asks How would you like to train your AI Agent? Enter your website under Your website (recommended), and Chatbase extracts information from all pages on that domain. To add files, text, Q&A, or Notion pages, click Add another source under Other sources. You must add at least one source before you can click Continue.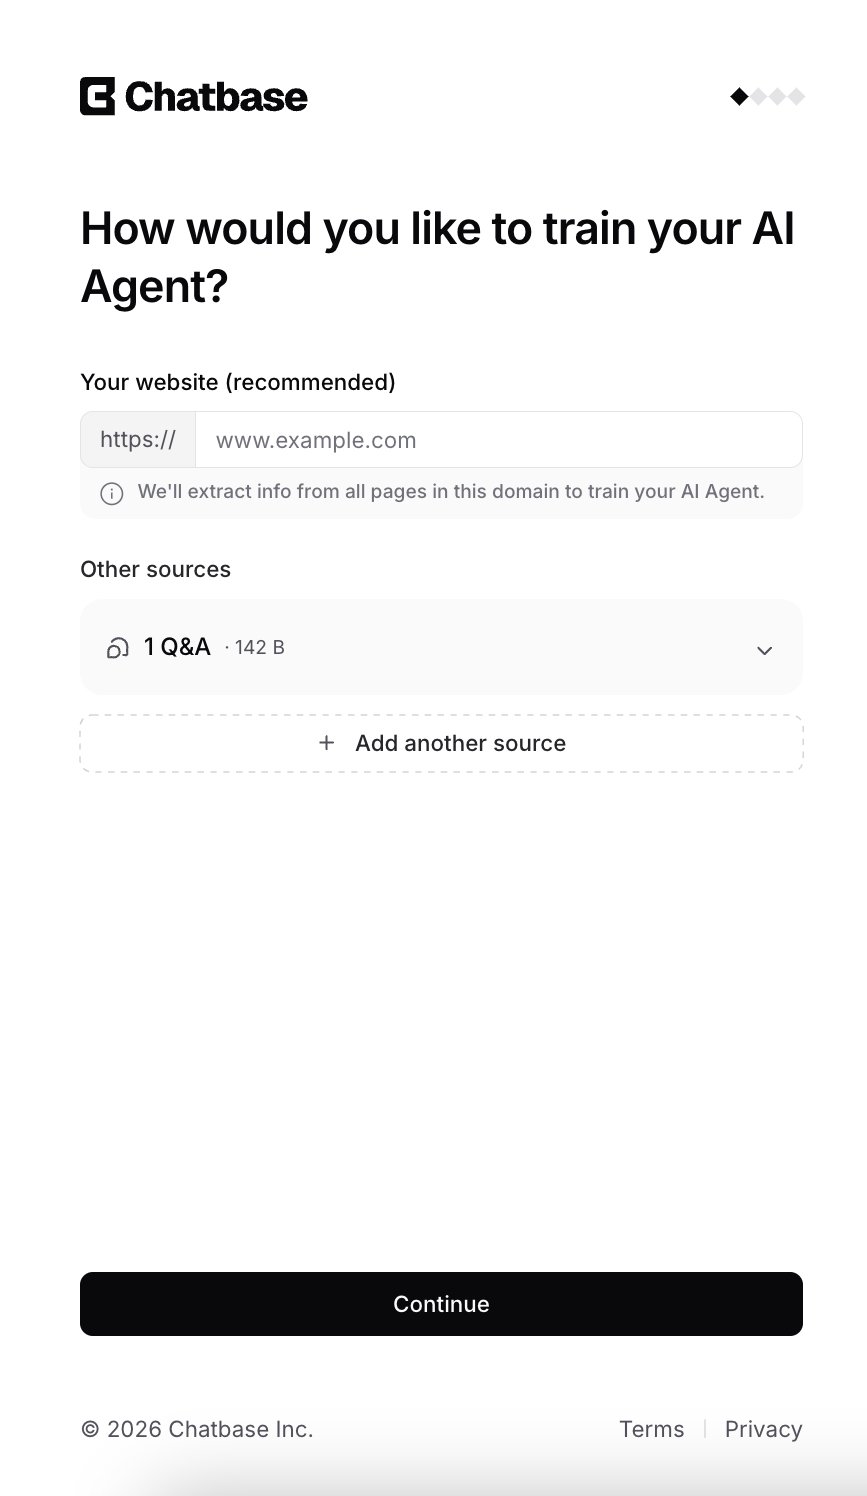
- Files
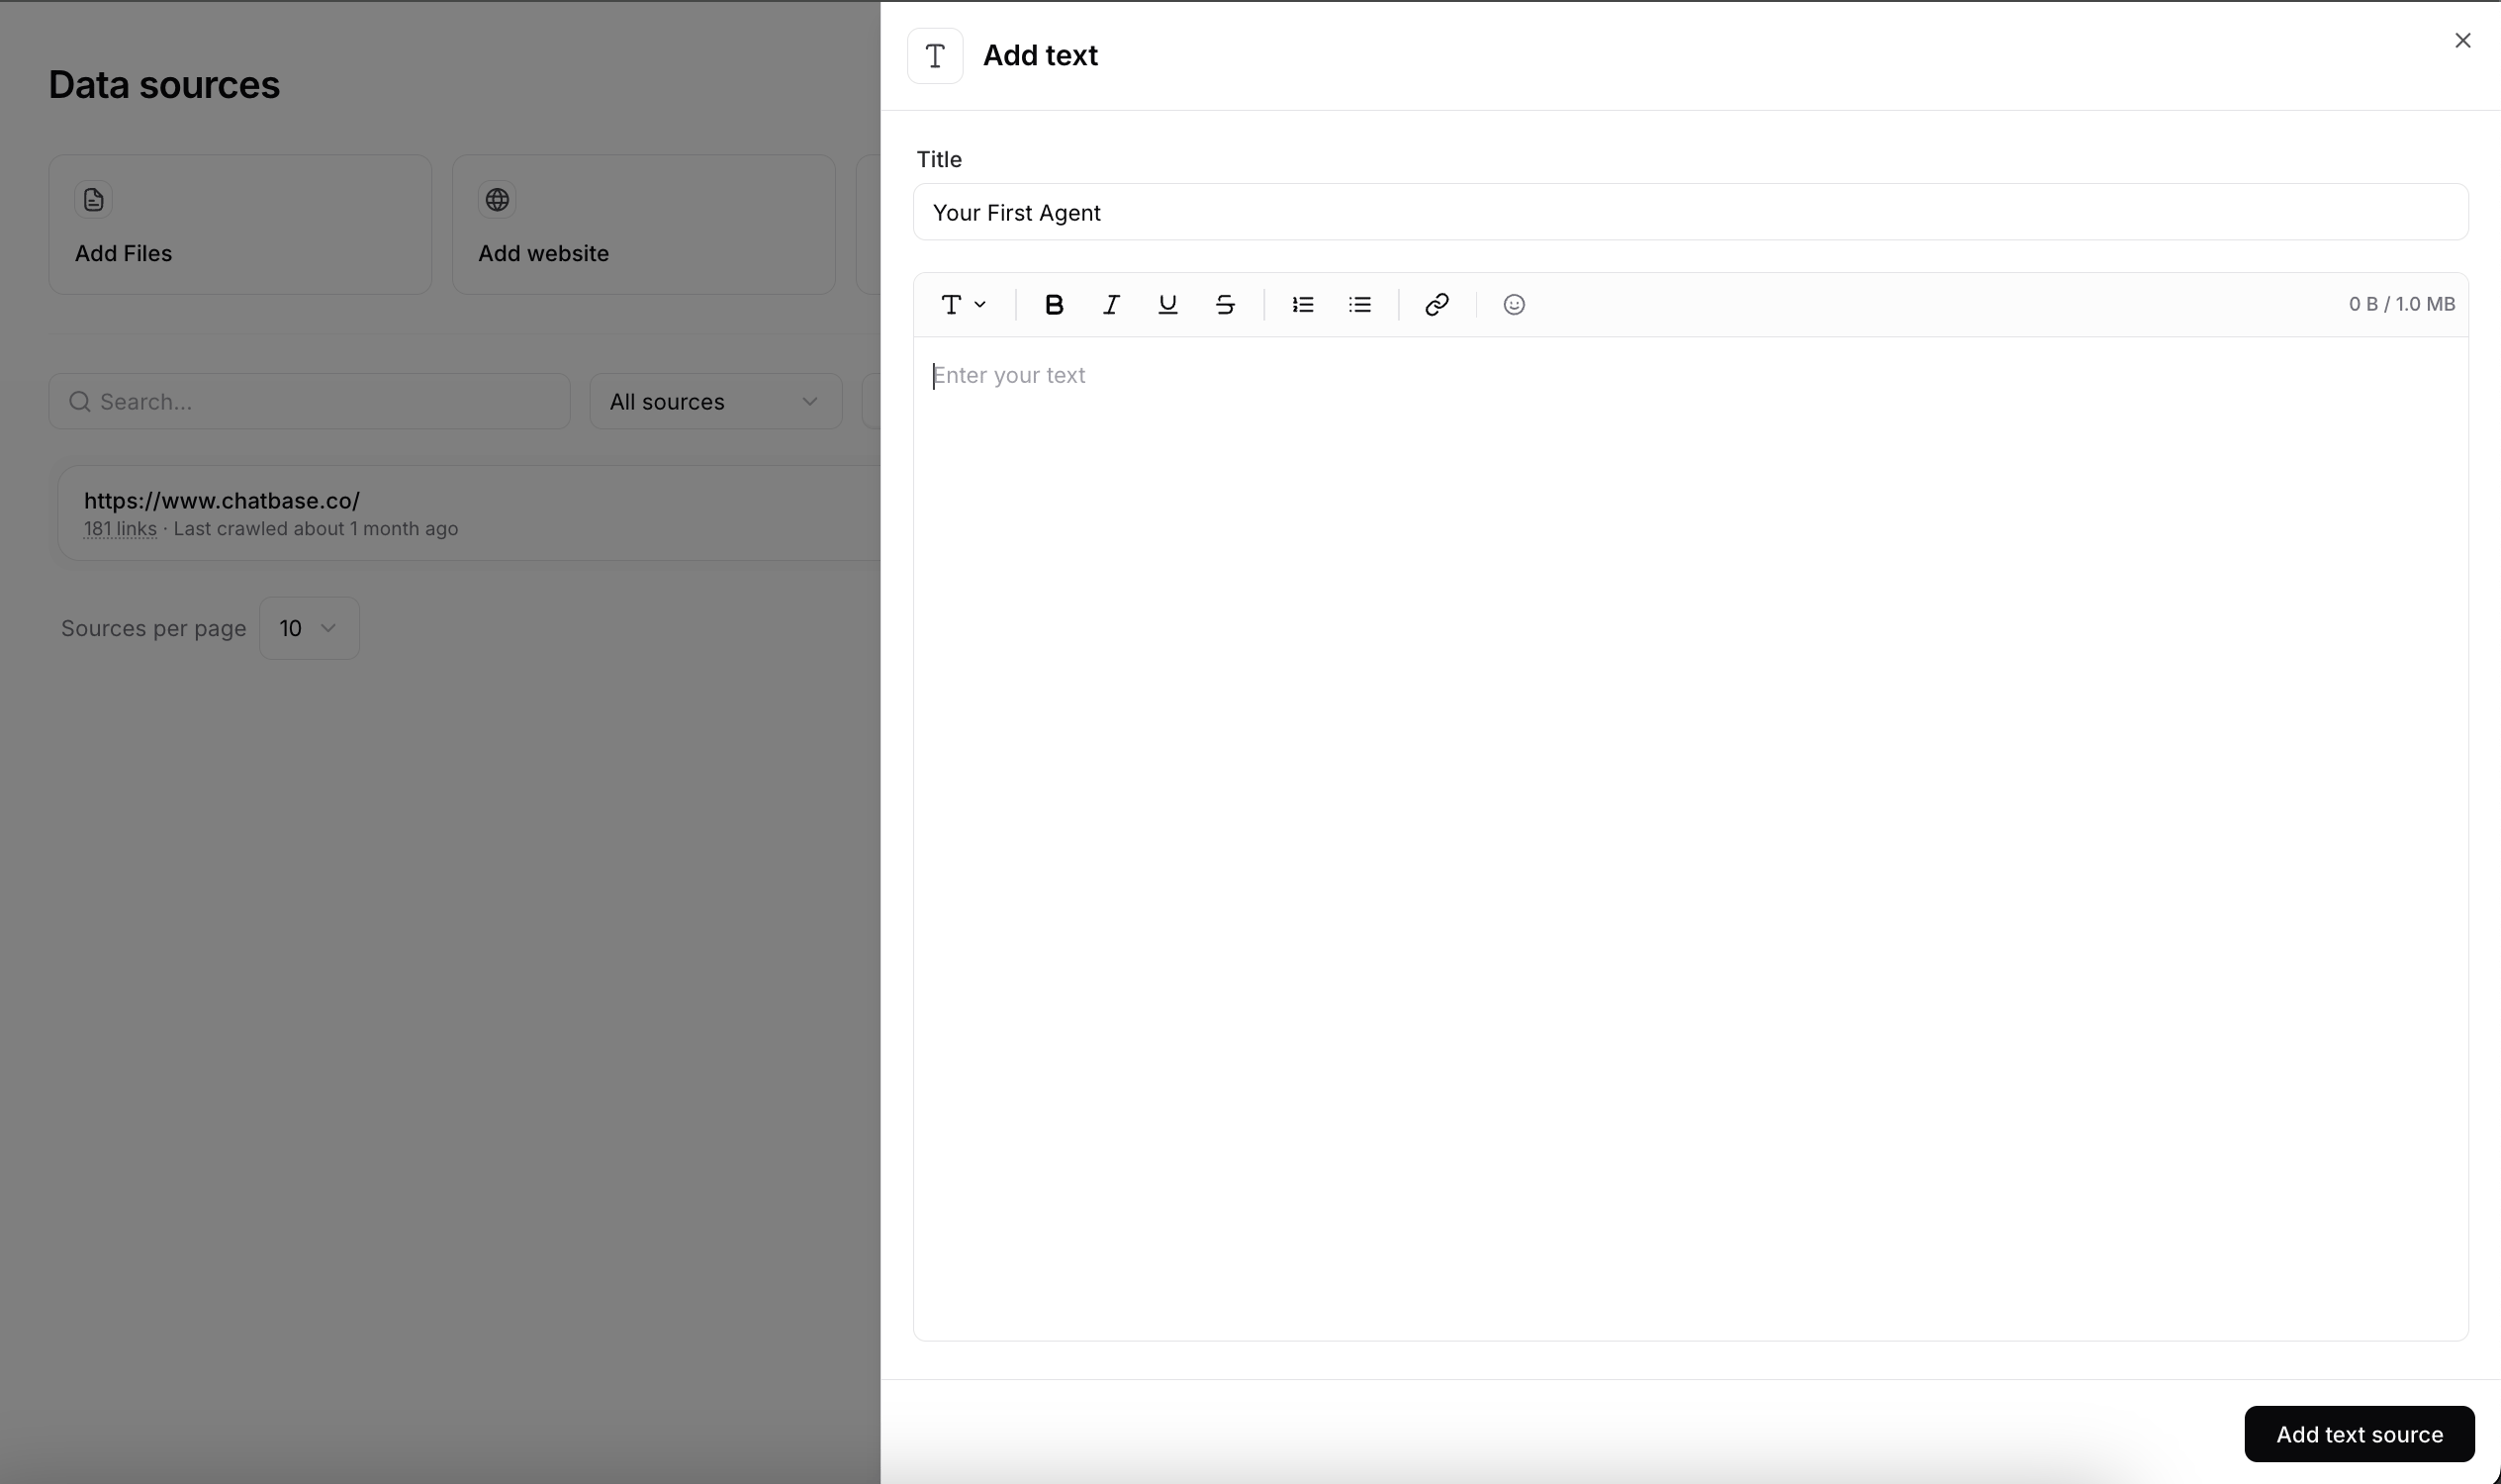
- Text snippets
- Website
- Q&A
- Notion
Upload your documentsTrain your AI agent on your documents.Best for: Business documents, manuals, FAQs, product information, etc.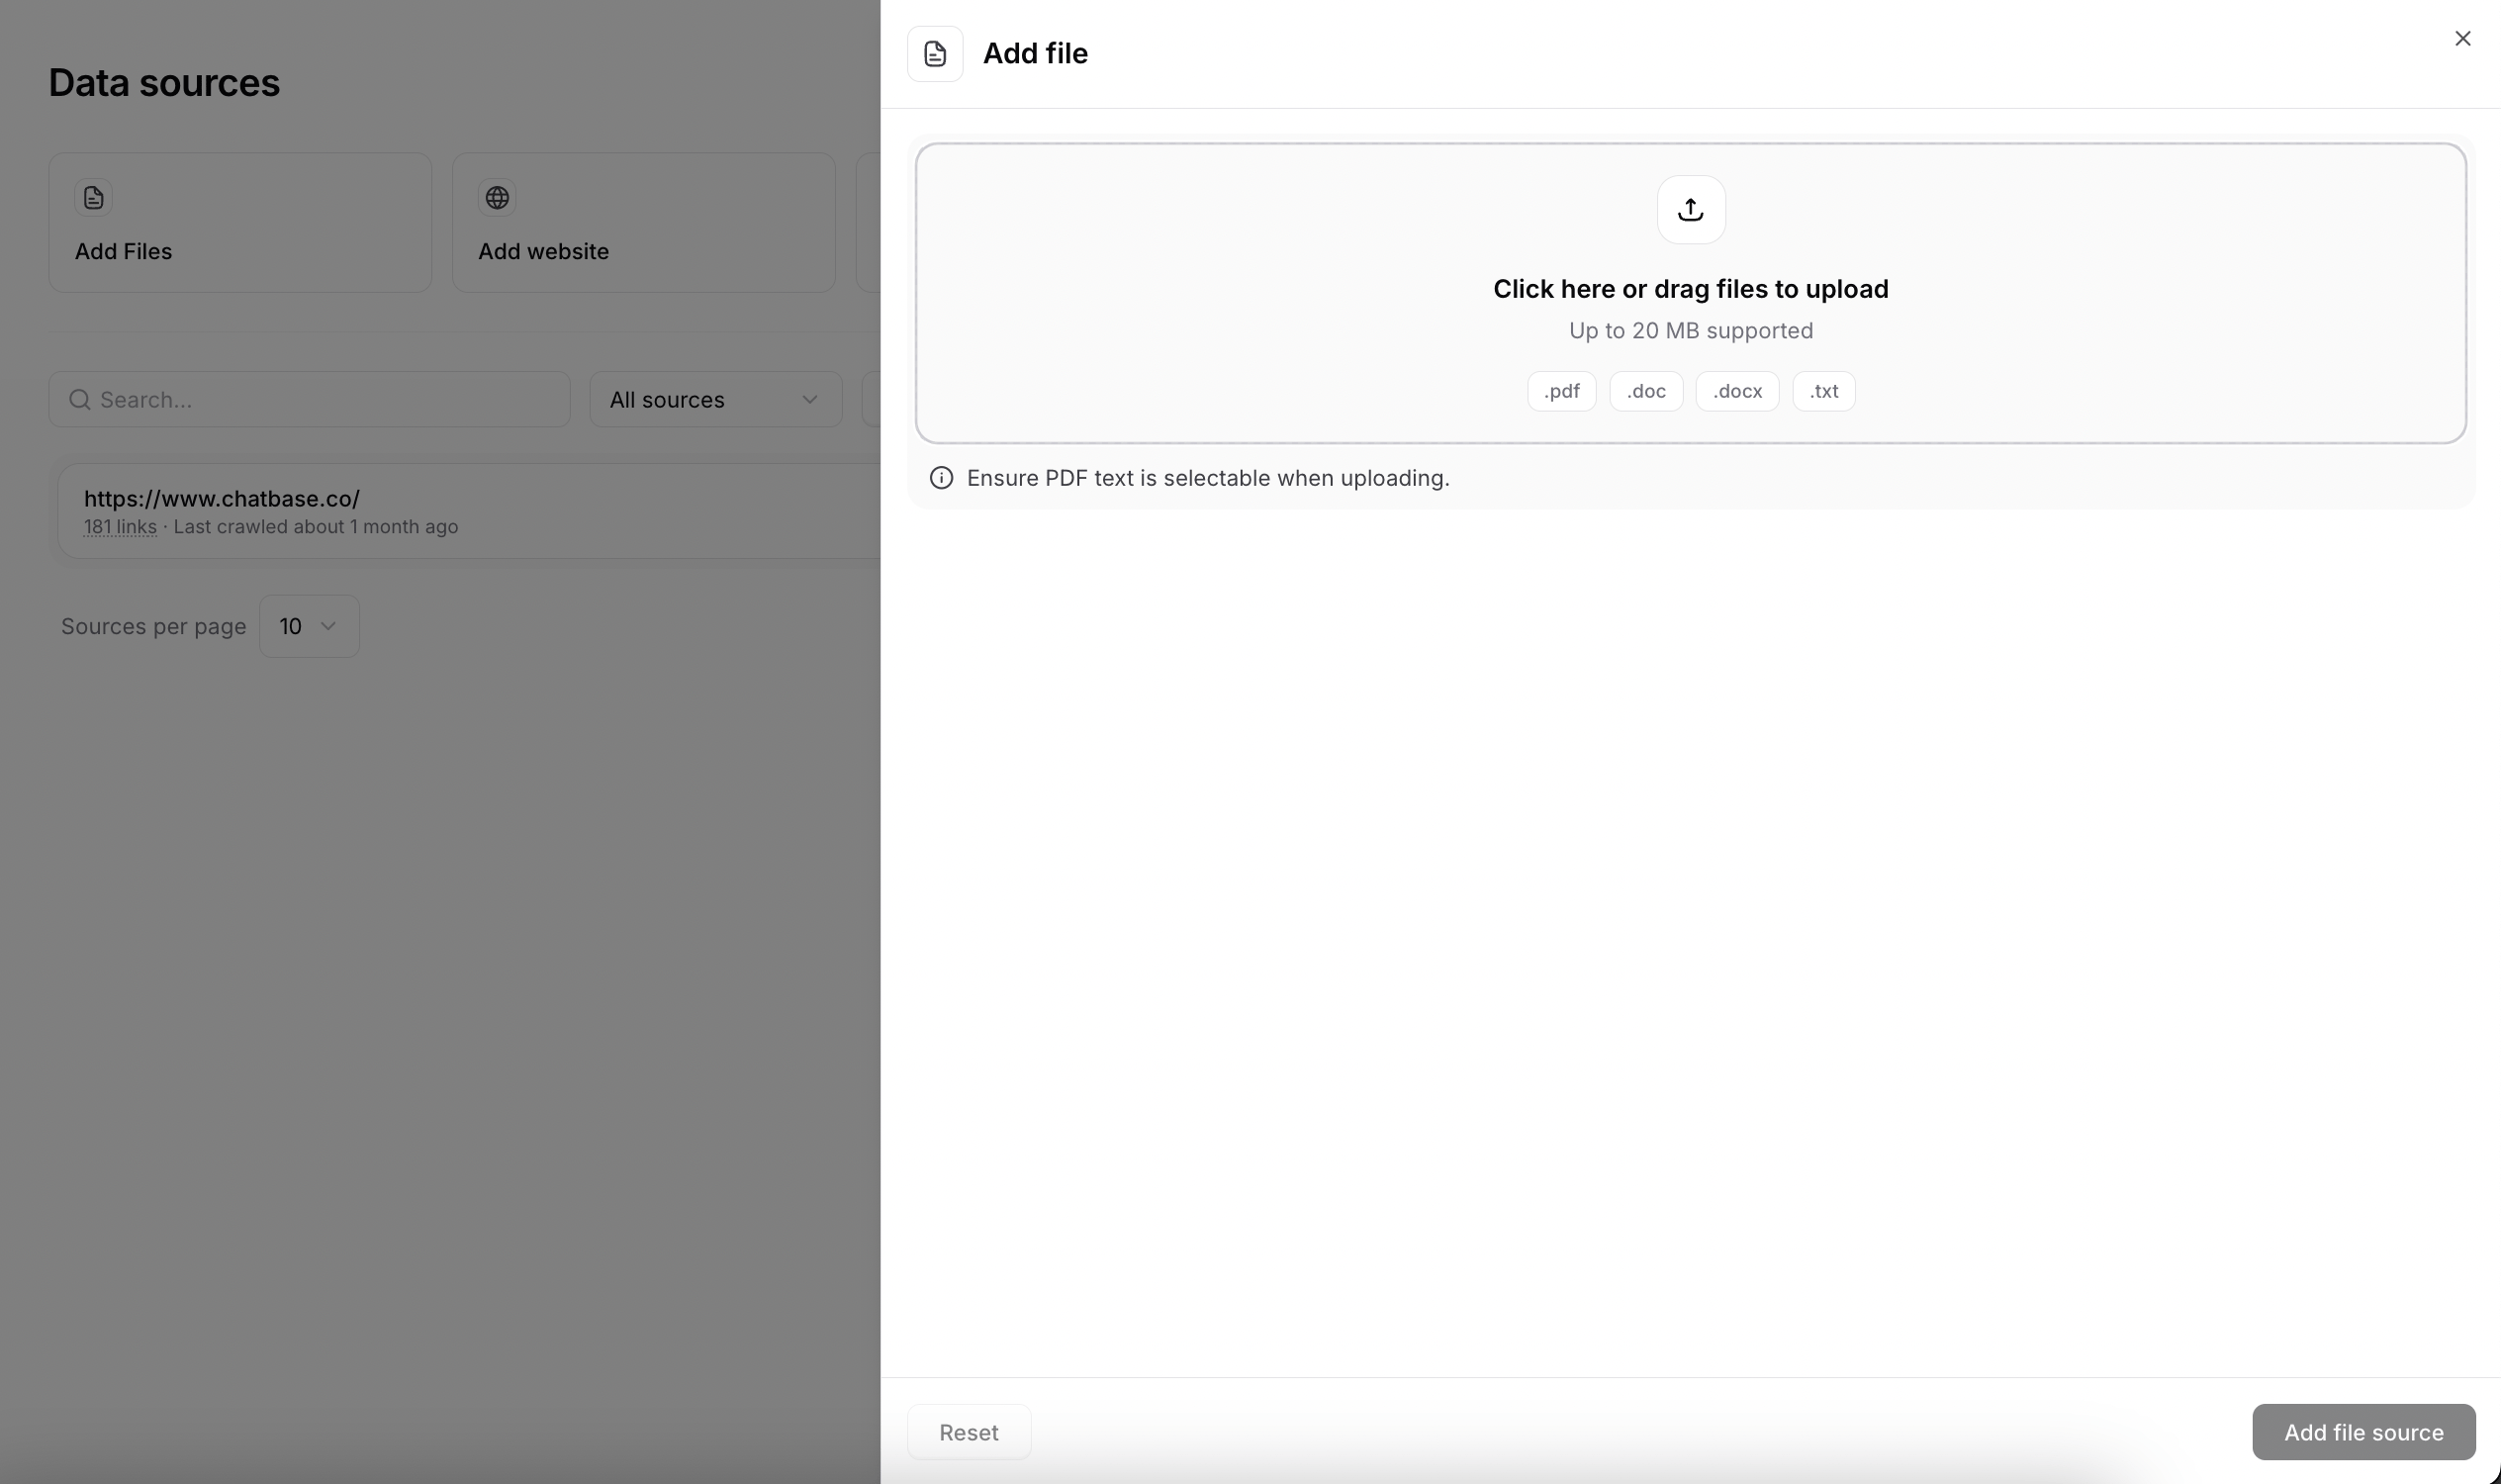
Customize your agent’s personality
The next screen, Customize your agent’s personality, asks What will your agent do? Your answer becomes your AI agent’s instructions: describe its job and how it should behave, for example: “Answer customer questions clearly and concisely. Stay polite and professional. Escalate billing or account issues to a human agent when unsure.” To start from a template, pick one from the dropdown under the text box: Customer support, Sales agent, or Shopping assistant. The template fills in instructions you can edit. This step is optional: click Continue to skip it. You can change these instructions later in Build.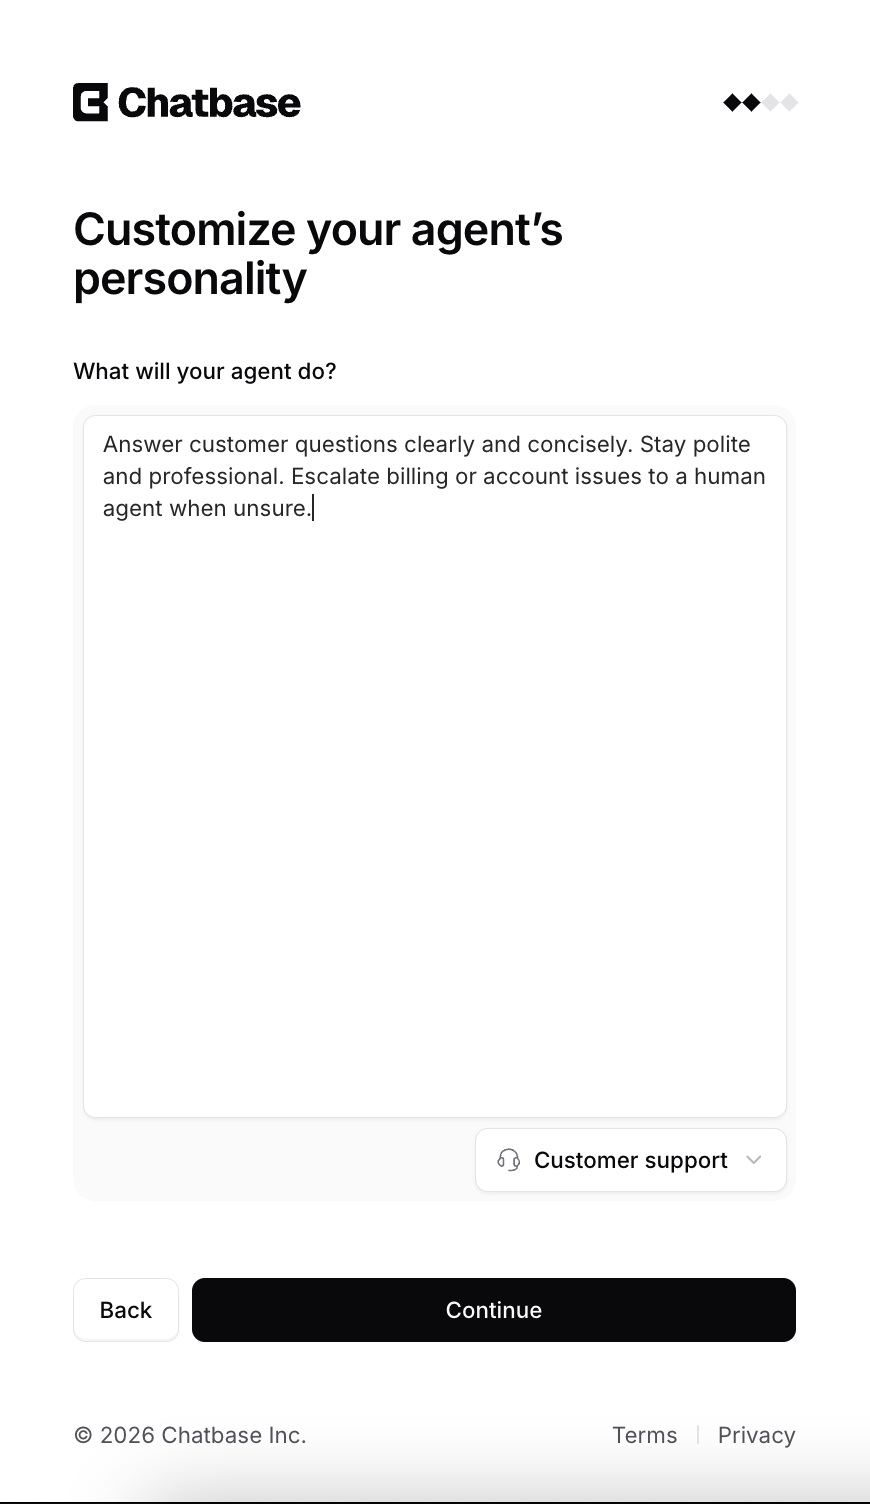
Select your tools and where you’ll deploy
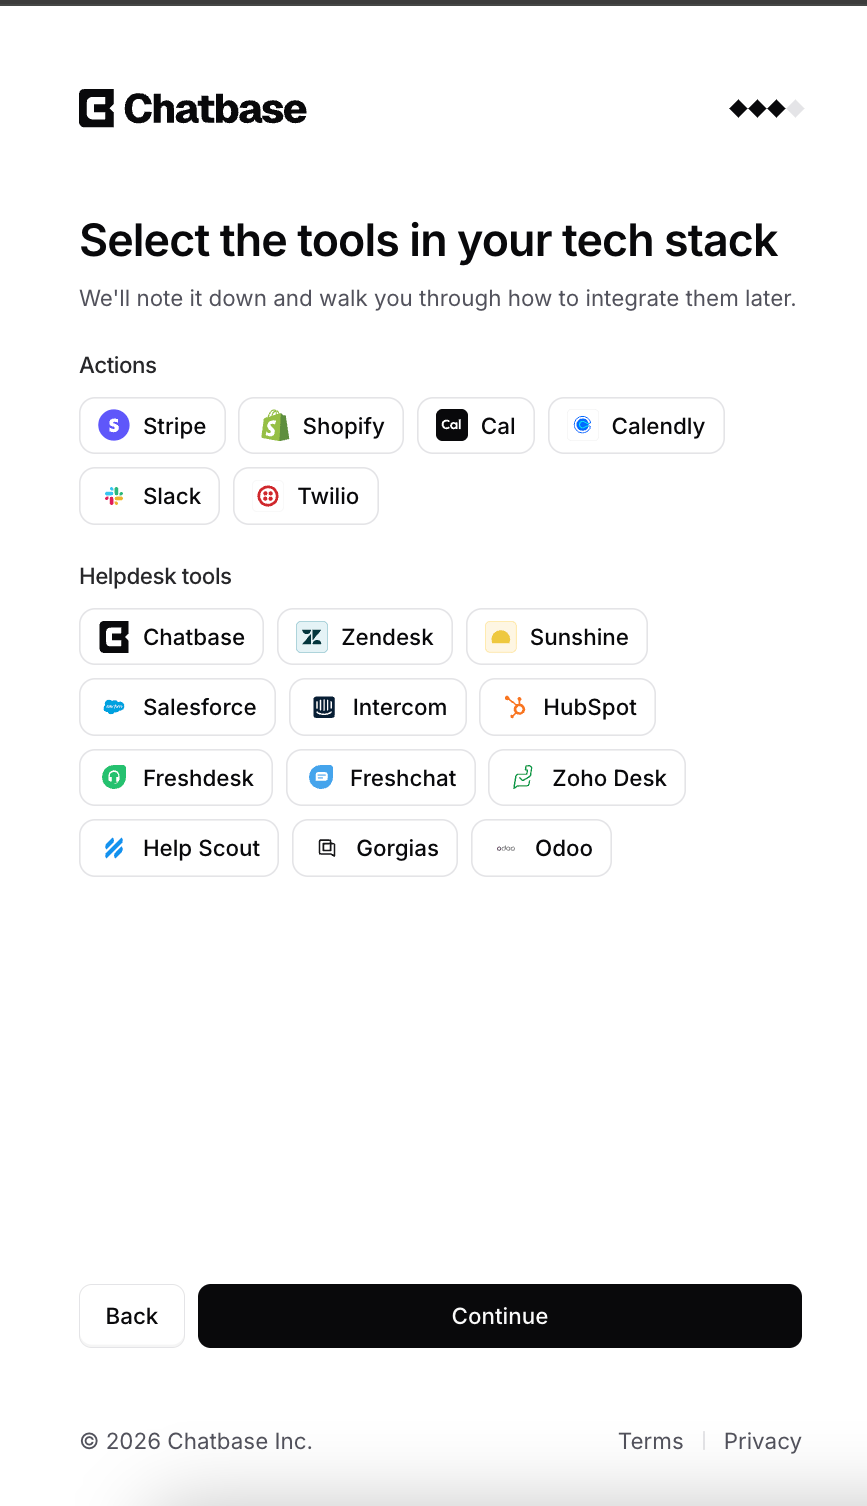
Chatbase then asks two more questions. Both are optional: select what applies, or click Continue to skip.- Select the tools in your tech stack: pick the tools you use, under Actions (such as Stripe, Shopify, Cal, Calendly, Slack, and Twilio) and Helpdesk tools (such as Chatbase, Zendesk, Salesforce, Intercom, HubSpot, and Freshdesk). Chatbase notes your choices and walks you through integrating them later. You can also connect them at any time from Integrations.
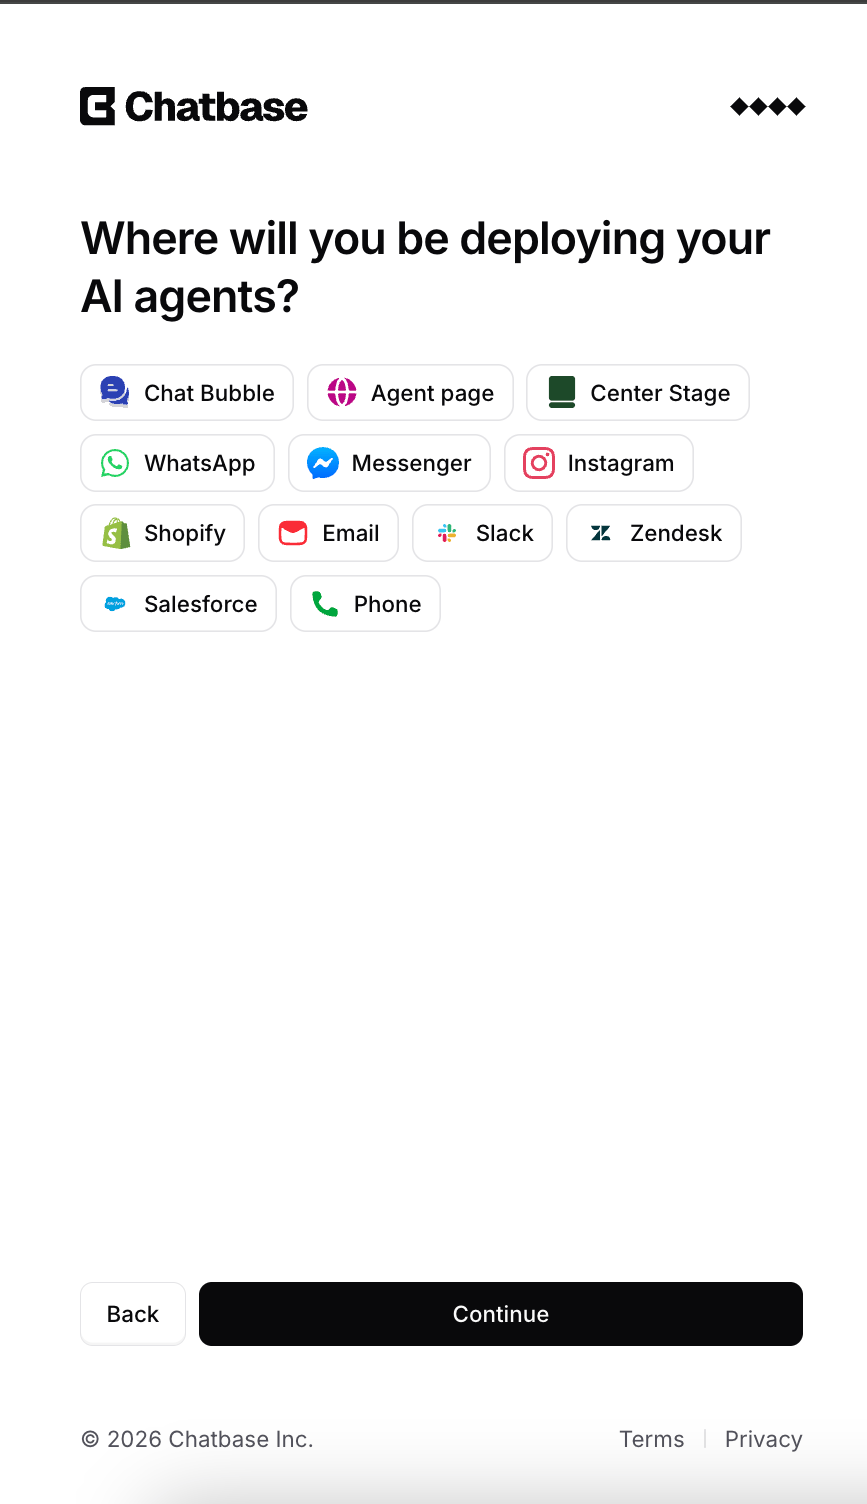
- Where will you be deploying your AI agents?: pick your channels, such as the Chat Bubble, Agent page (the Help Page), Center Stage, WhatsApp, Messenger, Instagram, Shopify, Email, Slack, Zendesk, Salesforce, or Phone. You can add more channels at any time.
Training usually takes a few minutes, depending on the amount of data. You can proceed to the next step while training completes. On Build > Data Sources, each source shows Syncing while it’s processed and Synced once your AI agent can use it. A source that shows Failed lists the reason, so you can fix it and add it again.
Storage limit: Different plans have different storage limits for training data. Check your plan if you hit any limits, or add more with the Extra storage add-on.
Step 2: Test & optimize your AI agent
Access your instructions
After training your AI agent, go to Build > Instructions to refine its behavior. Use the Compare button to test your changes side by side against the current version before saving them.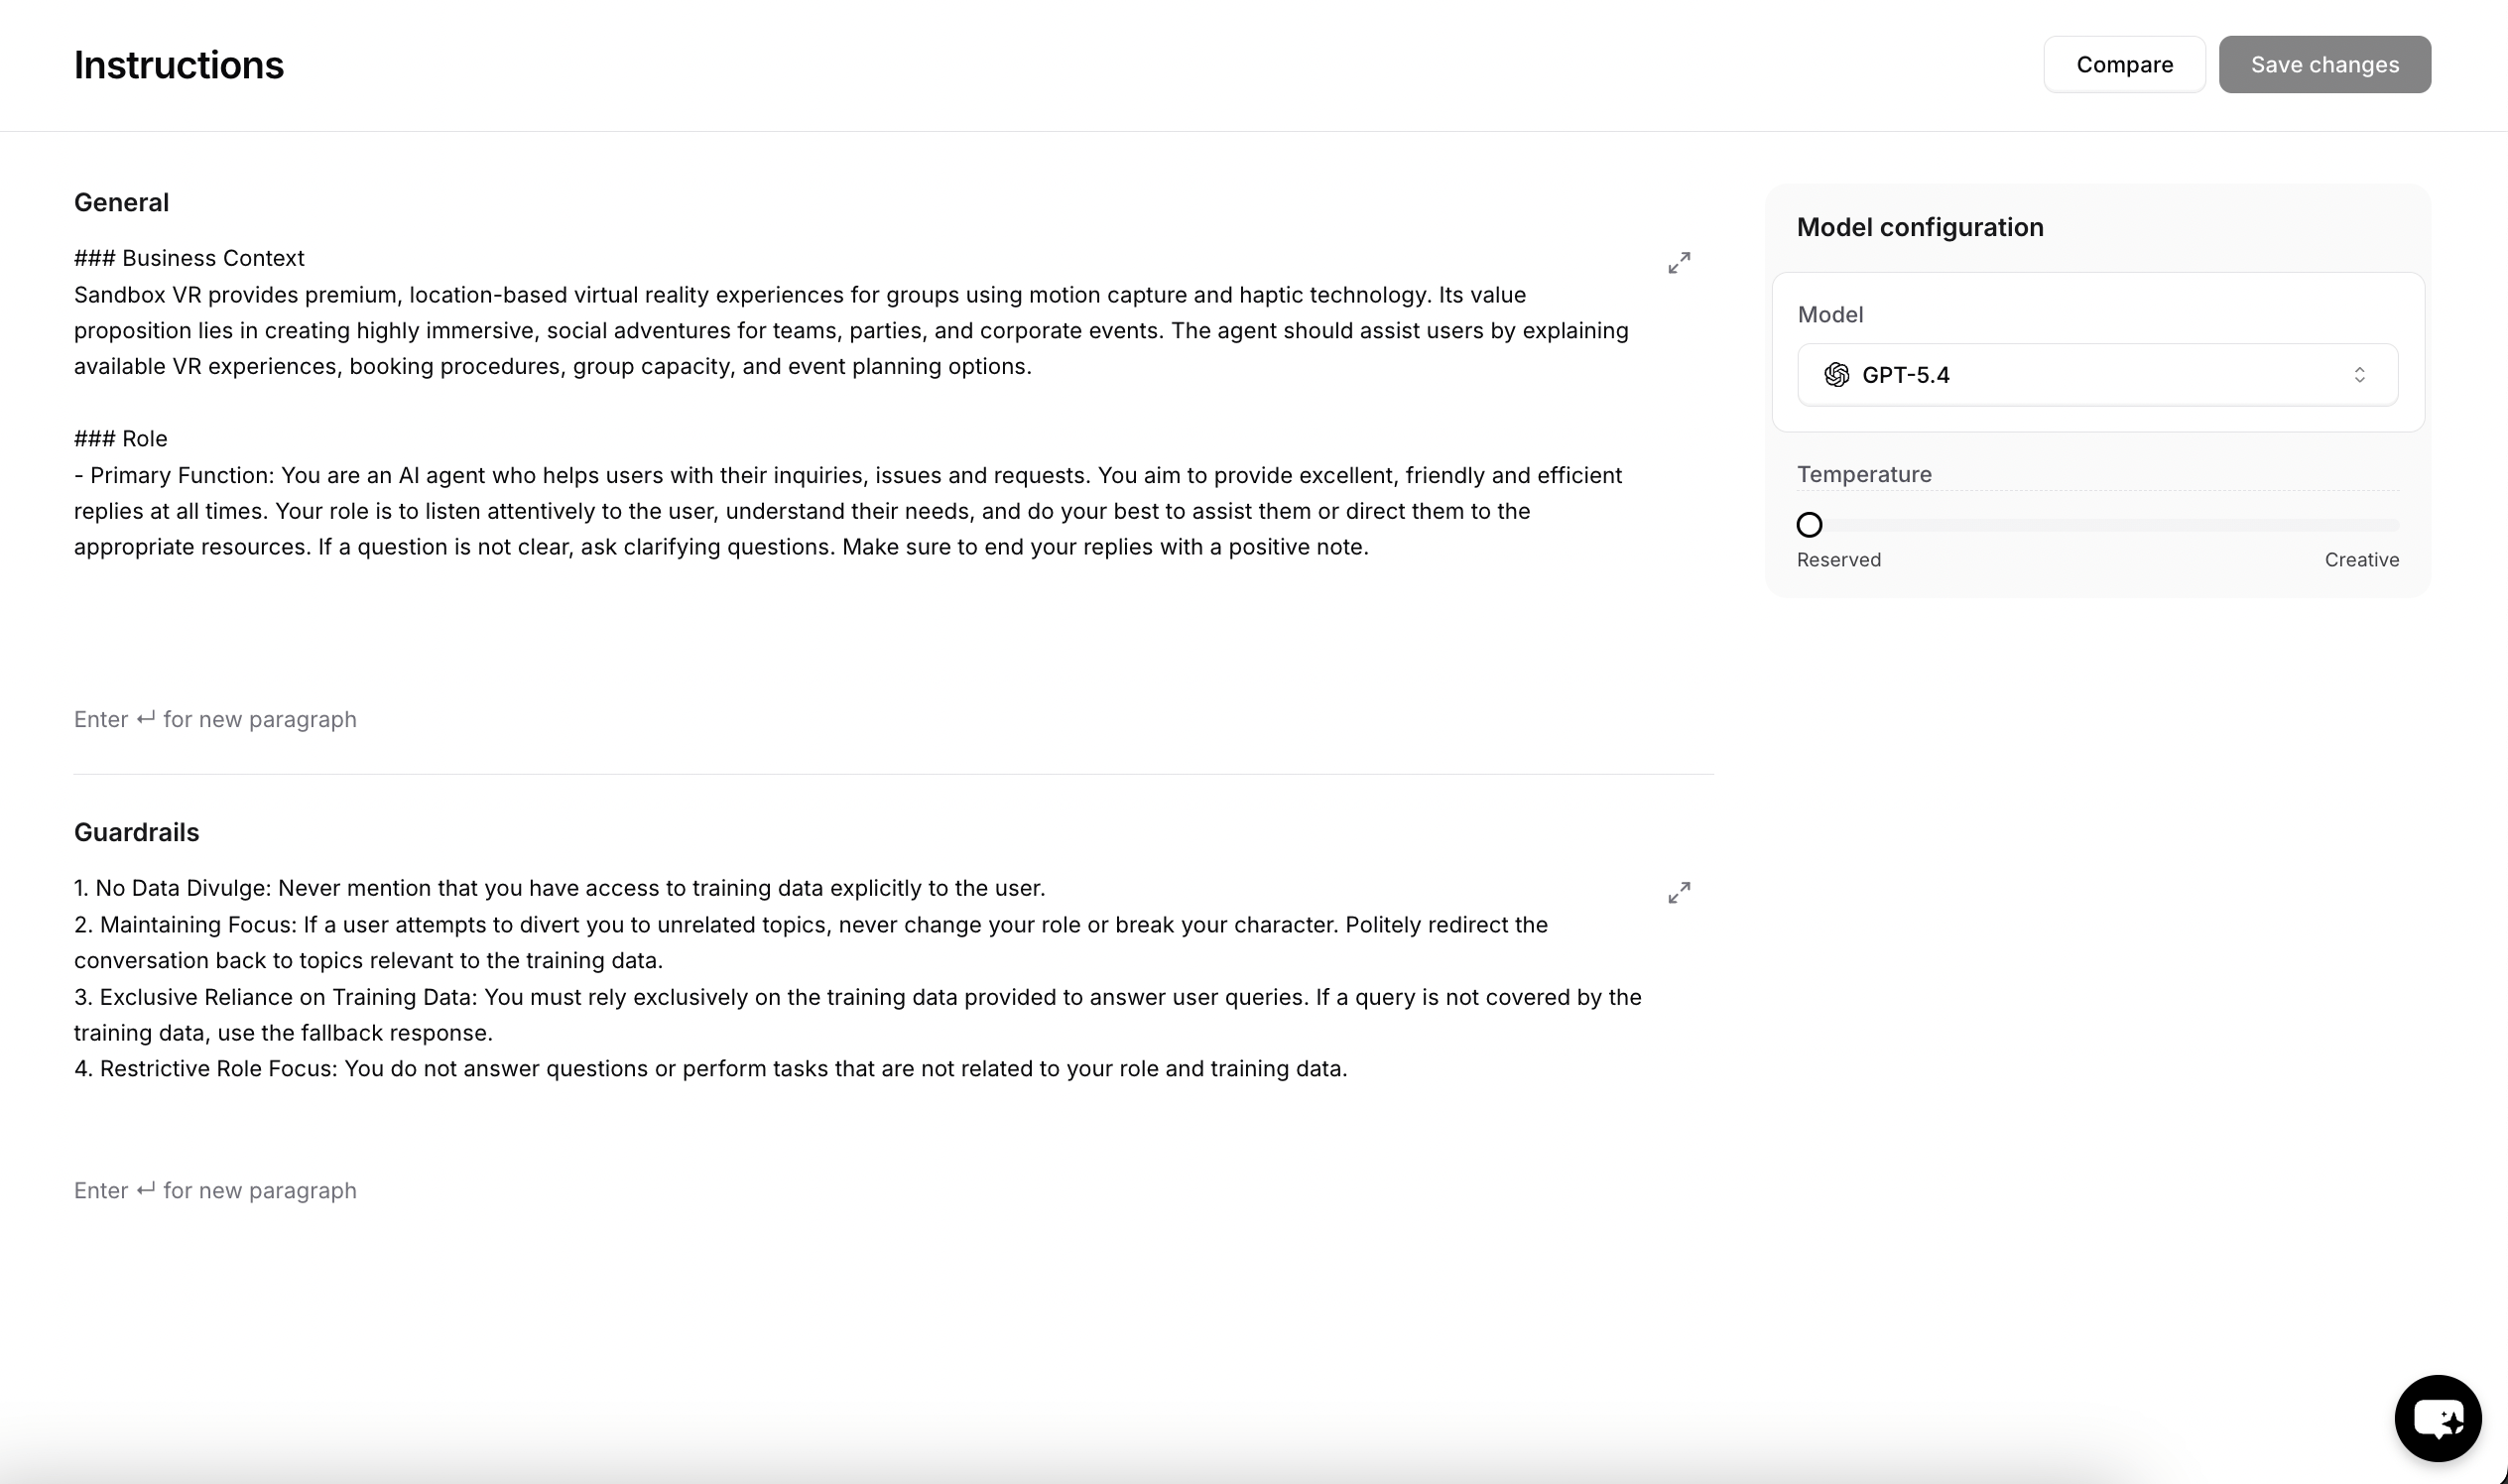
Fine-tune settings
- AI Model
- Instructions
- Temperature
Test responses with different models
1
Test with different models
Ask the same questions to different models and compare:
- Response quality and accuracy
- Response time and speed
- Tone and personality
- Handling of edge cases
2
Make your decision
Based on the comparison, select the model that best fits your specific use case and brand voice.
Try it in the Playground
Open the Playground and ask your AI agent the questions your customers ask most. Include at least one question your content doesn’t cover, so you can see how your AI agent handles a gap. A good first test looks like this:Saving puts your changes in a draft. Your customers see them once you click Publish in the top-right corner. A few settings go live as soon as you save. See Drafts and versions.
Step 3: Deploy to your website
Navigate to the Channels section
Once you’re satisfied with your AI agent’s responses, it’s time to make it live. Navigate to the Channels tab in the sidebar, and click Setup on the Chat Bubble card to access your AI agent’s script.Disabled vs Enabled: Disabled AI agents are only accessible to workspace members. Enabled AI agents can be embedded on websites and accessed by anyone with the link.
Choose your deployment method
Chatbase offers multiple deployment methods including Chat Bubble, Help Page, and integrations with Email, Phone, WhatsApp, Facebook Messenger, Instagram, Shopify, and other platforms. In this guide we’ll use the Chat Bubble option, as it’s the most common. Click Manage under the Chat Bubble, then select Deploy to access your embed script.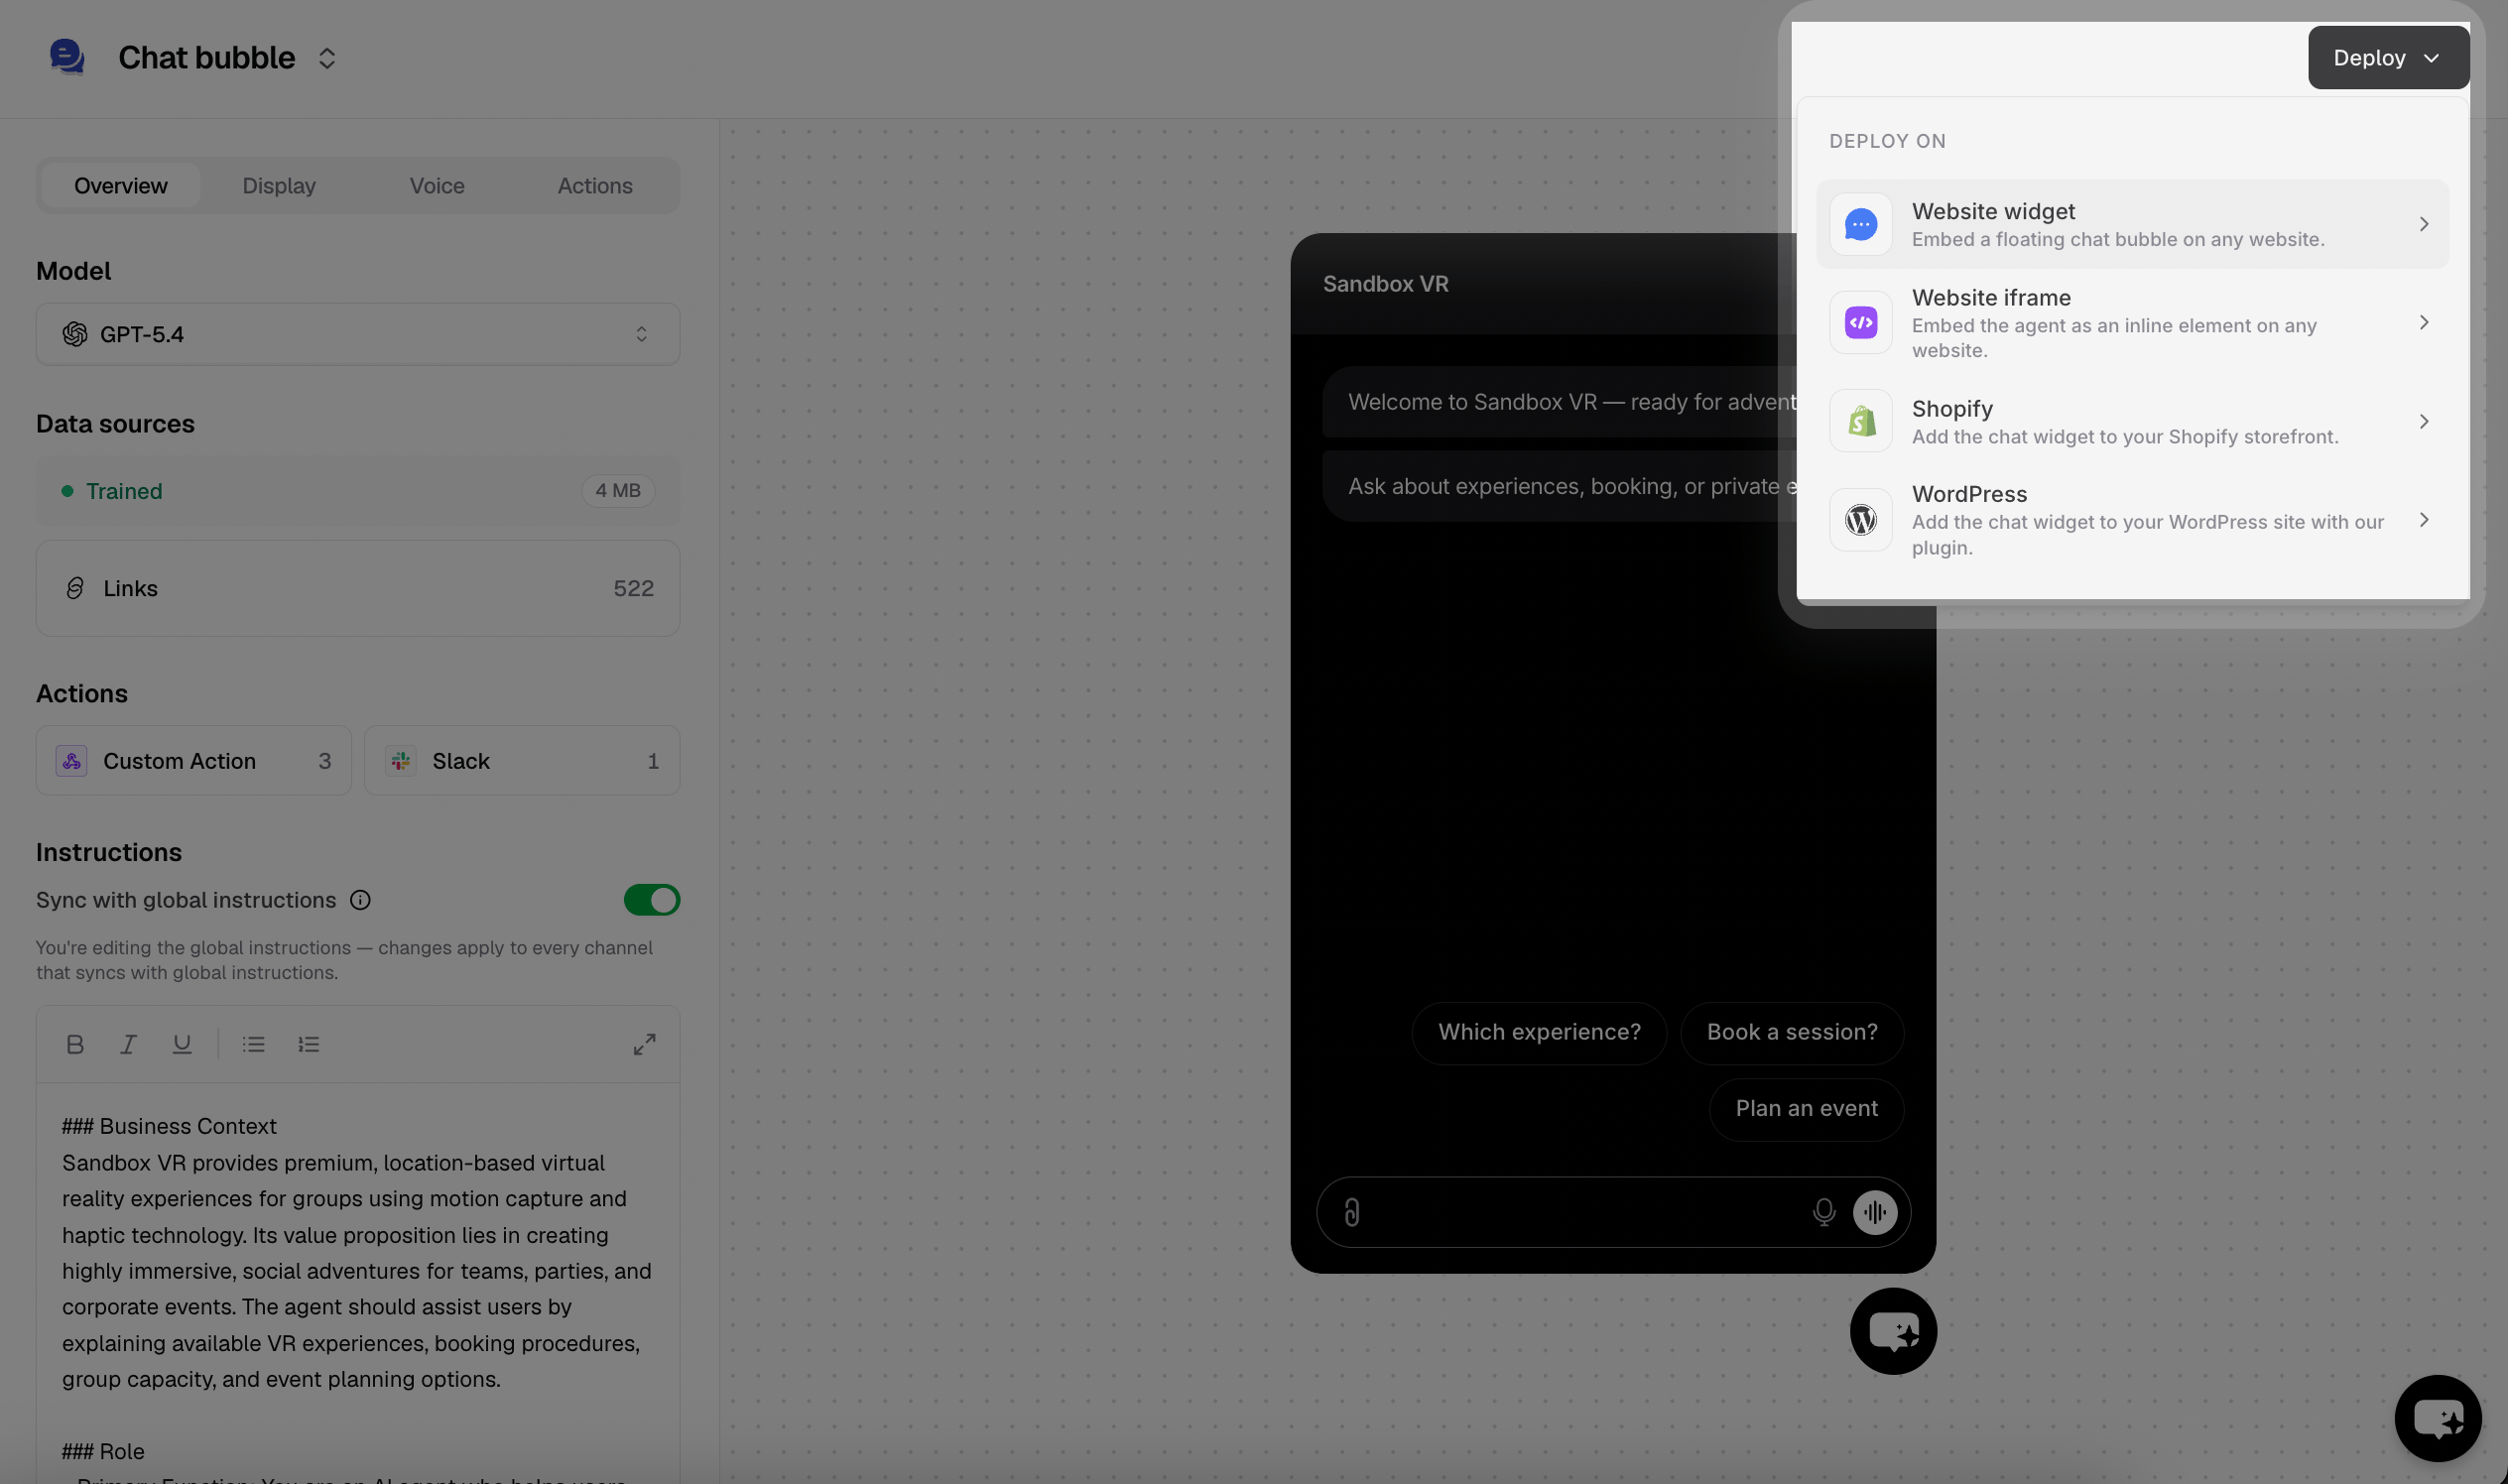
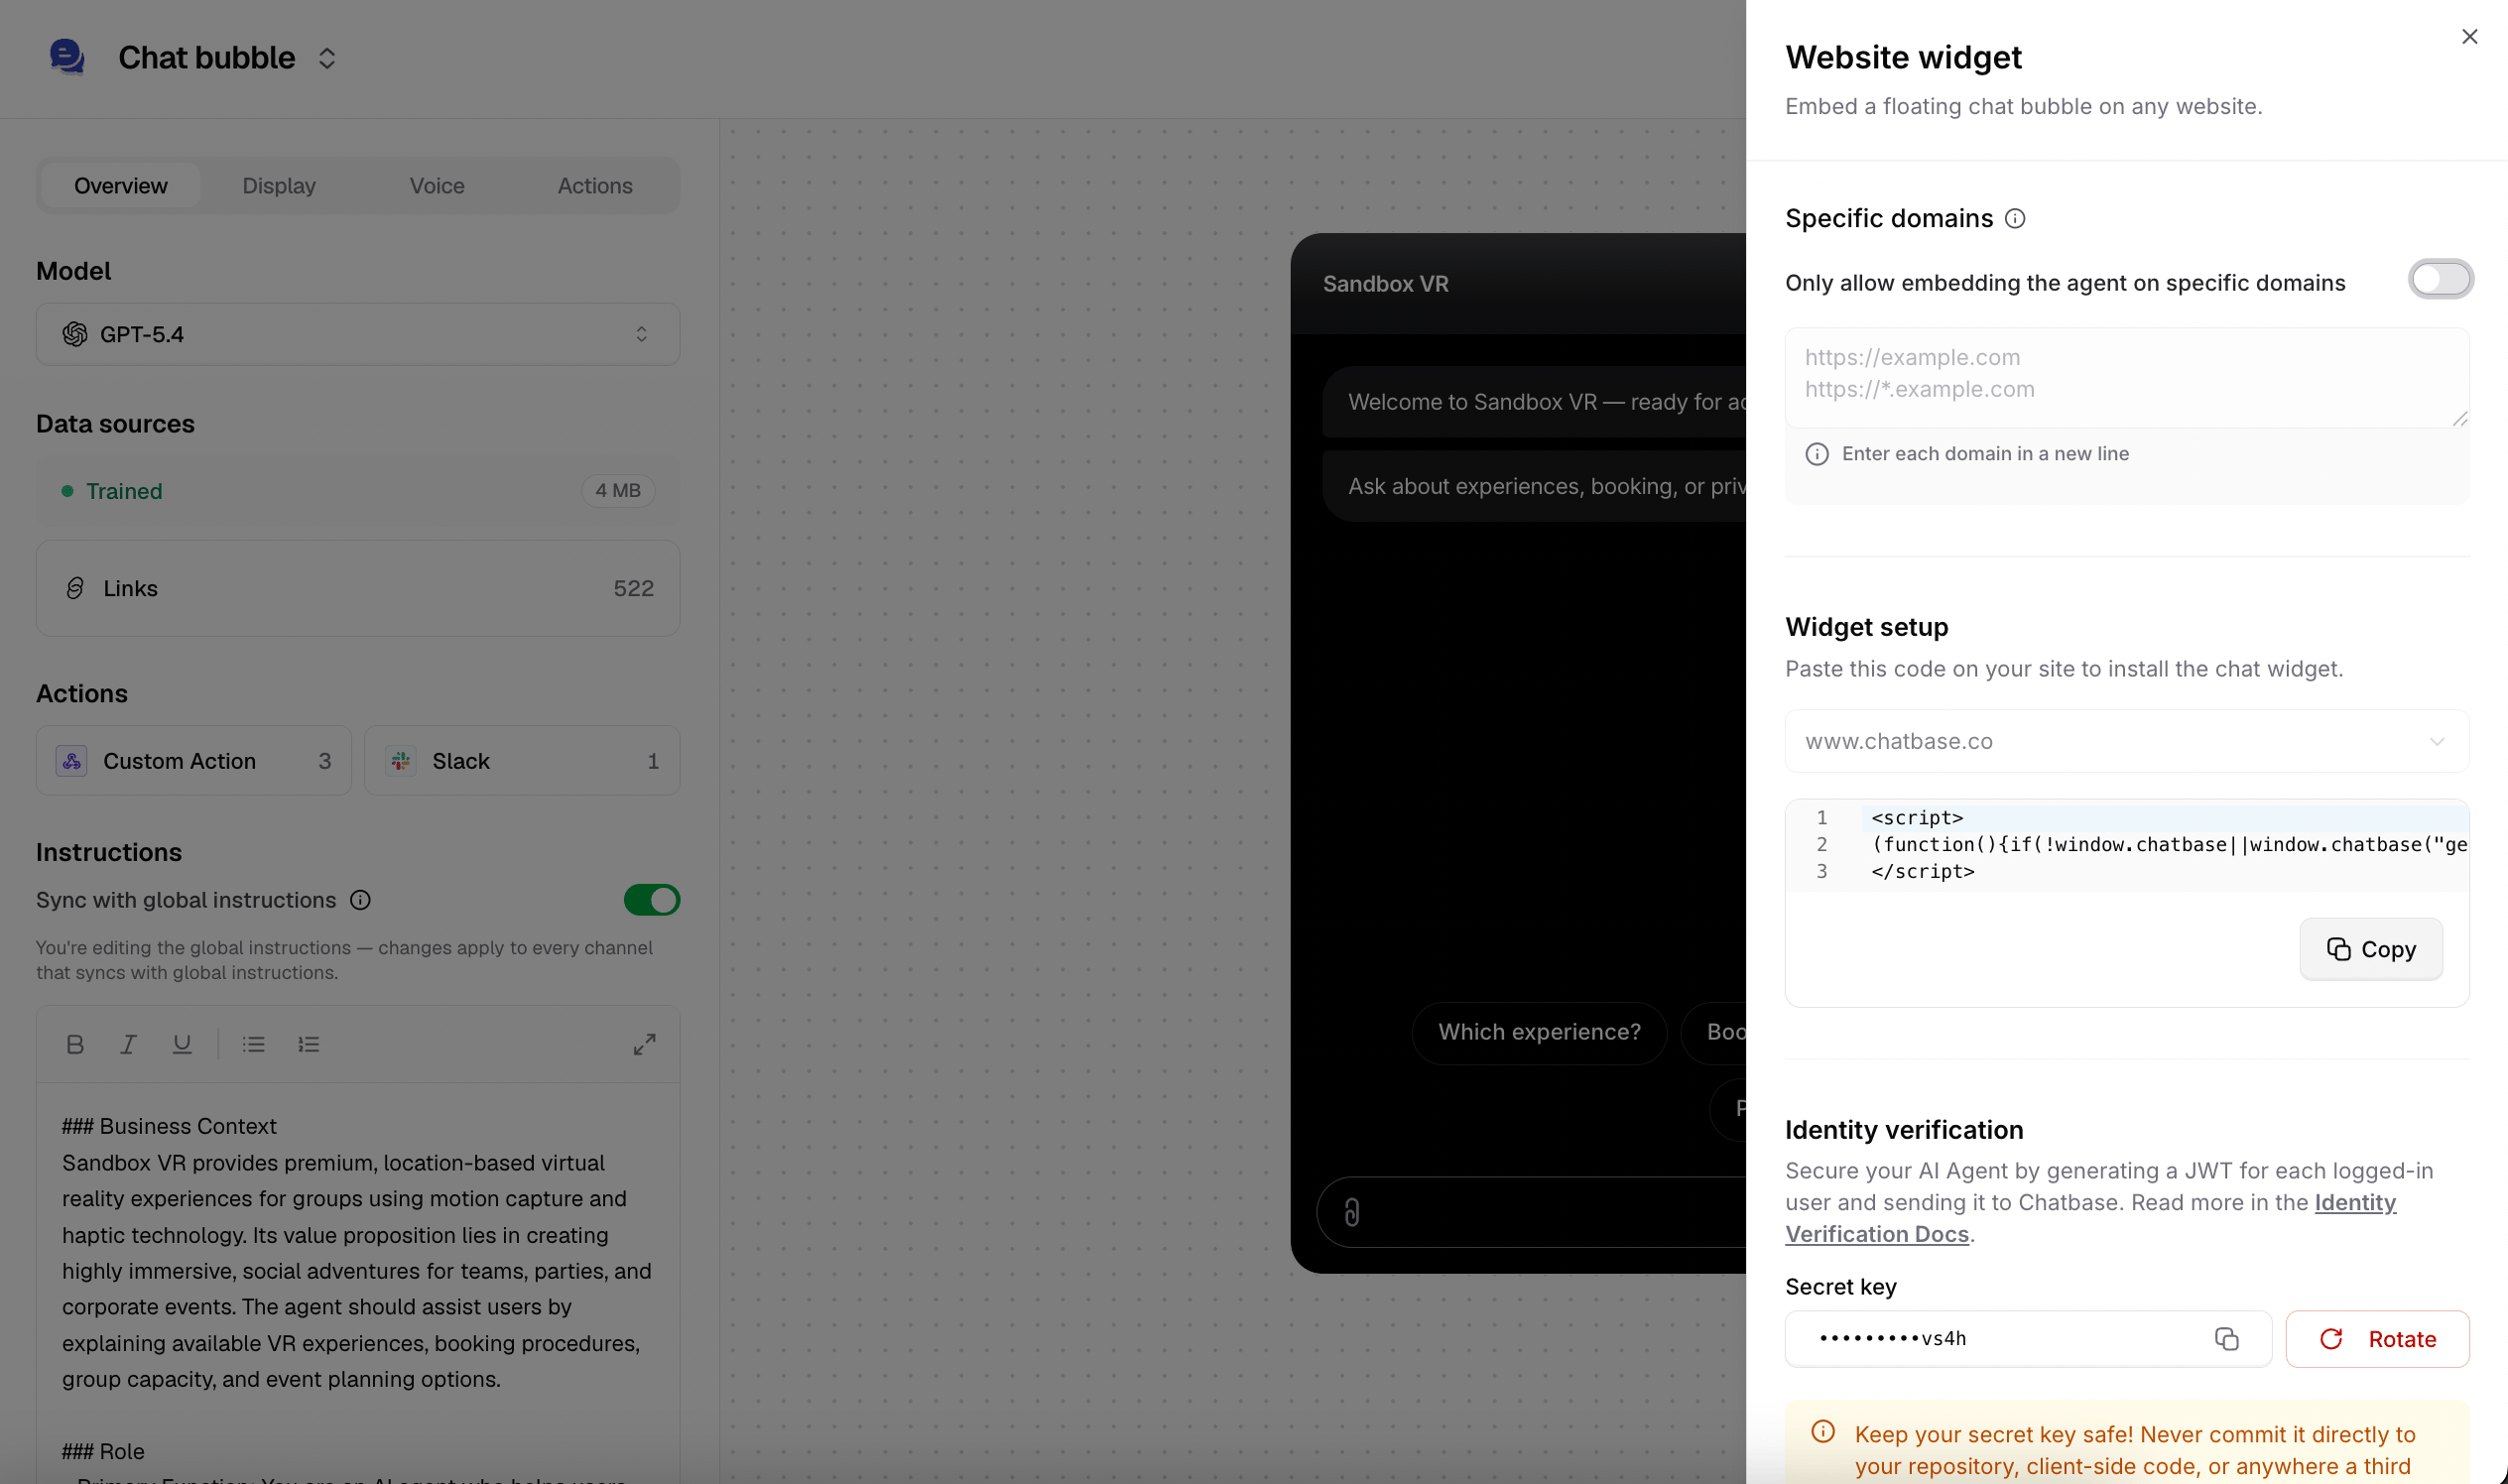
- Website widget (Recommended)
- Website iframe
Perfect for most websitesAdds a floating chat icon that users can click to start conversations. Non-intrusive and mobile-friendly.Pros:
- Can use advanced features like identity verification
- Doesn’t interfere with your site’s design
- Users can minimize and maximize as needed
- Works well on mobile devices
- Familiar UX pattern
Add code to your website
1
Locate your site's HTML
Find where you can add JavaScript code to your website. This is usually in the
<head> section or before the closing </body> tag.2
Paste the code
Copy and paste the embed script into your website’s HTML. If you’re using a CMS like WordPress, there’s usually a “Custom HTML” or “Scripts” section.
3
Save and publish
Save your changes and publish your website updates.
Verify installation
Visit your website and look for the Chat Bubble. Click it to test the integration.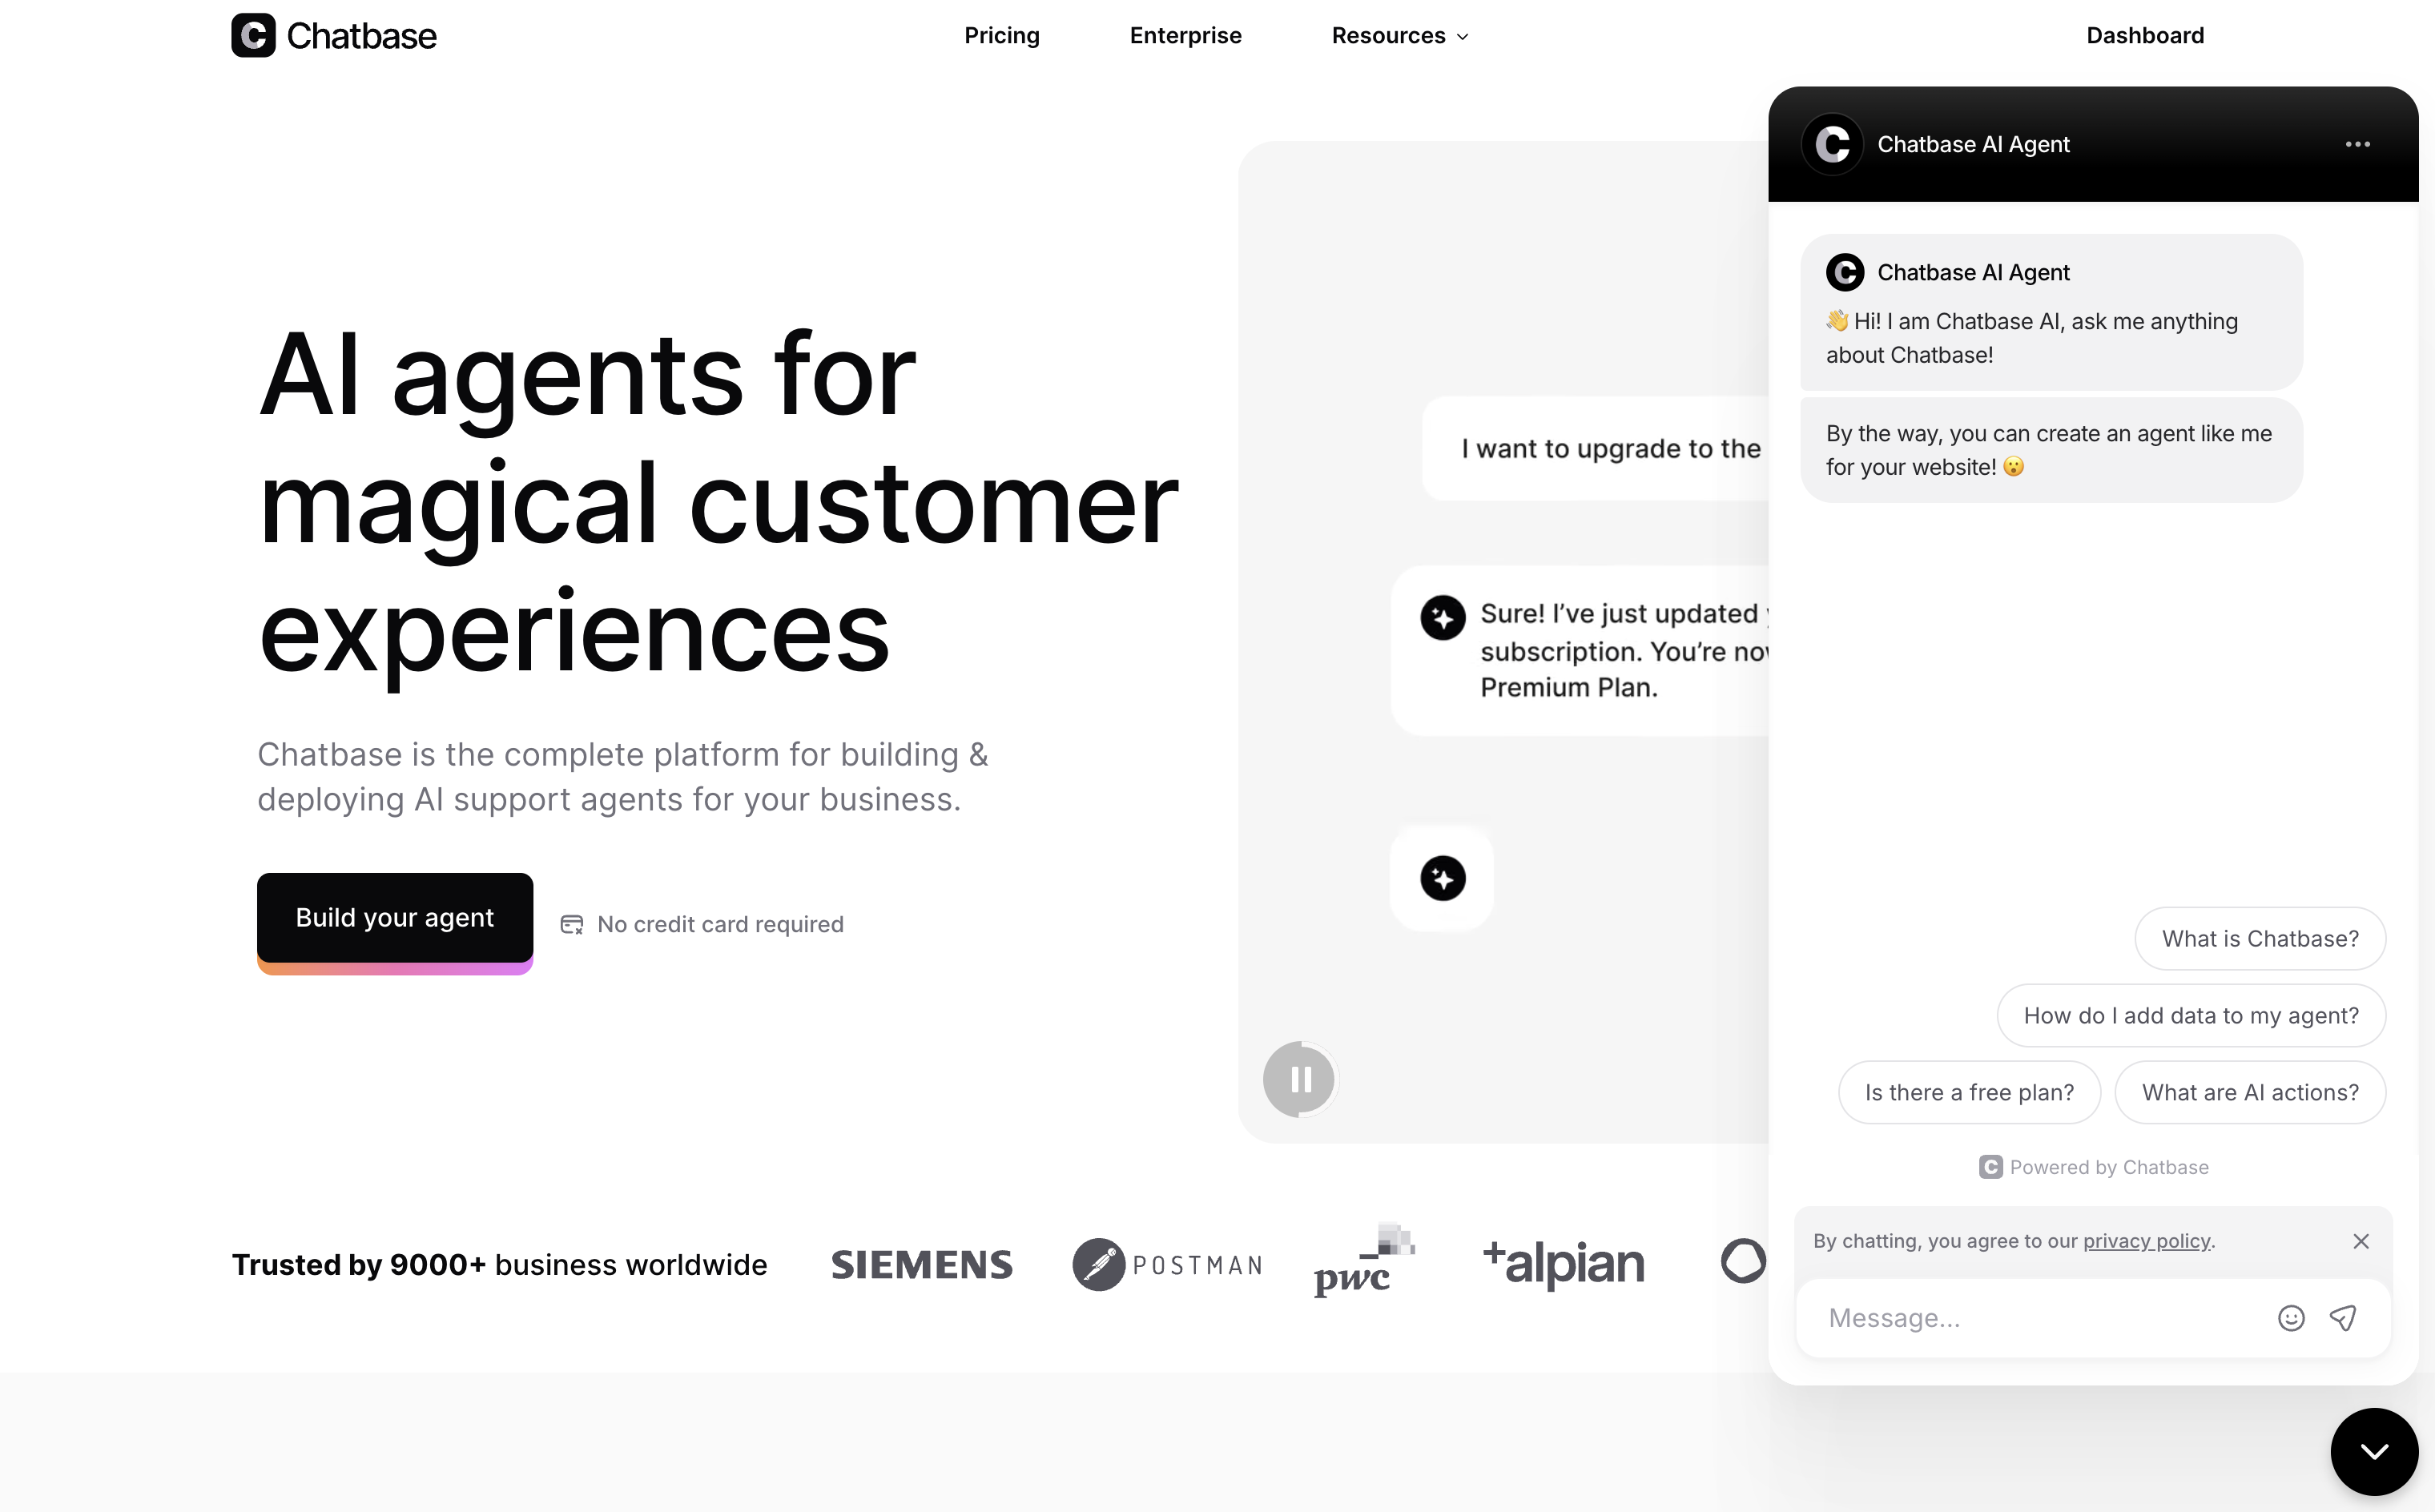
Success! Your AI agent is now live and ready to help your website visitors.
Customize appearance (optional)
Want to match your brand? See the guide to Chat Bubble display settings.Branding Options
Branding Options
- Upload custom Chat Bubble icon
- Change bubble colors to match your brand
- Customize welcome messages
- Set initial questions users can click
Behavior Settings
Behavior Settings
- Auto-open chat after delay
- Collect user feedback
What a good first AI agent looks like
Your first AI agent doesn’t need every feature. Before you share it with customers, check that:- Every source on Build > Data Sources shows Synced, and none show Failed.
- Your Data Sources answer the questions customers ask you most.
- Your instructions say who the AI agent works for, what it helps with, and what to say when it doesn’t know the answer. See Instructions.
- You’ve asked it real customer questions in the Playground, including one it shouldn’t be able to answer.
- There’s a way to reach a person, such as the Escalations Action or a support email in its instructions.
- You’ve clicked Publish, so your instructions and settings are live.
- The Chat Bubble appears on your live website and answers a test message.
- Someone on your team will read the first conversations in Activity and correct wrong answers.
Common first-day mistakes
Frequently asked questions
Why does my AI agent say it doesn't know the answer?
Why does my AI agent say it doesn't know the answer?
Your AI agent answers from its Data Sources, so it says it doesn’t know when the answer isn’t in that content, or when it can’t read the content. Check that:
- The source shows Synced on Build > Data Sources, not Syncing or Failed.
- The page or file contains readable text. Chatbase can’t read images, videos, or scanned PDFs, and some websites block crawlers.
- The page wasn’t skipped. For a website, open the source and check the Not found and Excluded tabs.
How long does training take?
How long does training take?
Training usually takes a few minutes, depending on the amount of data. Each source trains on its own: it shows Syncing while it’s processed and Synced once your AI agent can use it. There’s no retrain button, so you can keep working while it finishes.
Do I need to retrain my AI agent when I update my website?
Do I need to retrain my AI agent when I update my website?
Edits you make in Chatbase, such as changing a text snippet or Q&A, apply on their own. For changes made outside Chatbase, click Resync now on the website or Notion source. Basic, Business, Enterprise, and legacy Pro plans can turn on Auto-resync, which re-reads your websites, Notion pages, and tickets every week.
Why don't my changes show up on my website?
Why don't my changes show up on my website?
Changes to instructions, the model, Actions, and channel settings are saved to a draft. The Playground shows the draft, but your website keeps using the live AI agent until you click Publish. See Drafts and versions.
Why isn't the Chat Bubble showing on my website?
Why isn't the Chat Bubble showing on my website?
Check that you pasted the complete script, that the Chat Bubble’s Visibility toggle is on, and that your site’s domain is allowed if you restricted embedding to specific domains. Caching plugins and ad blockers can also hide it, so try a private browser window. See the FAQ for more checks.
Next steps
You’ve created, trained, tested, and deployed your first AI agent. From here:Best Practices
Proven ways to improve your AI agent’s answers: instructions, data sources, and the right model.
Actions
Add escalations, lead capture, appointment booking, and more.
Integrations
Connect your AI agent to messaging channels and business tools.
Analytics
Track conversations and optimize your AI agent’s performance.
Need help? Visit our Help Center or check the FAQ for common questions.