When to Use Identity Verification
Personalize the Chat Experience
Personalize the Chat Experience
Make your AI Agent recognize logged-in users so it can:
- Greet users by name instead of saying “Hello there”
- Access their account information and preferences
- Show content relevant to their subscription or role
- Provide support based on their history with your service
Enable Actions with User Data
Enable Actions with User Data
When you need actions that require specific user information from their contact record:
- Custom actions that need to access user details (name, email, subscription info, etc.)
- Stripe actions (billing, subscriptions, invoices) Learn more about Stripe actions.
These actions work by matching the authenticated user’s ID with a Contact record that contains their detailed information.
Sync Contacts with the Chatbot
Sync Contacts with the Chatbot
By sending user contact information in the JWT, you can always keep contact information up to date instead of sending contact information separately via the API.
Implementation Guide
Prerequisites
A website with the Chatbase embed script already installed and working.
New to Chatbase? Check out Your First Agent to get started with the embed script first.
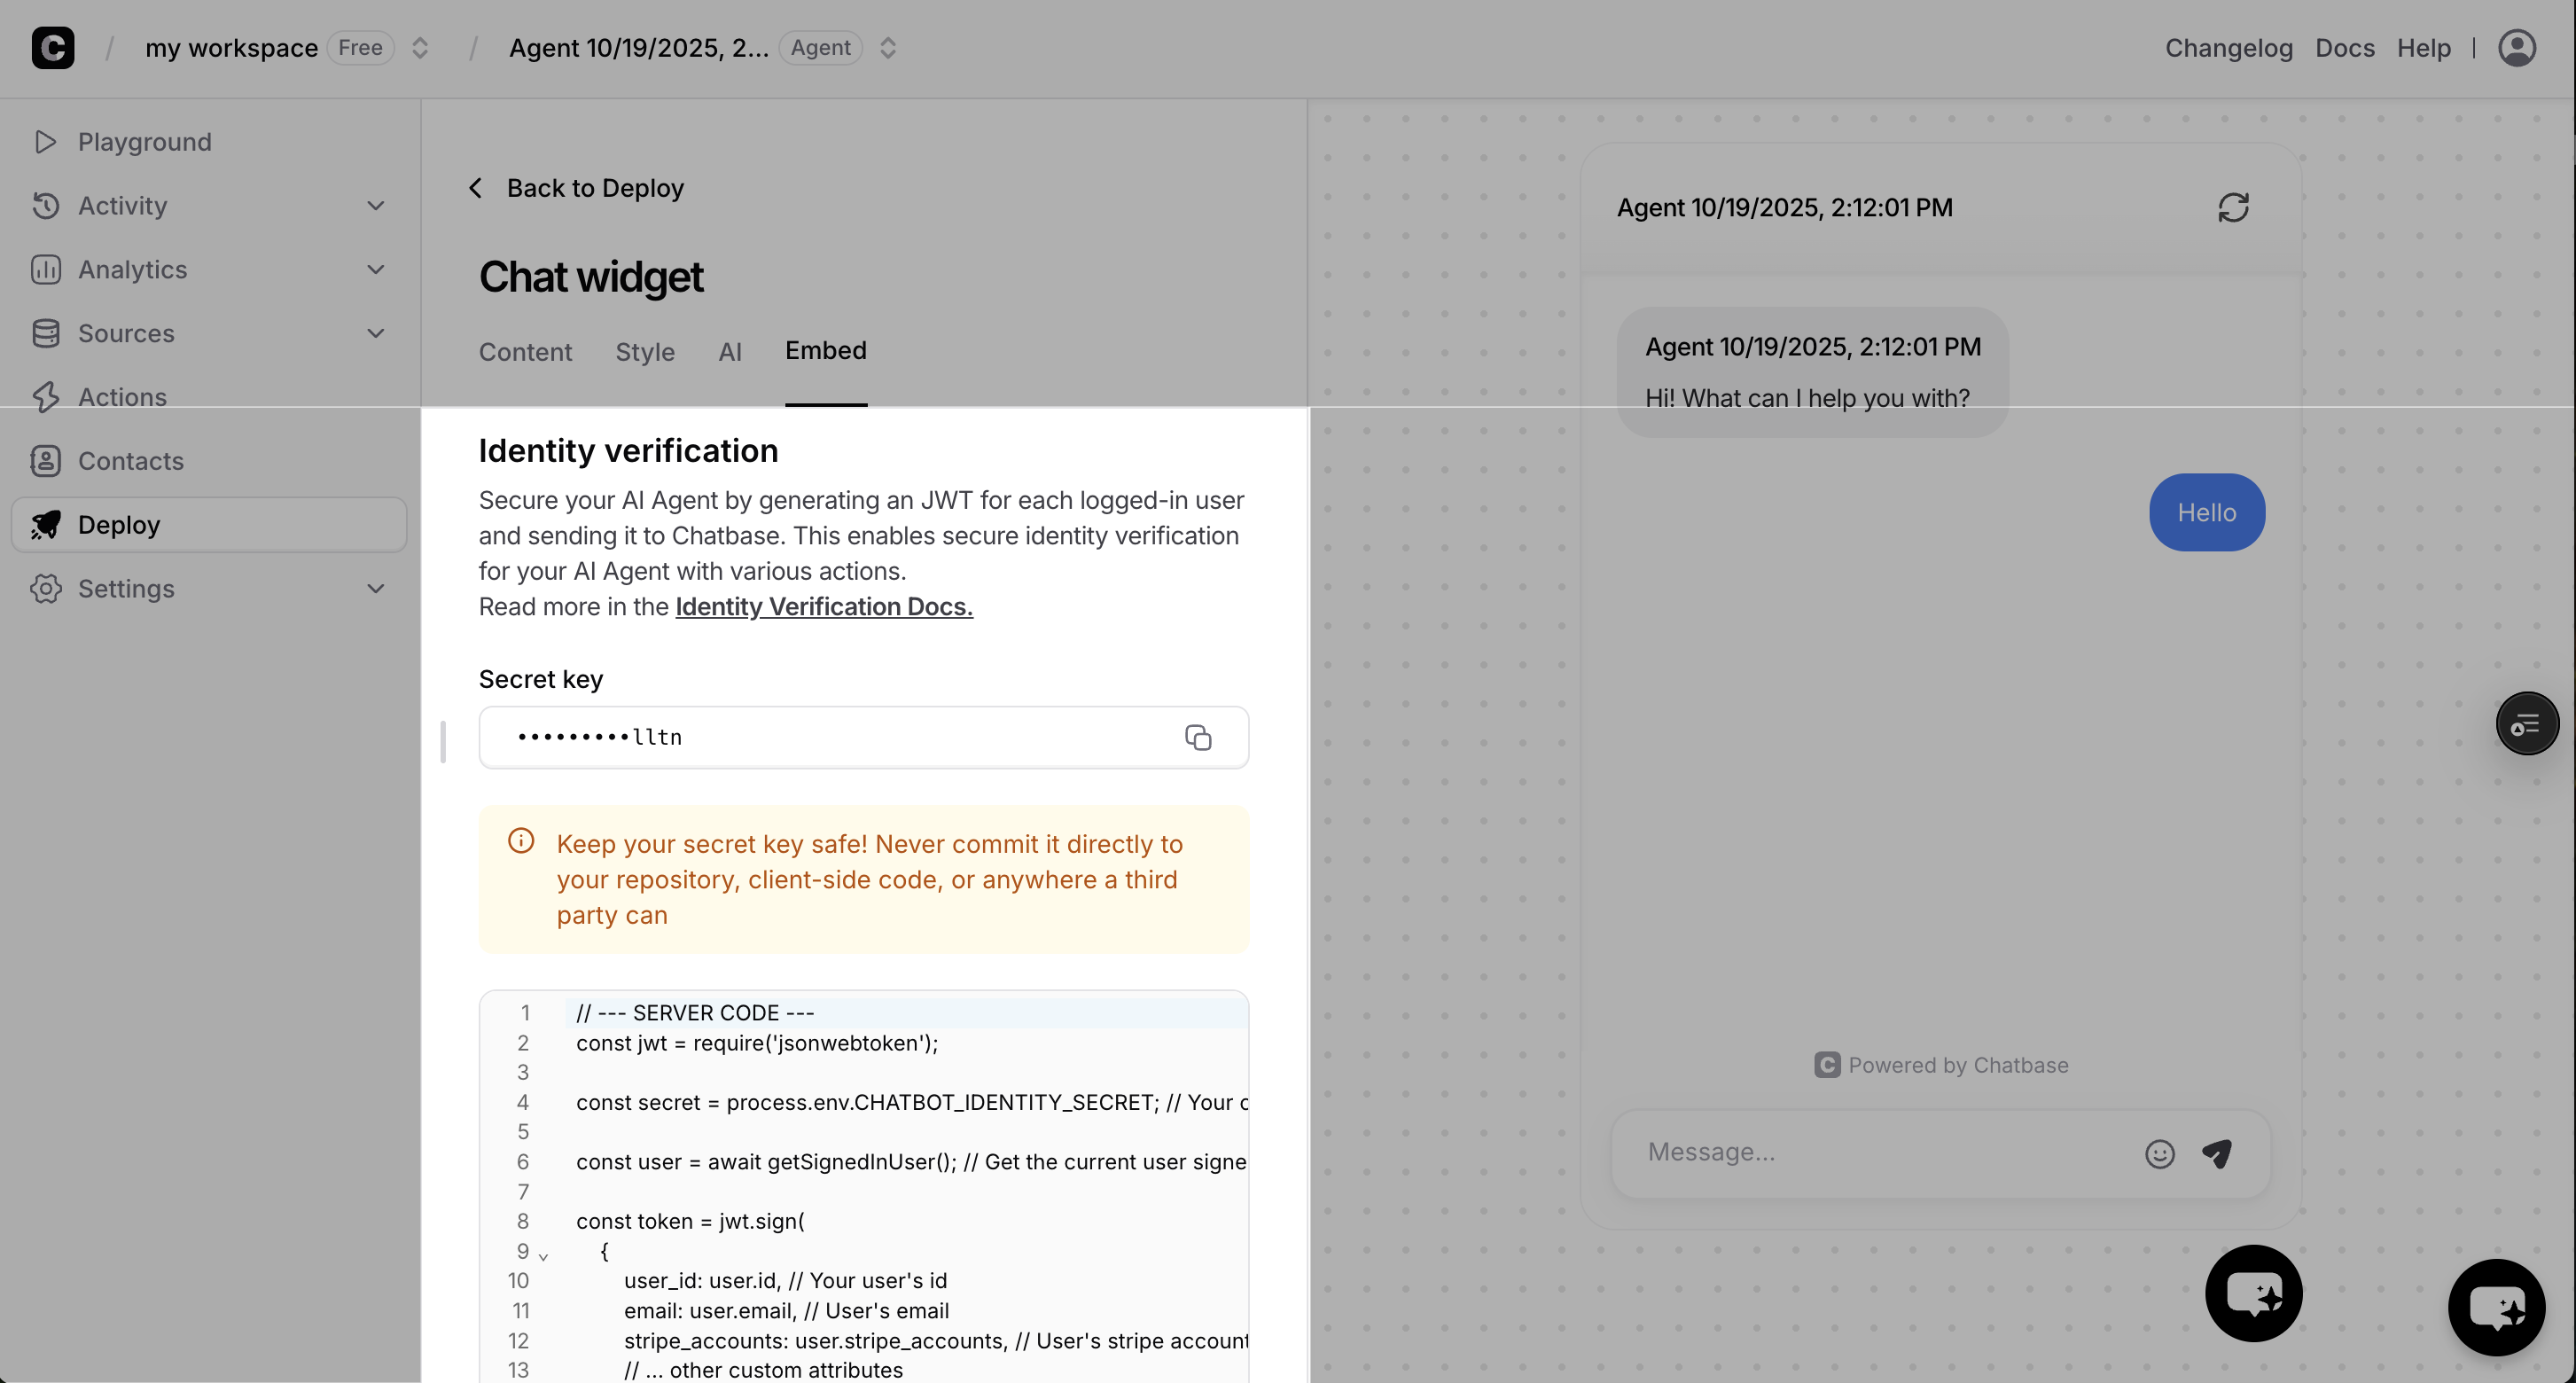
Get Your Secret Key
Navigate to your Chatbase Dashboard to get your verification secret:Open Your AI Agent
Go to Chatbase Dashboard and select your AI Agent.
Method 1: JWT (Recommended)
JWT Overview
With a JSON Web Token (JWT), you can securely pass a contact’s information to Chatbase. This process, known as identification, serves two purposes: it identifies the user to the chatbot and updates the contact’s information in Chatbase.Generating the JWT Payload
The payload of the JWT contains the sensitive information you want to pass. When you provide contact details like email, name, or Stripe information, Chatbase will use it to update or create the user’s contact profile.The only required field in the JWT payload is
user_id or sub. All other fields are optional.Identifying the User
Once you have the signed JWT on your frontend, you can identify the user to your AI Agent in two ways:- Embed script identify method (Recommended)
- Embed Configuration
Dynamically identify end usersData in the token (such as stripe IDs or dates of birth) are not visible to the chatbot to maintain privacy. However, the chatbot can use them to perform actions with your configured integrations. They are passed securely to maintain privacy.This call identifies the user to the chatbot and syncs their contact information.
Logging out Users
When a user logs out, call theresetUser method to clear their identity from the chatbot session:
How Contact Updates Work
-
Adding/Updating Fields: New fields will be added, and existing ones will be updated.
-
Ignoring Fields: If you don’t include a field in the payload, it will be ignored, and the existing value will be preserved.
-
Deleting Fields: To delete a field, pass
nullas its value.
Complete JWT Implementation Flow
This example shows the complete JWT flow: generating JWT tokens with user data, then using identity verification to enable personalized AI responses and automatic contact updates.Step 1: Generate JWT Token on User Login
When users log in, generate a JWT token on your server with their contact information:Step 2: Identify User in Frontend
Use the JWT token to identify the user to Chatbase widget:Frontend JWT Identity Verification
Method 2: User Hash (deprecated)
Generate End User Hash on Your Server
Identify End Users to Your AI Agent + Update Contact
Once you’ve generated the end user hash on your server, you can identify the end user to your AI Agent in two ways:- Embed script identify method (Recommended)
- Embed Configuration
Dynamically identify end users
Identity Parameters
Unique identifier for the user from your authentication system. This tells your AI Agent which end user is currently authenticated. You can use ‘sub’ instead of ‘user_id’ and it will work identically.Format: Any string (UUID recommended)
Example:
Example:
"end-user-12345", "550e8400-e29b-41d4-a716-446655440000"To enable personalized responses and actions, create a Contact record with
external_id matching this user_id using the Contacts API.HMAC-SHA256 hash of the user_id using your Chatbase secret key. This proves to Chatbase that the end user is authentically logged in. Must be generated on your server for security.Format: 64-character hexadecimal string
Example:
Example:
"a1b2c3d4e5f6..."Additional session-specific information about the authenticated end user. This provides context to the AI Agent about the current session.Character limit: 1000 characters total across all fields
Use for: Session state, temporary preferences, current page context, authentication level
Use for: Session state, temporary preferences, current page context, authentication level
Security & Best Practices
Server-Side Hash Generation
Server-Side Hash Generation
Always generate end user hashes on your server, never in client-side JavaScript:✅ Secure: Generate hash in your backend API
✅ Secure: Use environment variables for Chatbase secret keys
❌ Insecure: Generate hash in browser JavaScript
❌ Insecure: Include secret key in client-side code
✅ Secure: Use environment variables for Chatbase secret keys
❌ Insecure: Generate hash in browser JavaScript
❌ Insecure: Include secret key in client-side code
End User ID Format
End User ID Format
Use consistent, unique end user identifiers:✅ Good: UUIDs (
❌ Avoid: Emails or usernames that might change
550e8400-e29b-41d4-a716-446655440000)❌ Avoid: Emails or usernames that might change
Metadata Management
Metadata Management
Keep end user metadata relevant and concise:✅ Include: Information that helps personalize AI responses
✅ Include: Context that aids in customer support
❌ Avoid: Sensitive data like passwords or SSNs
❌ Avoid: Excessive data that exceeds 1000 character limit
✅ Include: Context that aids in customer support
❌ Avoid: Sensitive data like passwords or SSNs
❌ Avoid: Excessive data that exceeds 1000 character limit
JWT Security Best Practices
JWT Security Best Practices
Secure JWT implementation and management:✅ Secure: Generate JWTs on your server with proper expiration times
✅ Secure: Use strong, unique secret keys stored in environment variables
✅ Secure: Include only necessary user data in JWT payload
✅ Secure: Implement proper token refresh mechanisms
❌ Insecure: Generate JWTs in client-side JavaScript
❌ Insecure: Use excessively long expiration times (keep under 24 hours)
Troubleshooting
Hash Mismatch Errors
Hash Mismatch Errors
Symptoms: End user identity not recognized, actions using Contact data failSolutions:
- Verify secret key matches the one from Chatbase Dashboard
- Ensure user_id used for hashing exactly matches the one sent
- Check that hash is generated using HMAC-SHA256
- Confirm user_id is a string, not a number
- Confirm user_id is the same as the one used in the Contact record
Contact Data Not Available
Contact Data Not Available
Symptoms: End user is verified but Contact data isn’t accessible, actions using Contact info failSolutions:
- Verify a Contact exists with
external_idmatching the end user’suser_id - Check Contact was created using Contacts API
- Ensure
user_idand Contactexternal_idmatch exactly (case-sensitive) - Confirm Contact has required fields populated (e.g., Stripe accounts for payment actions)
Identity Not Persisting
Identity Not Persisting
Symptoms: End user identity lost between page loads, Contact data not maintainedSolutions:
- Use
chatbaseUserConfigfor page-load identification - Call
identify()early in your application lifecycle - Ensure end user hash is available before calling identify
- Check browser console for JavaScript errors
Metadata vs Contact Data Confusion
Metadata vs Contact Data Confusion
Symptoms: Expected end user information not available to AI AgentSolutions:
- Use Contact data for permanent end user information
- Use
user_metadataonly for session-specific context - Reduce metadata size to under 1000 characters
- Store comprehensive end user data in Contact custom attributes
Complete User Hash Implementation Flow
This example shows the complete flow: creating Contacts with custom attributes, then using identity verification to enable personalized AI responses.Step 1: Create Contact on User Registration/Updates
When users sign up or their data changes, create a Contact record in Chatbase with custom attributes and Stripe customer ID:Contact Creation API Call
Step 2: Generate Hash on User Login
When users log in, generate the identity hash on your server:Server-Side Hash Generation
Step 3: Identify User in Frontend
Use the hash to identify the user to Chatbase widget:Frontend Identity Verification
Step 4: Unlock Powerful Custom Actions with Contact Data 🚀
Note: The JWT method allows you to insert and update chatbot contacts without the need for seperate API calls to the Contacts API. Now that your AI Agent has access to rich contact data, it can perform incredibly sophisticated custom actions that were previously impossible!Custom Actions User Guide
Learn how to build powerful custom actions that leverage your contact data for personalized user experiences.
Step 5: Unlock Stripe Actions 💳
Here’s where the magic really happens! By addingstripe_accounts to your contacts, you’ve just unlocked the full power of our Stripe integration. Your AI Agent can now handle complex billing operations seamlessly without any additional coding on your part.
What This Means for Your Business:
- Reduced Support Tickets: Common billing questions are handled instantly
- Improved Customer Experience: No more “let me transfer you to billing”
- Increased Efficiency: One AI Agent handles both support AND billing operations
- Personalized Service: Every interaction is tailored to the customer’s specific account details
Stripe Actions
Learn how to use Stripe actions to handle billing, subscriptions, and invoices.
Next Steps
Contacts API
Learn how to create and manage Contact records that link to verified end users
Custom Attributes API
Store additional end user data in Contact custom attributes for personalized experiences
Client-Side Custom Actions
Call backend actions from the client side
Client-Side Custom Forms
Add interactive forms and data collection to your chat