> ## Documentation Index
> Fetch the complete documentation index at: https://chatbase.co/docs/llms.txt
> Use this file to discover all available pages before exploring further.
# WordPress
> Add your Chatbase AI agent to a WordPress website using the official Chatbase plugin and your Agent ID
## Overview
WordPress is the one website platform where you don't paste an embed script. Instead, you install the official Chatbase plugin and give it your Agent ID. The plugin handles the rest.
Put your AI agent in front of every visitor to your WordPress site, with no theme code to edit.
## Before you start
* A Chatbase account with an AI agent, and [the AI agent enabled](/docs/user-guides/quick-start/your-first-agent#navigate-to-the-channels-section). If you don't have an account, [create one for free](https://www.chatbase.co/auth/signup); if you're not sure how to build an AI agent, see [Your first AI agent](/docs/user-guides/quick-start/your-first-agent).
* A WordPress site where you can install plugins, and access to your admin dashboard.
## How to add your AI agent
Your dashboard URL is typically *yourdomainname.com/wp-admin/*. You can also reach it through your web hosting control panel.
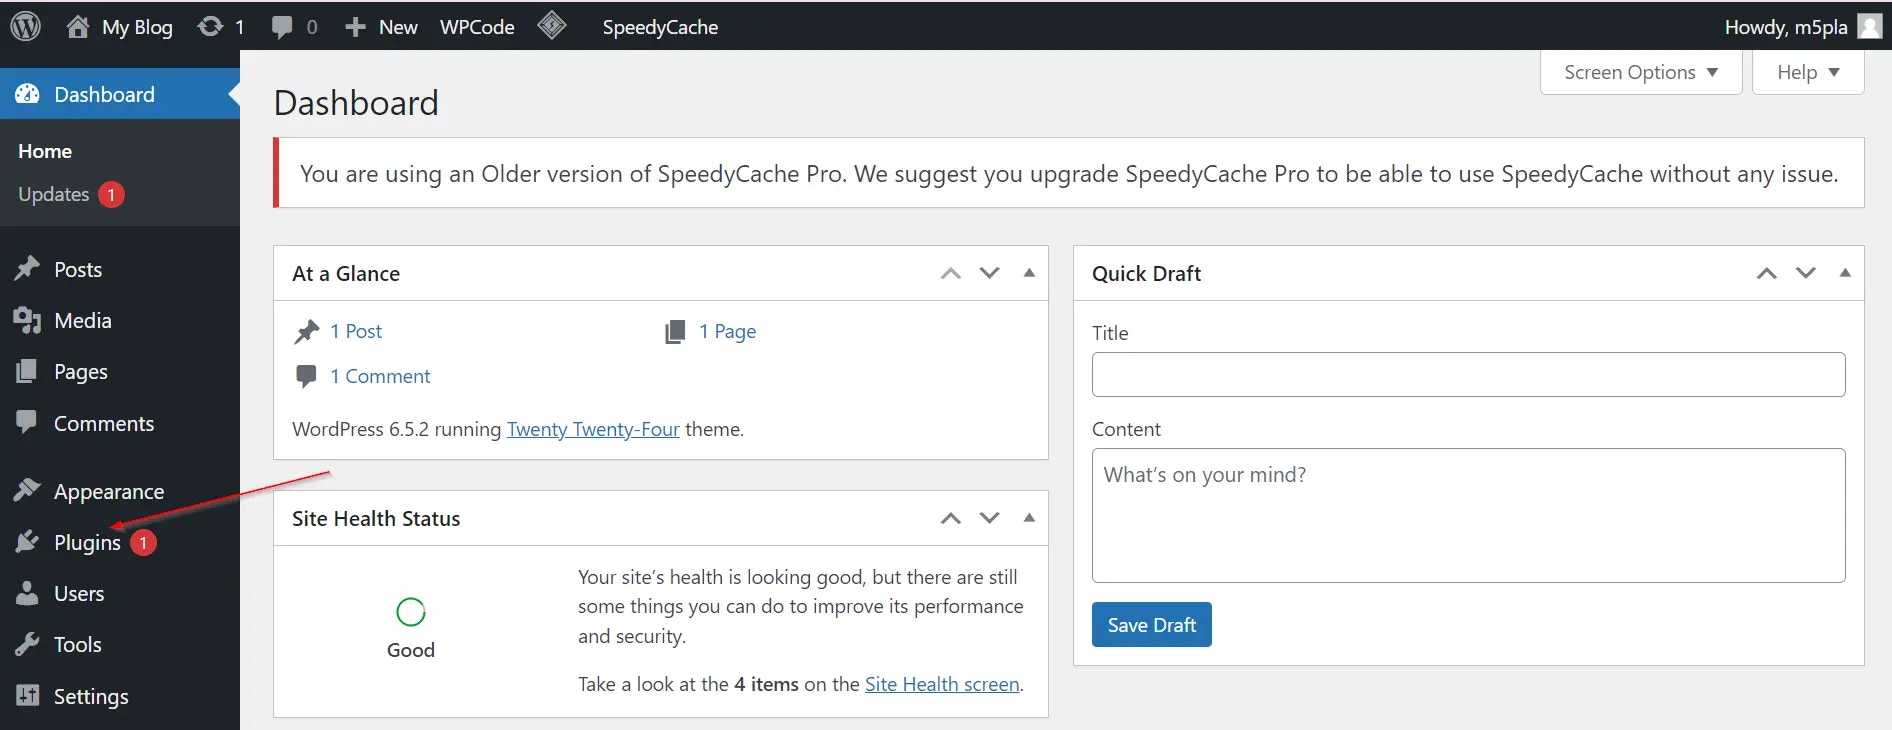
In the left sidebar of your WordPress admin dashboard, click **Plugins**.
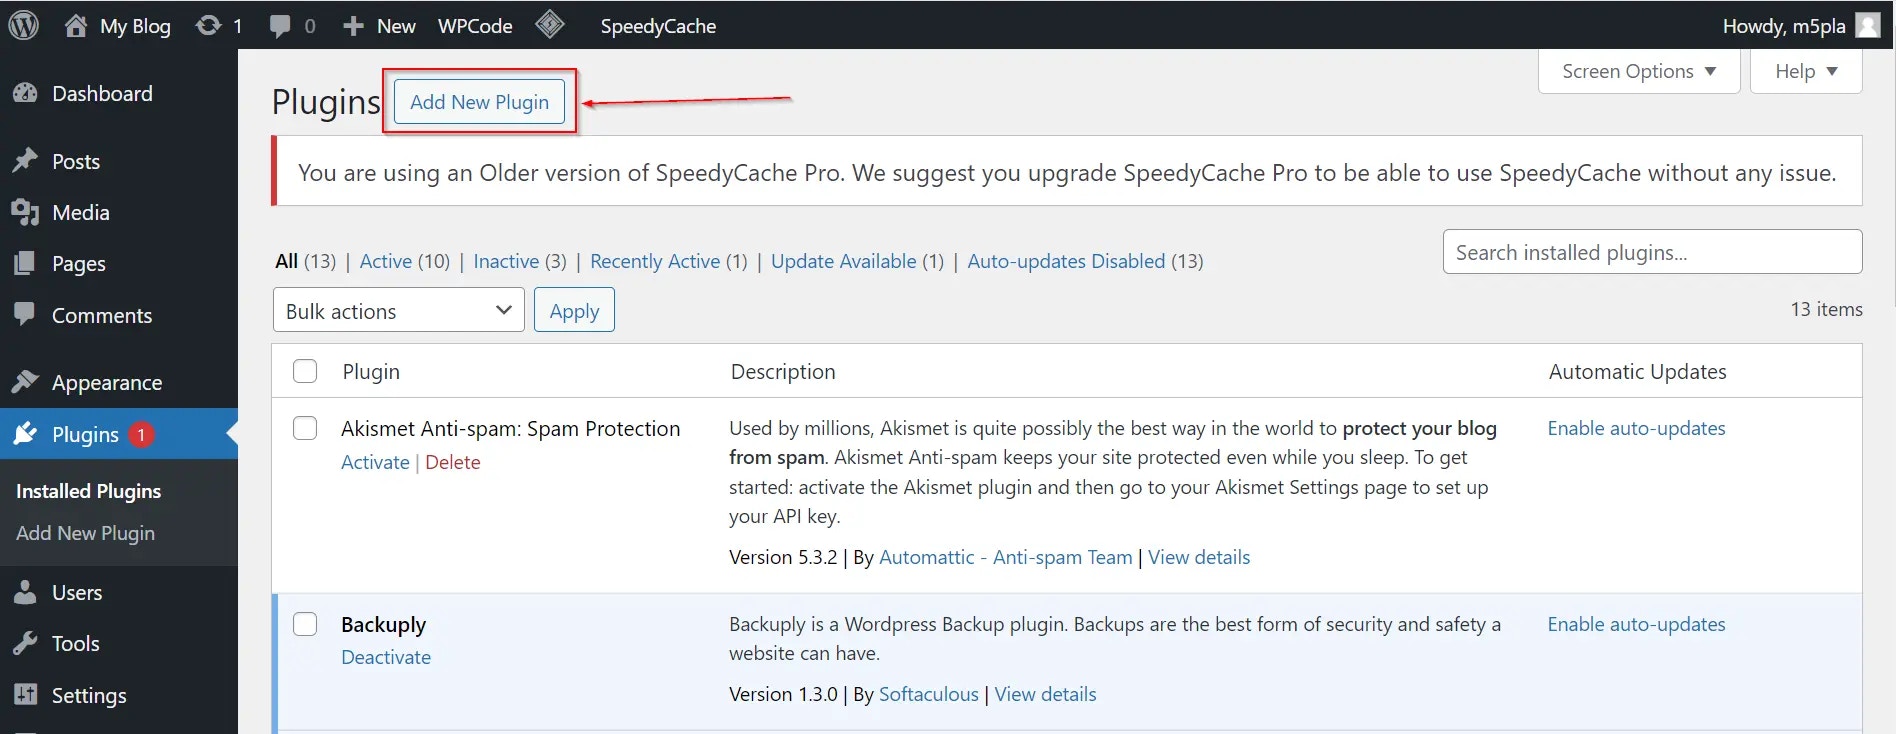
 Click **Add New Plugin** at the top of the next page.
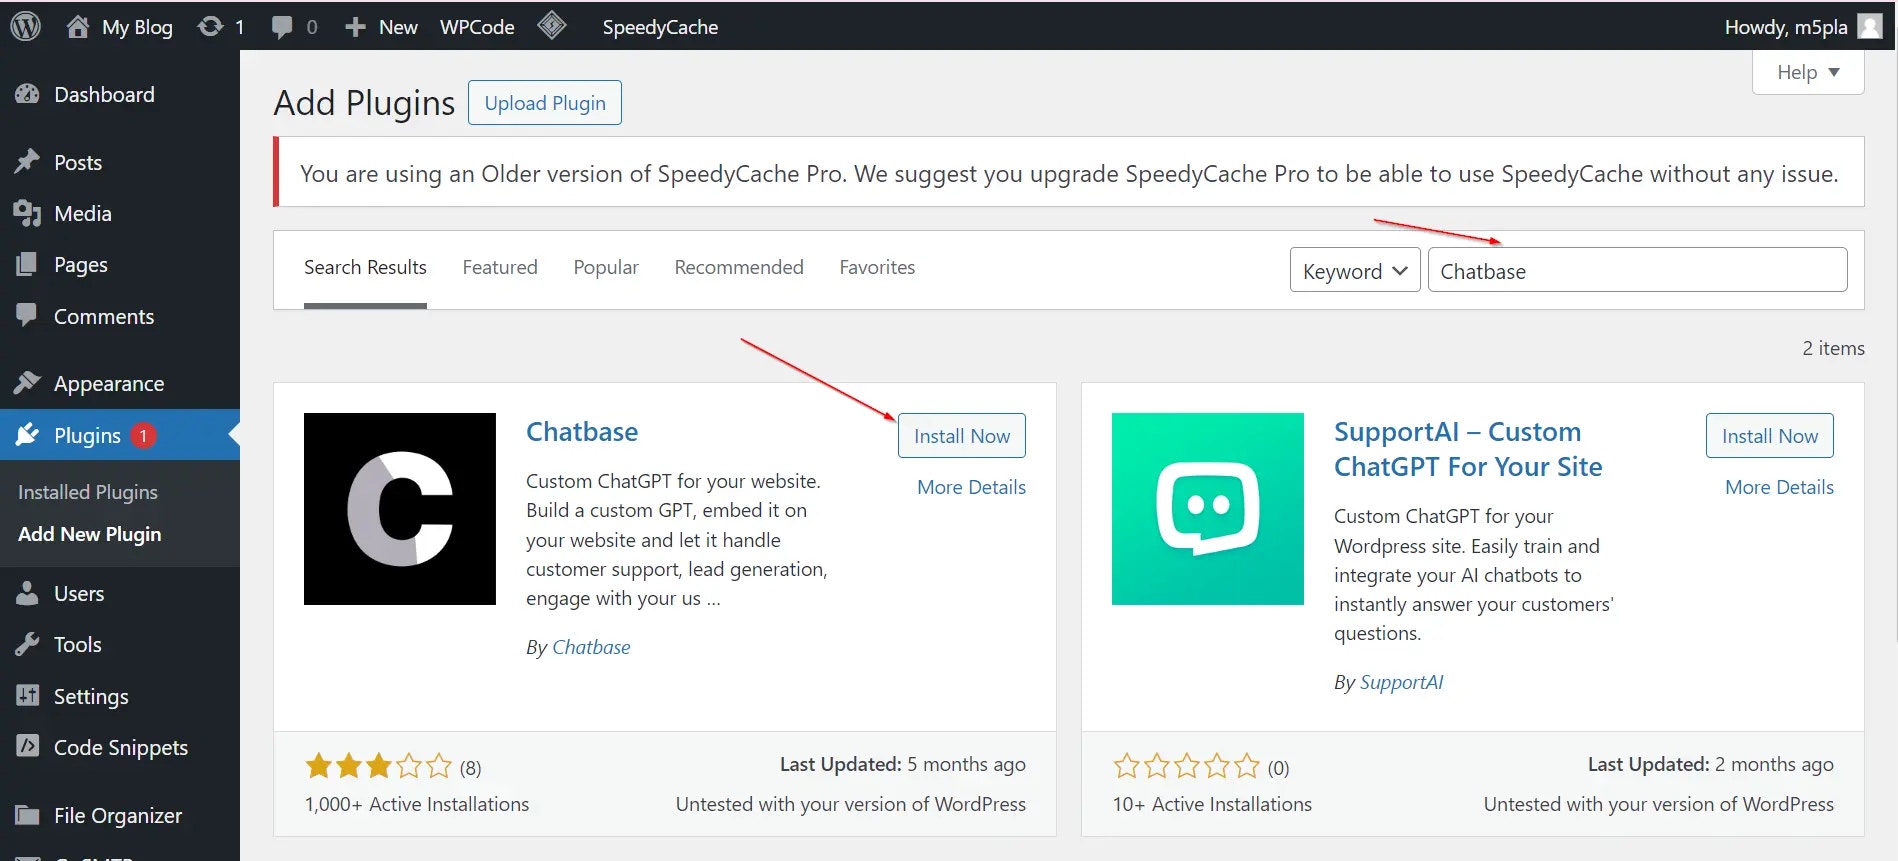
 In the search bar, type **Chatbase**. Find the Chatbase WordPress plugin, click **Install Now**, then **Activate**.
 1. In the left sidebar of the WordPress admin dashboard, click **Settings**.
2. Look for **Chatbase options** and click it.
3. Find the text box labeled **Agent ID**.
1. In the left sidebar of the WordPress admin dashboard, click **Settings**.
2. Look for **Chatbase options** and click it.
3. Find the text box labeled **Agent ID**.
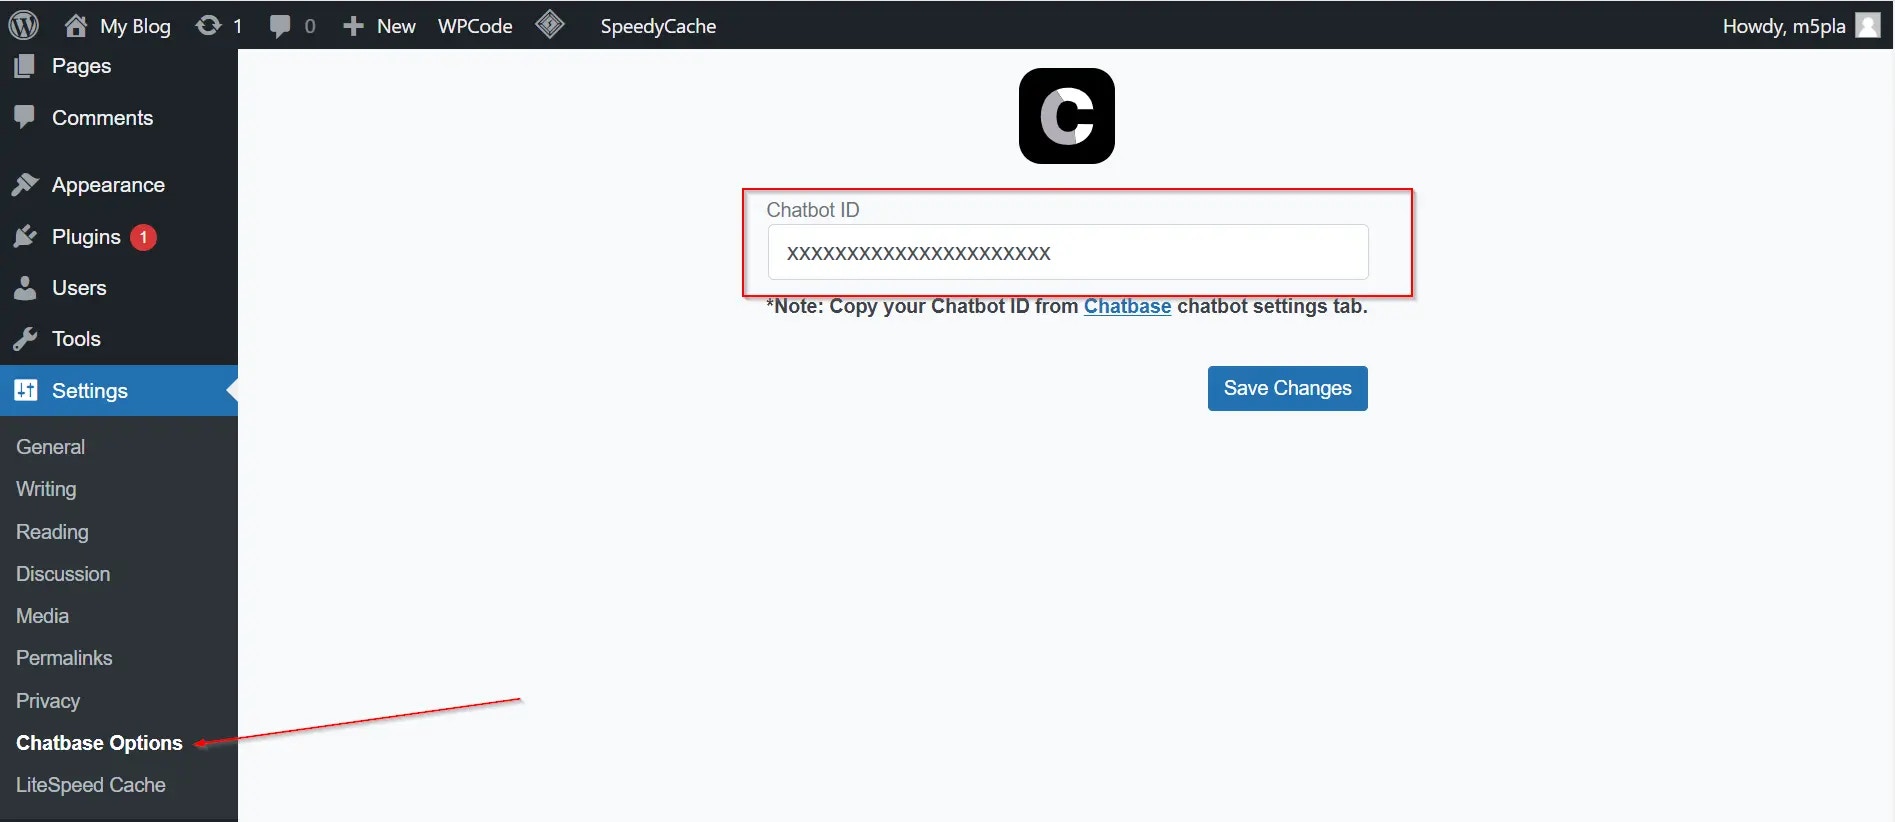 1. Go to your Chatbase [dashboard](https://www.chatbase.co/dashboard/) and select the AI agent you want to embed.
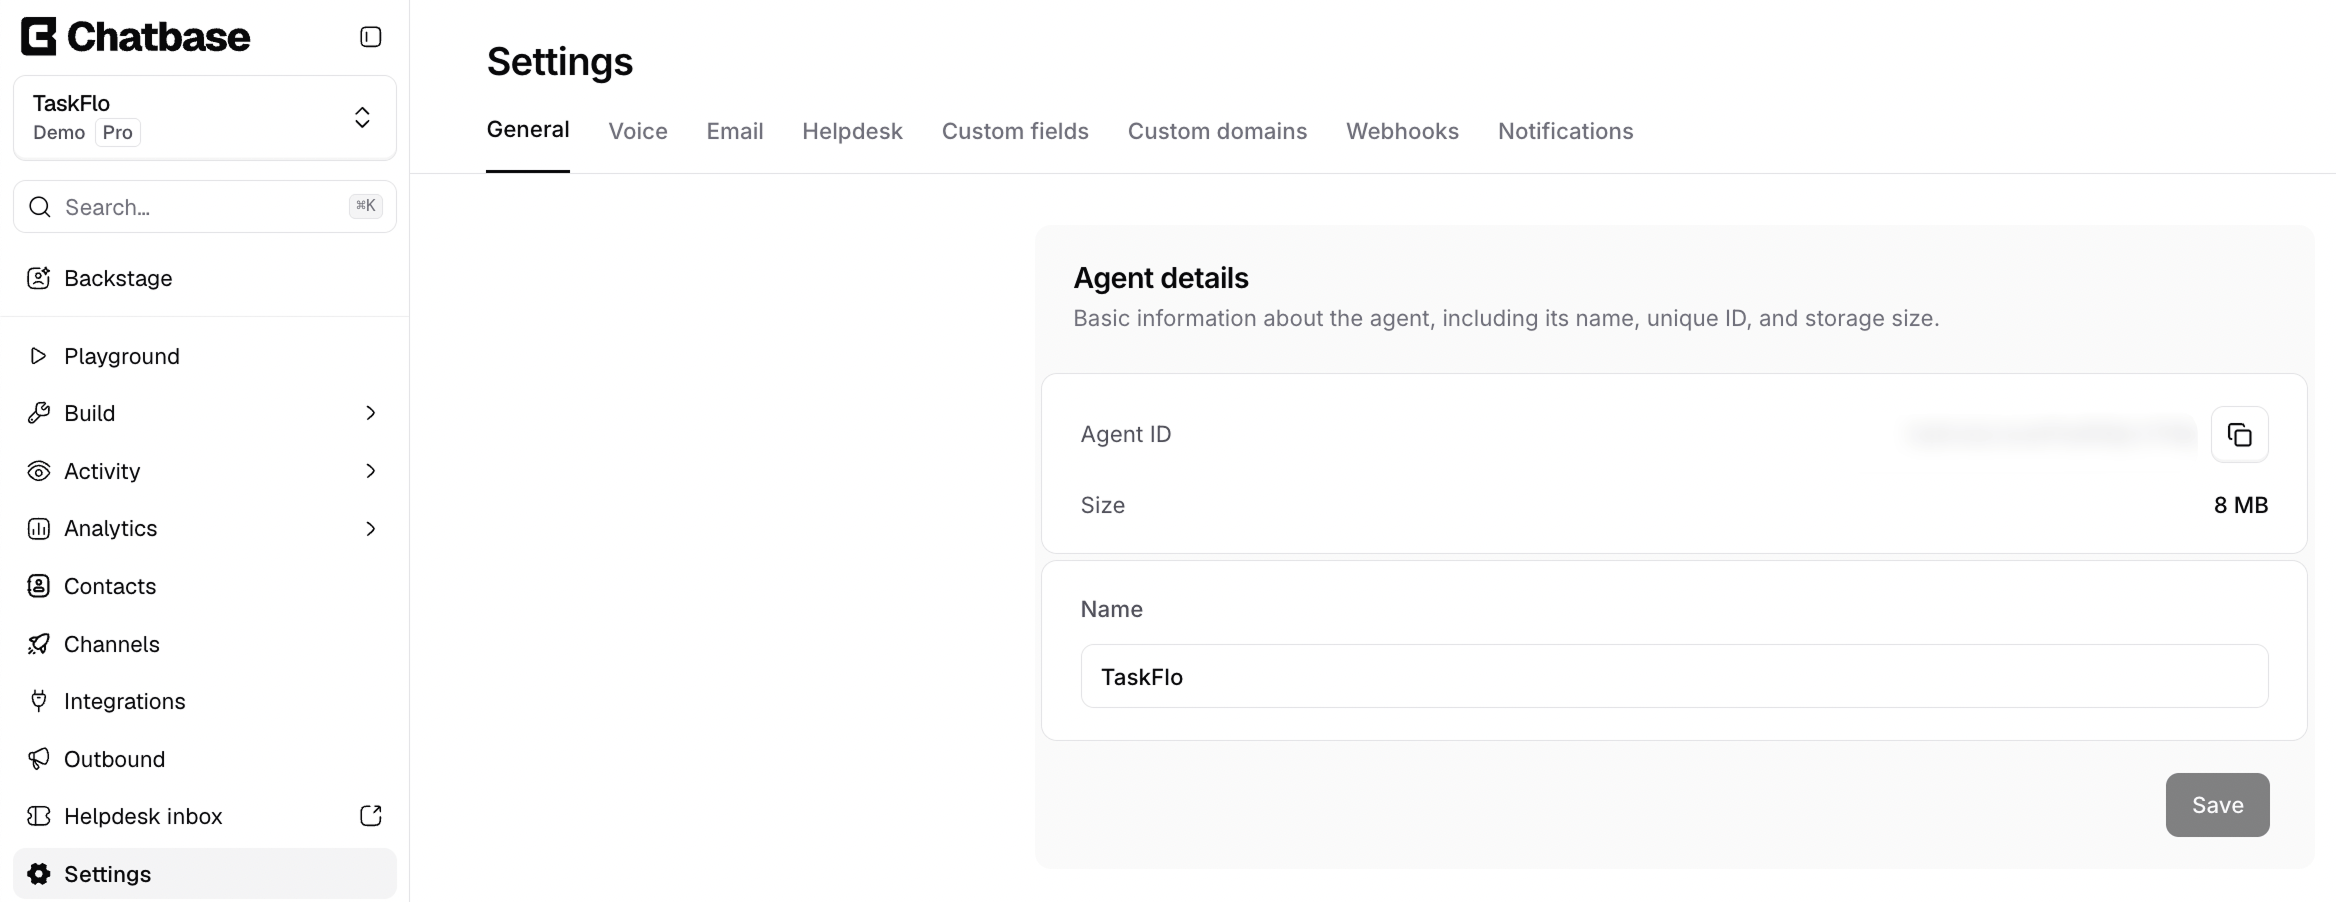
2. Click **Settings** in the sidebar and stay on the **General** tab. Copy the **Agent ID** from the **Agent details** card.
3. Paste the Agent ID into the text box in your WordPress settings.
1. Go to your Chatbase [dashboard](https://www.chatbase.co/dashboard/) and select the AI agent you want to embed.
2. Click **Settings** in the sidebar and stay on the **General** tab. Copy the **Agent ID** from the **Agent details** card.
3. Paste the Agent ID into the text box in your WordPress settings.
 Click **Save Changes**.
Visit your WordPress site and confirm the Chatbase AI agent appears and responds.
Click **Save Changes**.
Visit your WordPress site and confirm the Chatbase AI agent appears and responds.
 You can customize the appearance and colors of your AI agent on your Chatbase dashboard. Go to your **dashboard**, choose an AI agent, click **Channels** in the left sidebar, click **Manage** on the **Chat bubble** card, then open the **Display** tab to edit Content, Capabilities, Colors, Floating bubble, and Localization.
## Next steps
Match the widget to your brand colors, position, and copy.
You can customize the appearance and colors of your AI agent on your Chatbase dashboard. Go to your **dashboard**, choose an AI agent, click **Channels** in the left sidebar, click **Manage** on the **Chat bubble** card, then open the **Display** tab to edit Content, Capabilities, Colors, Floating bubble, and Localization.
## Next steps
Match the widget to your brand colors, position, and copy.