> ## Documentation Index
> Fetch the complete documentation index at: https://chatbase.co/docs/llms.txt
> Use this file to discover all available pages before exploring further.
# Wix
> Embed your Chatbase AI agent on a Wix website using the website widget embed code
## Overview
Adding your Chatbase AI agent to a Wix website takes two things: the embed code from your Chatbase dashboard, and Wix's **Custom Code** embed element. Once pasted, a floating chat bubble appears on your site.
Put your AI agent in front of every visitor to your Wix site, answering questions without them leaving the page.
## Before you start
* A Chatbase account with an AI agent. If you haven't built one yet, [sign up for a free account](https://www.chatbase.co/auth/signup) and follow [Your first AI agent](/docs/user-guides/quick-start/your-first-agent).
* A Wix website you can edit.
## How to embed your AI agent
1. Navigate to your [dashboard](https://www.chatbase.co/dashboard/) and select the AI agent you wish to embed.
2. Click **Channels** in the left sidebar, then click **Manage** on the **Chat bubble** card (or **Setup**, if you haven't configured it yet).
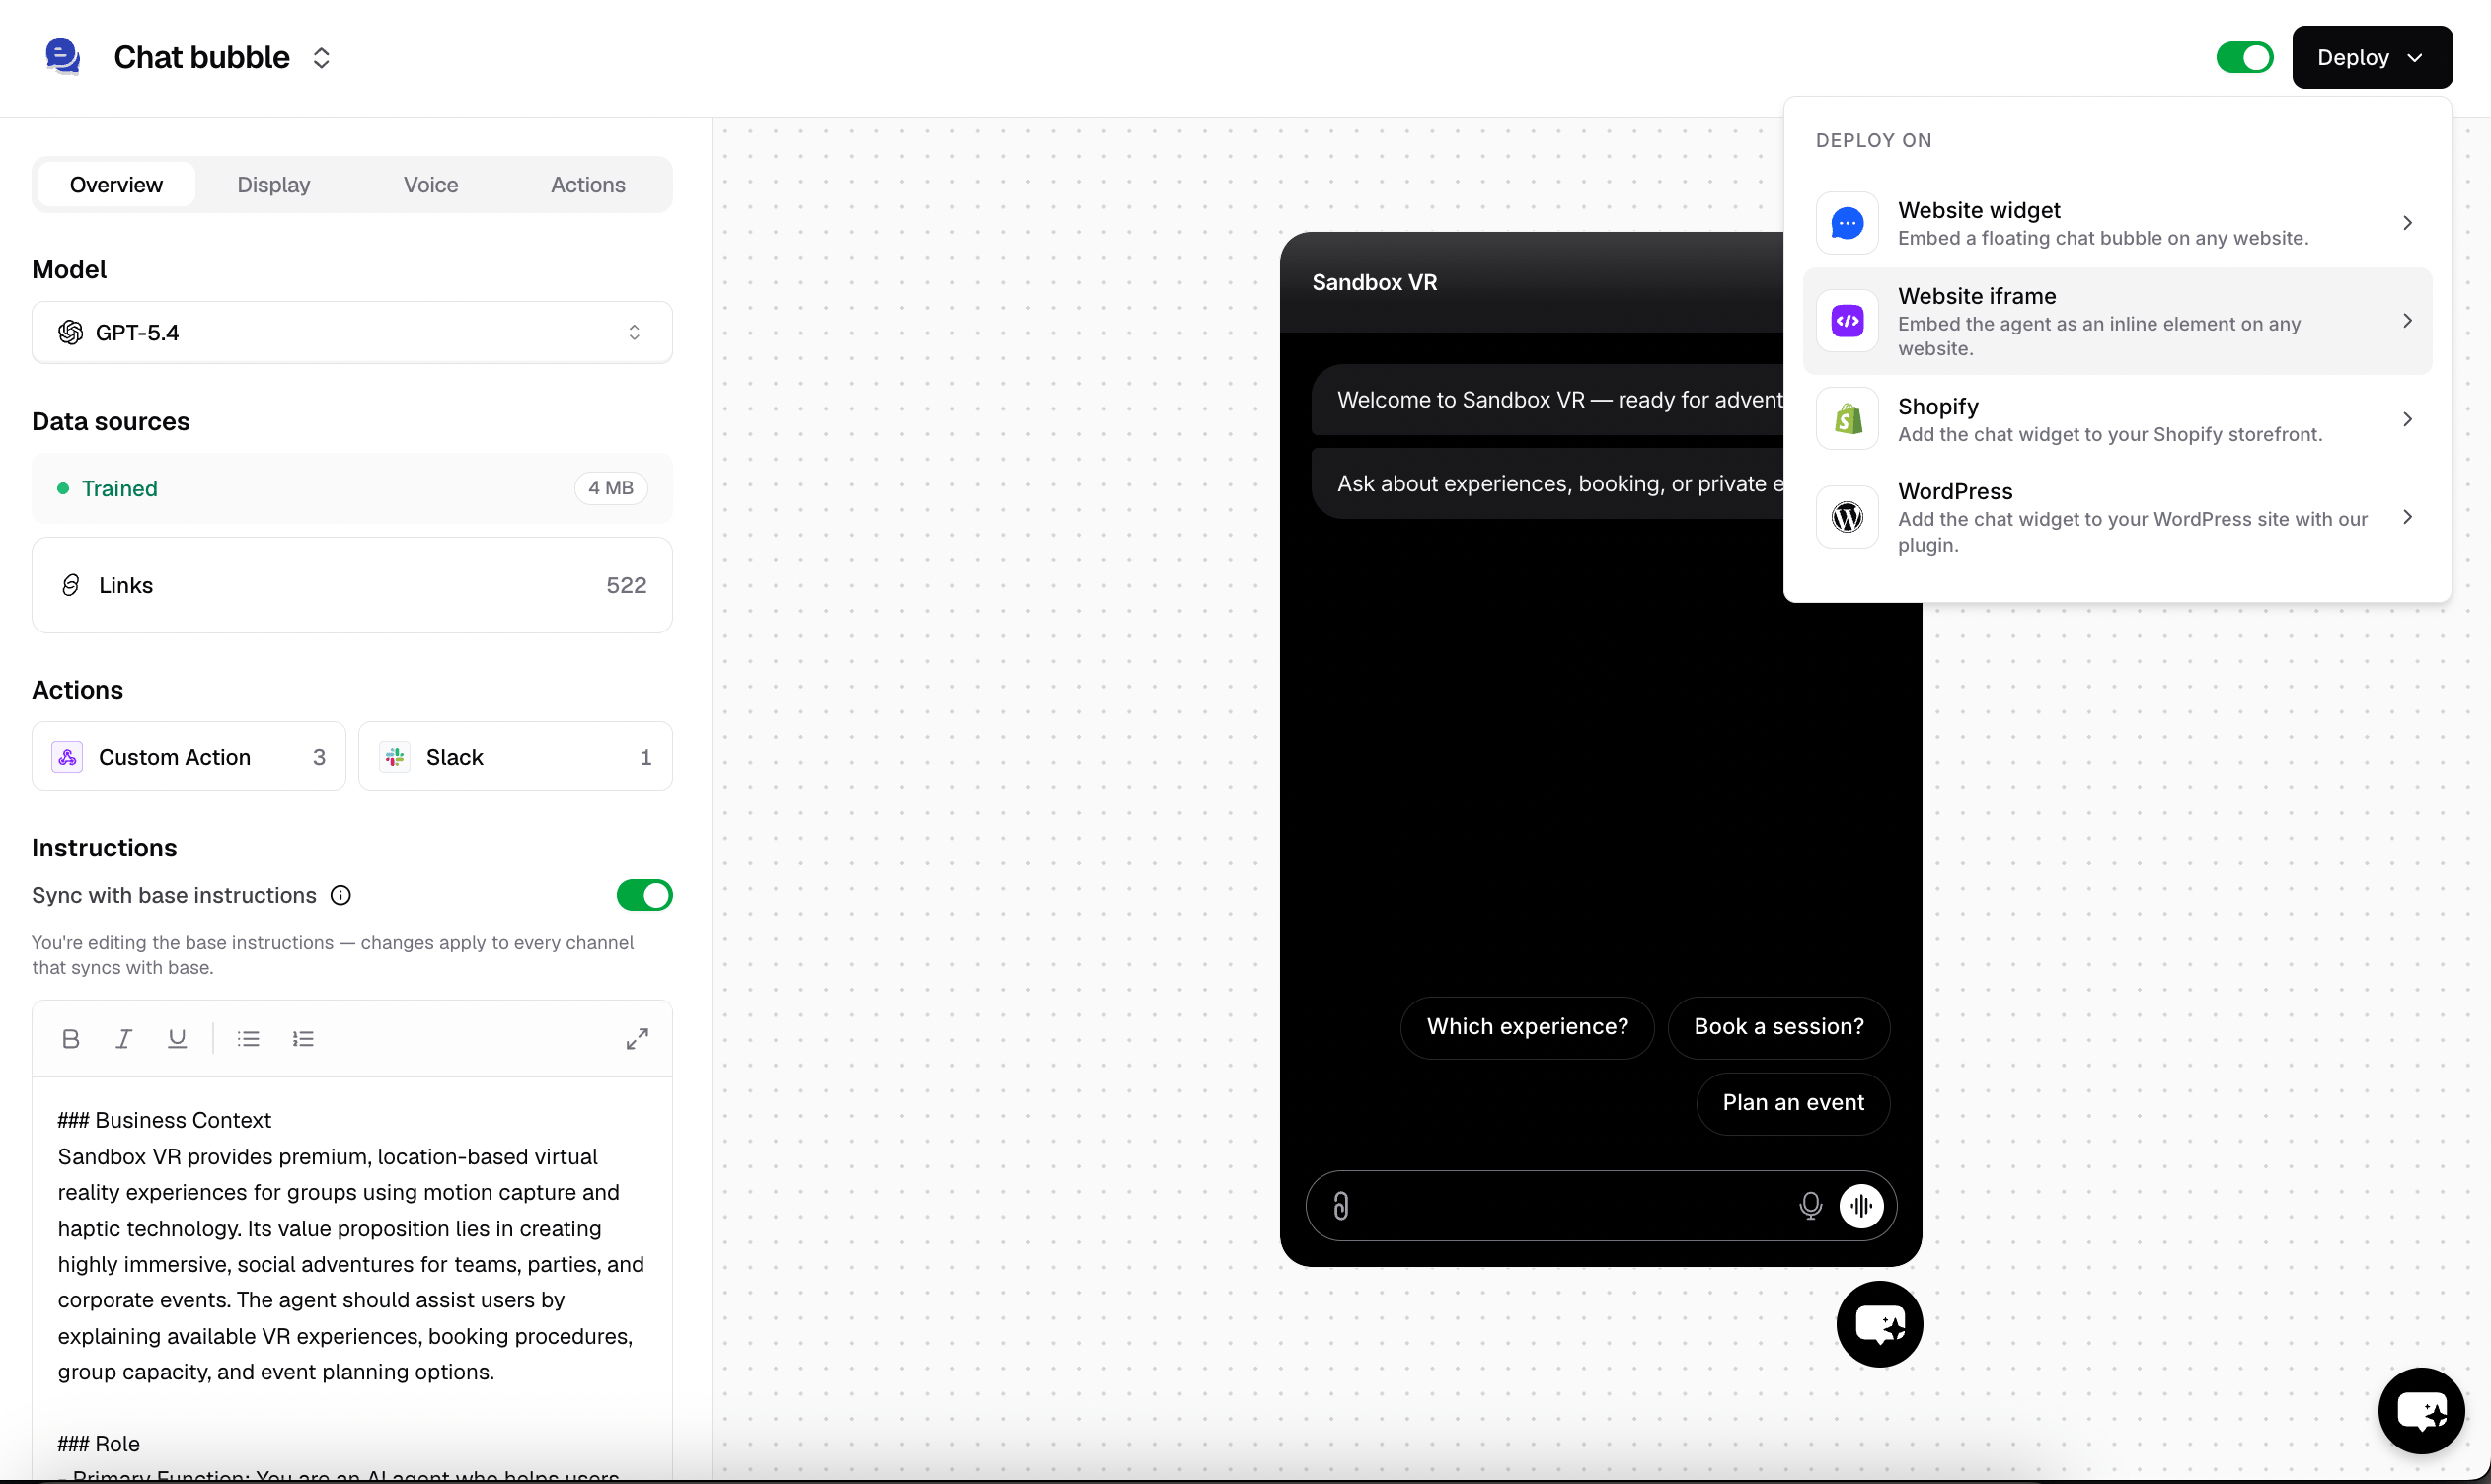
3. Click **Deploy** and select the **Website widget** embed type. Scroll down and click **Copy** to copy the provided script.
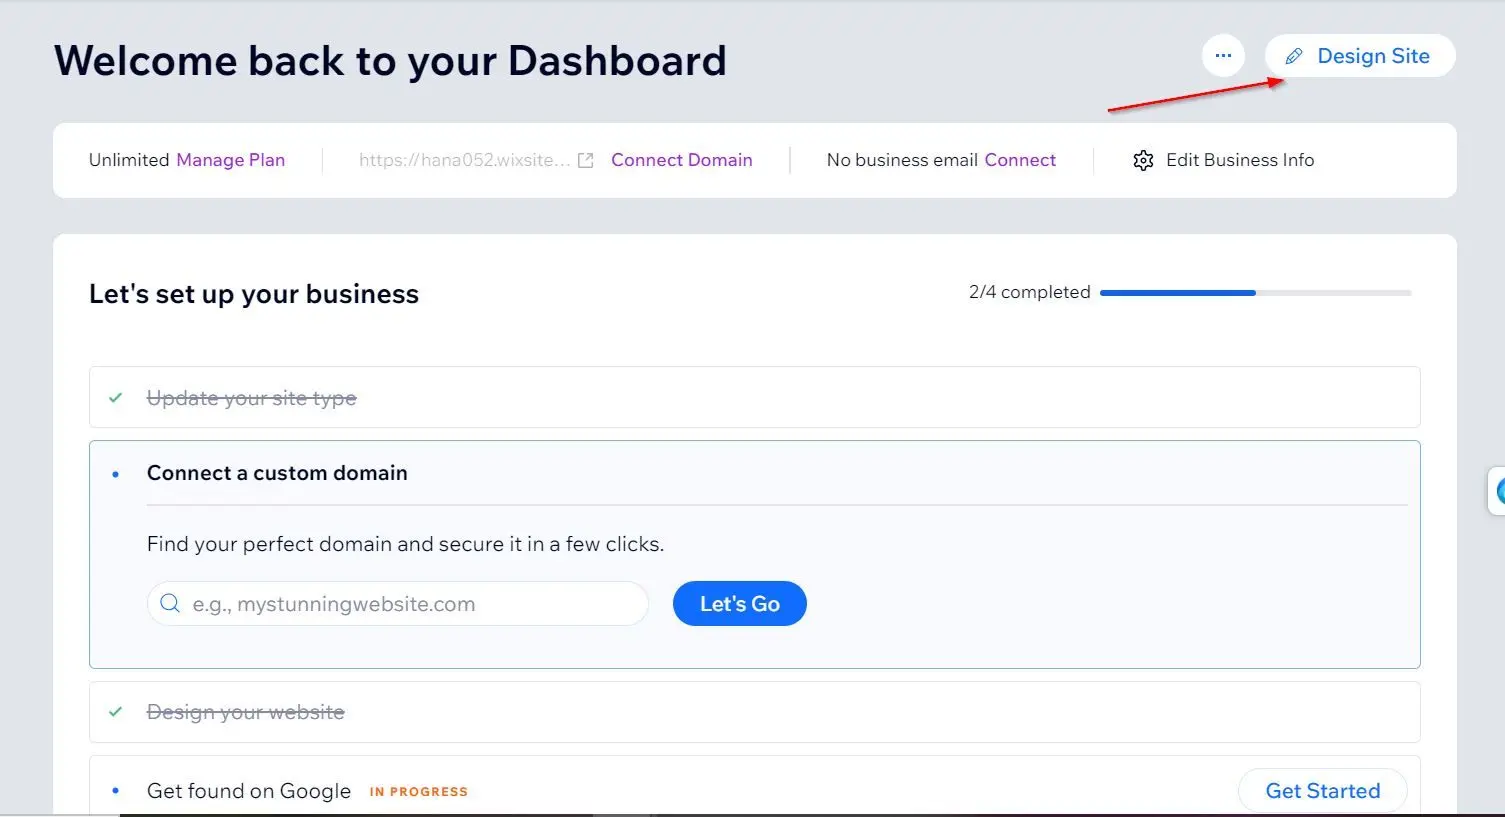
 Sign in to Wix and head to your dashboard. Click **Design Site** in the top-right corner of the page to load your site in the Wix editor.
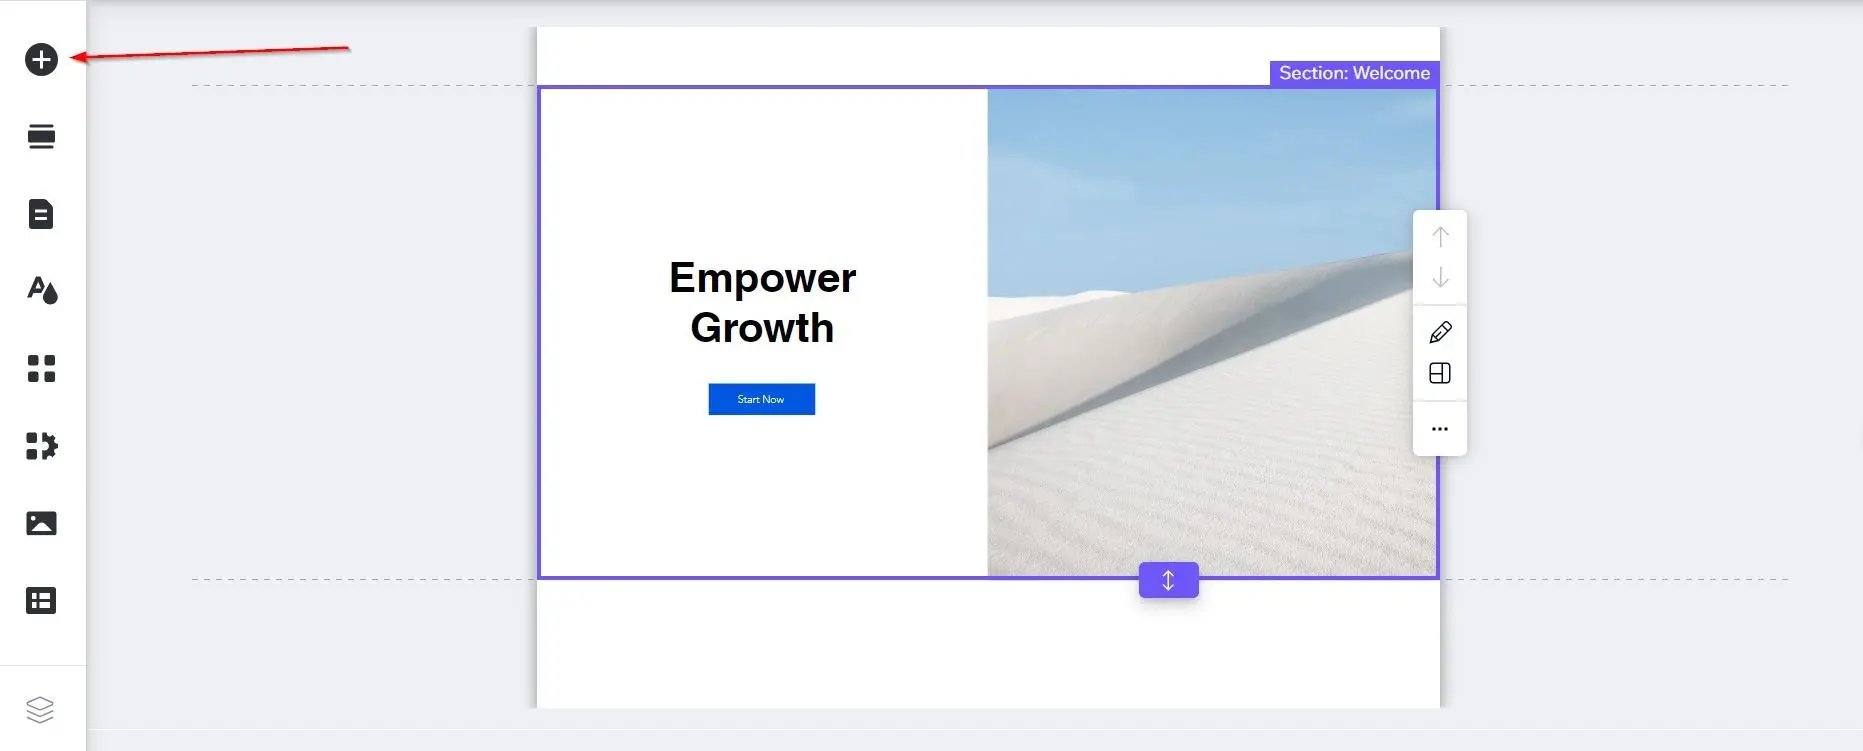
 Scroll to the section of the website where you want the AI agent, then click the big plus (**Add Elements**) button on the left sidebar.
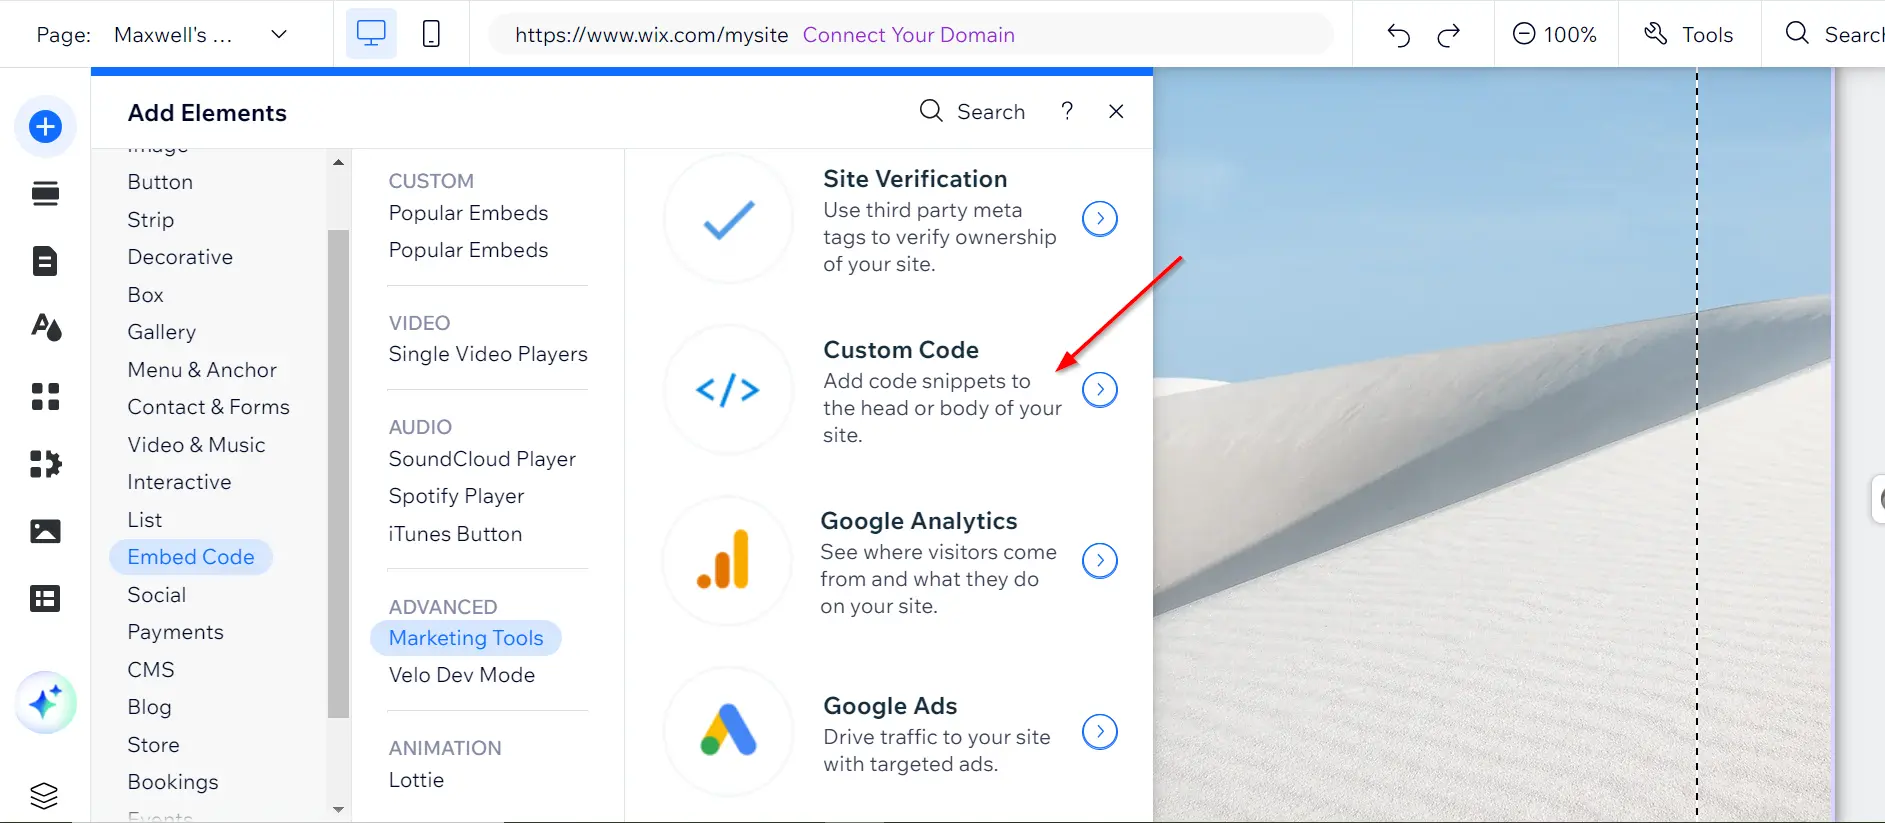
 Scroll down to locate and click **Embed Code**, then **Popular Embeds**, then **Custom Code**.
 When the custom code widget pops up, click **+ Add Custom Code** in the top right, then:
1. Paste the code snippet into the custom code editor.
2. Provide a name for your code.
3. Choose an option under **Add Code to Pages**.
4. Choose where to place your code under **Place Code in**.
5. Click **Apply**.
Preview your website and confirm the floating Chatbase chat icon appears.
When the custom code widget pops up, click **+ Add Custom Code** in the top right, then:
1. Paste the code snippet into the custom code editor.
2. Provide a name for your code.
3. Choose an option under **Add Code to Pages**.
4. Choose where to place your code under **Place Code in**.
5. Click **Apply**.
Preview your website and confirm the floating Chatbase chat icon appears.
 You can customize the appearance and colors of your AI agent on your Chatbase dashboard. Go to your **dashboard**, choose an AI agent, click **Channels** in the left sidebar, click **Manage** on the **Chat bubble** card, then open the **Display** tab to edit Content, Capabilities, Colors, Floating bubble, and Localization.
## Next steps
Match the widget to your brand colors, position, and copy.
You can customize the appearance and colors of your AI agent on your Chatbase dashboard. Go to your **dashboard**, choose an AI agent, click **Channels** in the left sidebar, click **Manage** on the **Chat bubble** card, then open the **Display** tab to edit Content, Capabilities, Colors, Floating bubble, and Localization.
## Next steps
Match the widget to your brand colors, position, and copy.