> ## Documentation Index
> Fetch the complete documentation index at: https://chatbase.co/docs/llms.txt
> Use this file to discover all available pages before exploring further.
# Shopify
> Connect your Shopify store so your AI agent can help customers browse, buy, track orders, and manage their account
## Overview
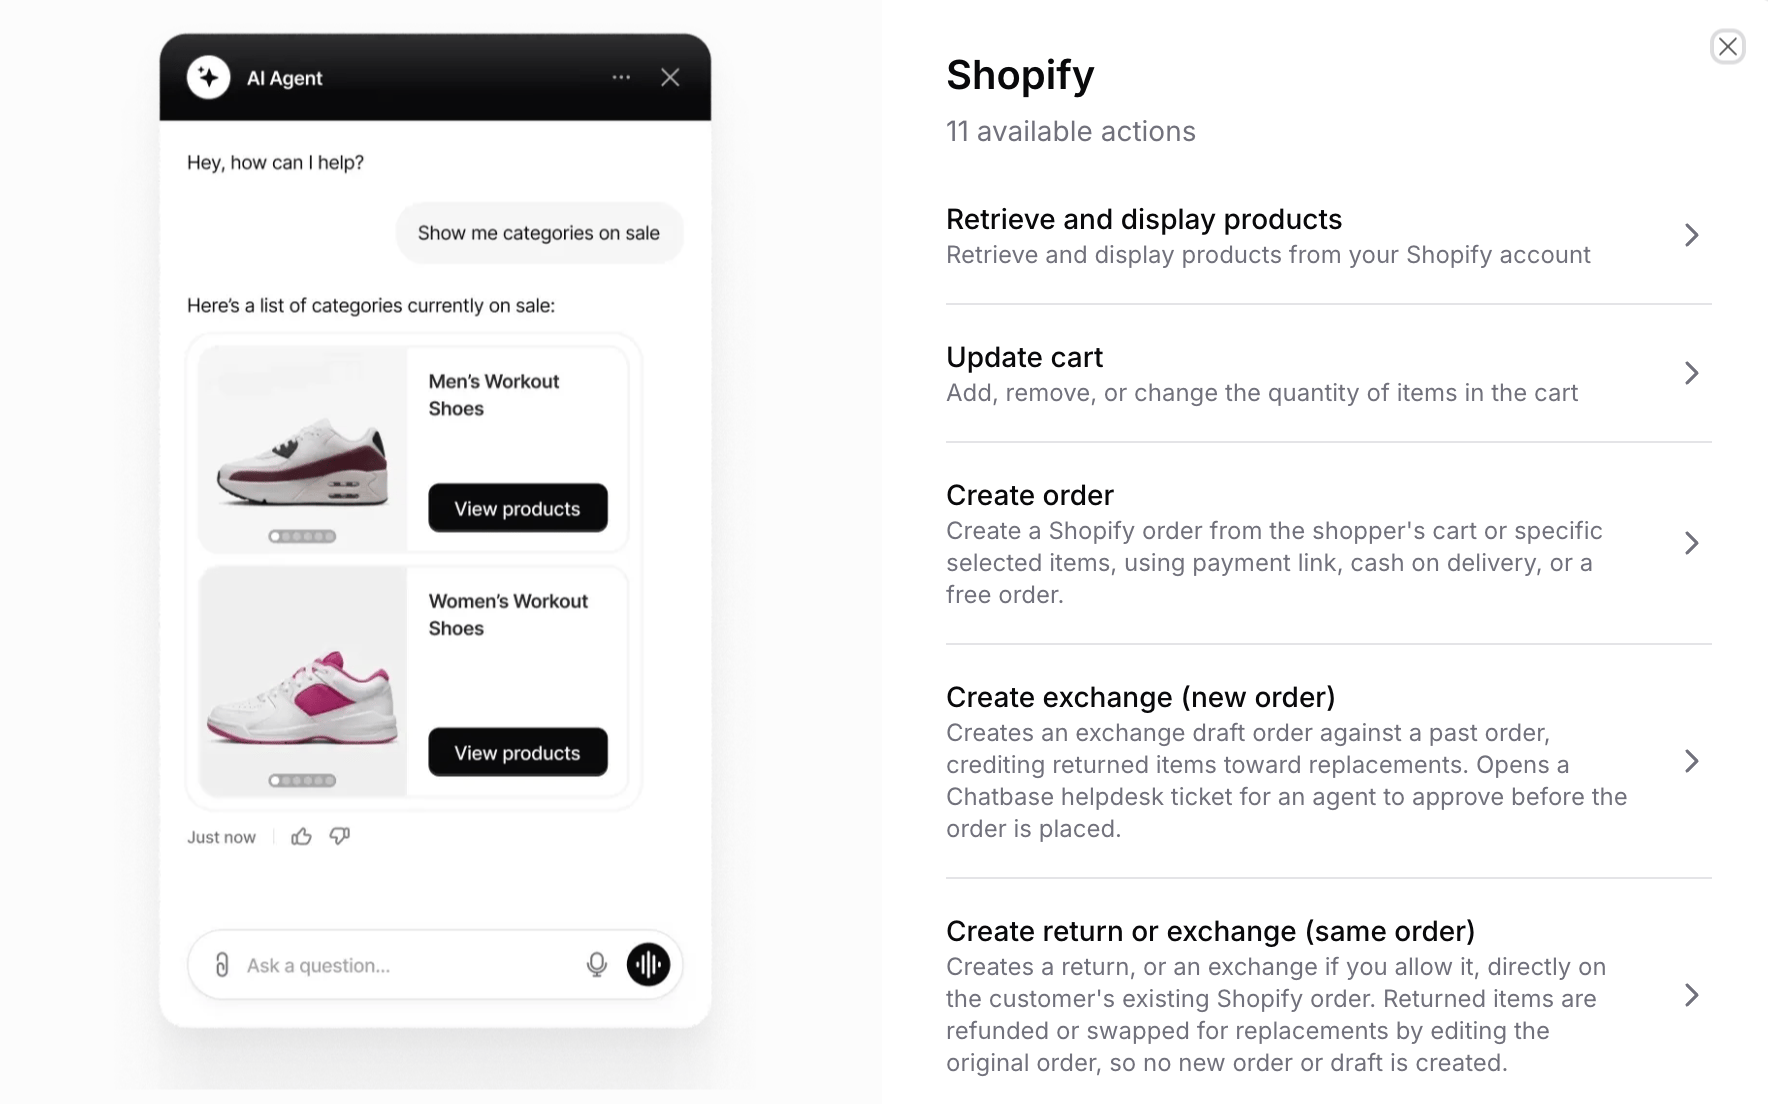
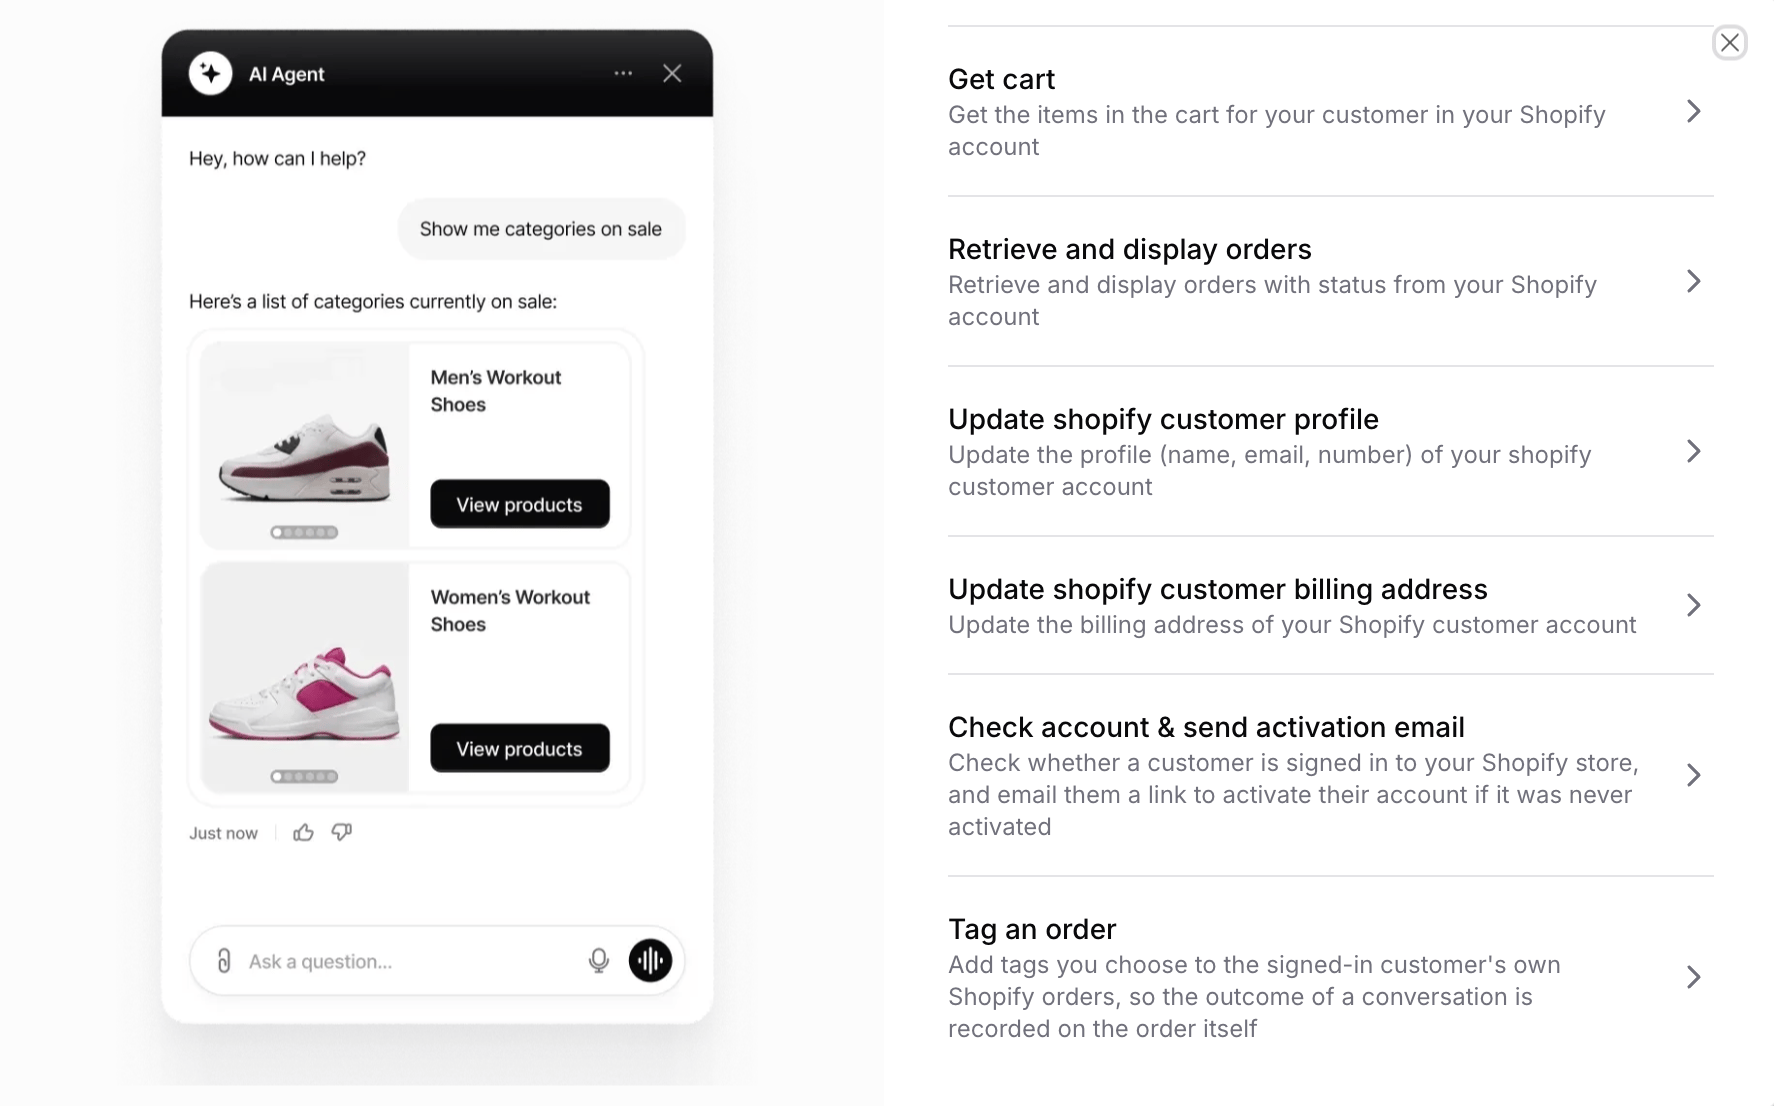
Connect your Shopify store to Chatbase and turn your AI agent into an e-commerce assistant. Your AI agent can help customers browse products, manage their cart, place orders, track and exchange orders, and update their account details, all through natural conversation.
Give shoppers a single place to find a product, add it to the cart, check out, and ask where their order is, without leaving the chat.
**You do not need to add any embed code manually.** Once you install the Chatbase Shopify app, whether from Chatbase or the Shopify App Store, the chat bubble is automatically added to your store. You do not need to copy or paste any embed script into your theme code.
## Before you start
* A Chatbase account with an AI agent, set to public. If you haven't built one yet, [create a free Chatbase account](https://www.chatbase.co/auth/signup) and follow [Your first AI agent](/docs/user-guides/quick-start/your-first-agent).
* A Shopify store you can install apps on.
## Integration methods
You can connect your Shopify store to Chatbase in two ways:
| Feature | Via Chatbase (Recommended) | Via Shopify Marketplace |
| ------------------- | ------------------------------------------------------------------------------------ | --------------------------- |
| Billing | Through Chatbase | Through Shopify |
| 7-day free trial | Available | Not available |
| Available add-ons | Auto recharge credits, Extra AI agents, Custom Domains, Remove 'Powered By Chatbase' | Auto recharge credits only |
| Number of AI agents | Multiple AI agents (only a single AI agent connected to the Shopify store) | Single AI agent per account |
| Setup location | Chatbase Dashboard | Shopify App Store |
We recommend connecting via Chatbase for full access to all features and add-ons.
## Method 1: Connect via Chatbase (Recommended)
This method gives you access to all Chatbase features and add-ons, and you can start a 7-day free trial.
1. Go to your [Chatbase dashboard](https://www.chatbase.co/dashboard/) and select the AI agent you want to connect to Shopify.
2. Open the Shopify connection flow in either of these ways. Both lead to the same store connection step below:
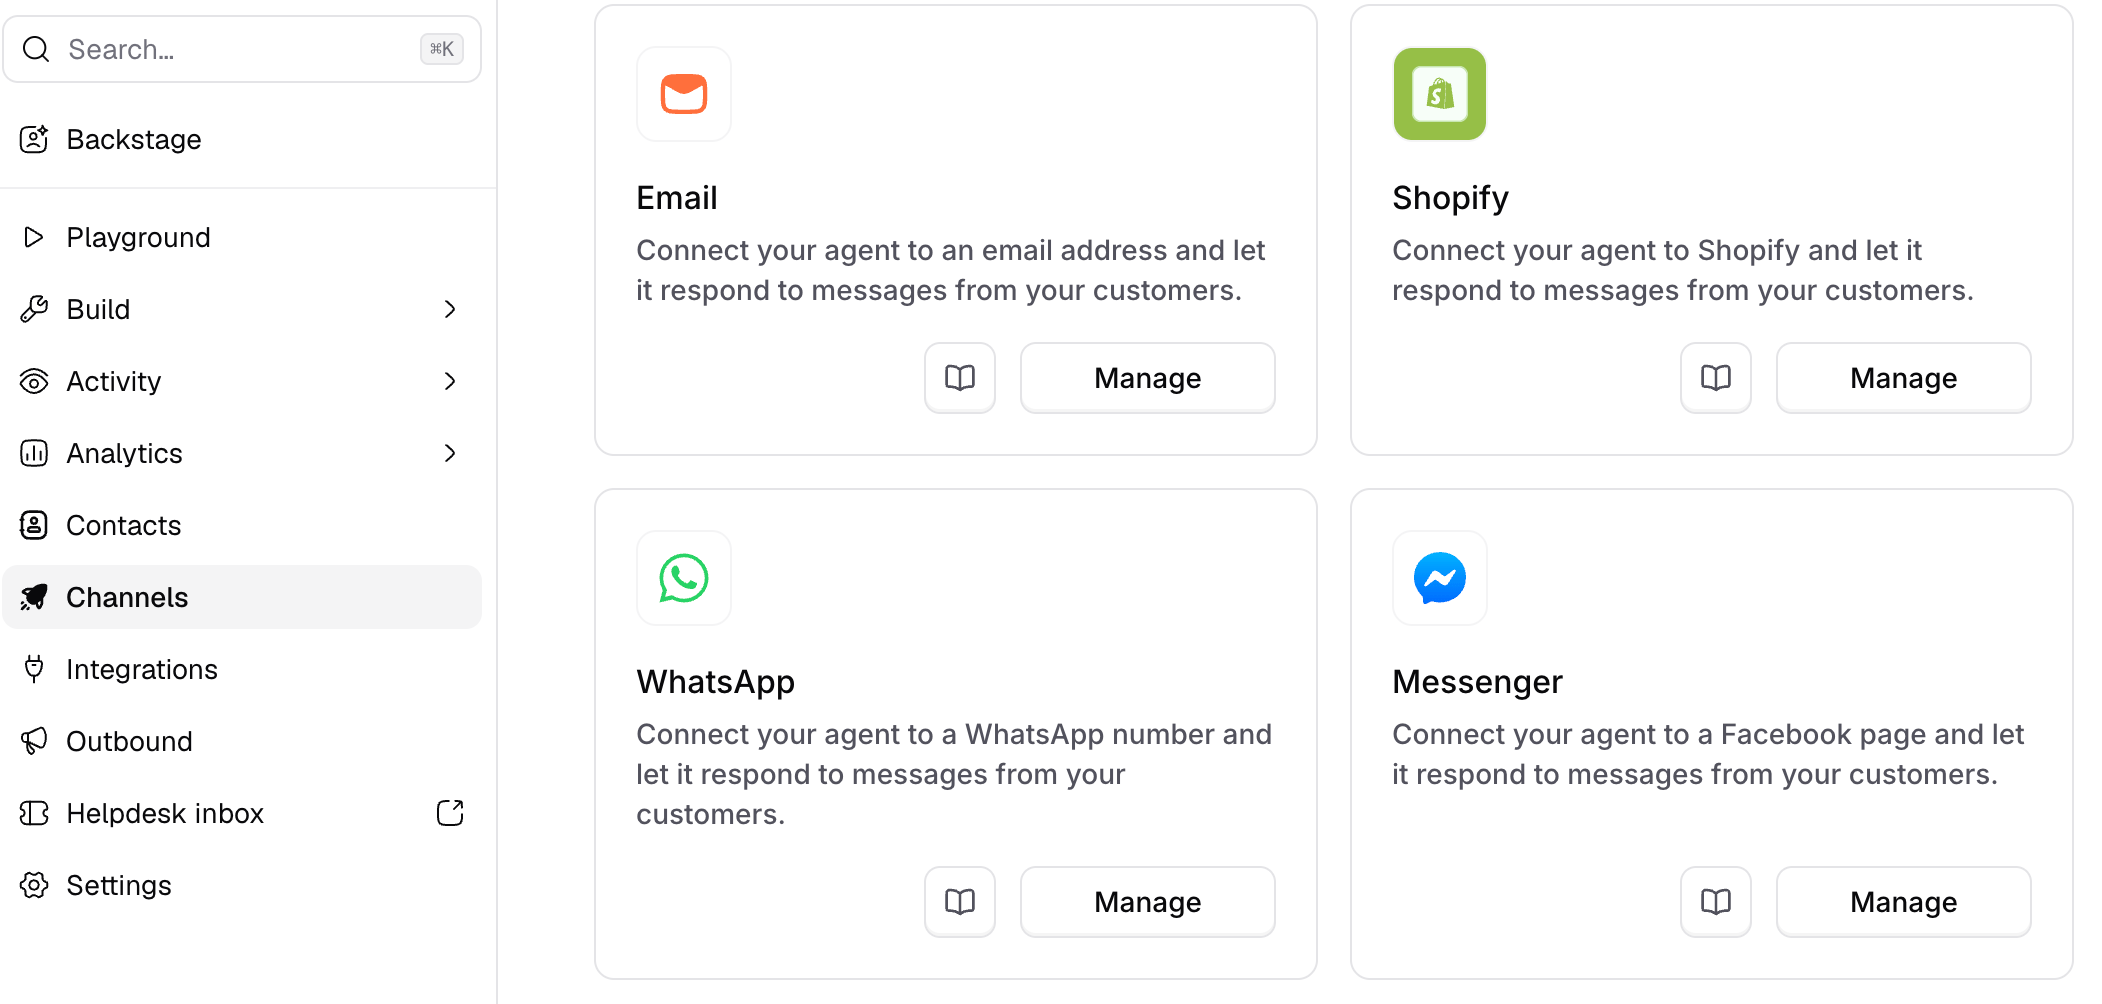
* Click **Channels** from the sidebar, then click **Setup** on the **Shopify** card.
* Or, click **Integrations** from the sidebar, then click **Connect** on the **Shopify** card.
1. Enter your Shopify store name, which is the subdomain of your myshopify.com URL. For example, if your store is at `mystore.myshopify.com`, enter `mystore`.
2. Click **Submit** to start the authorization process.
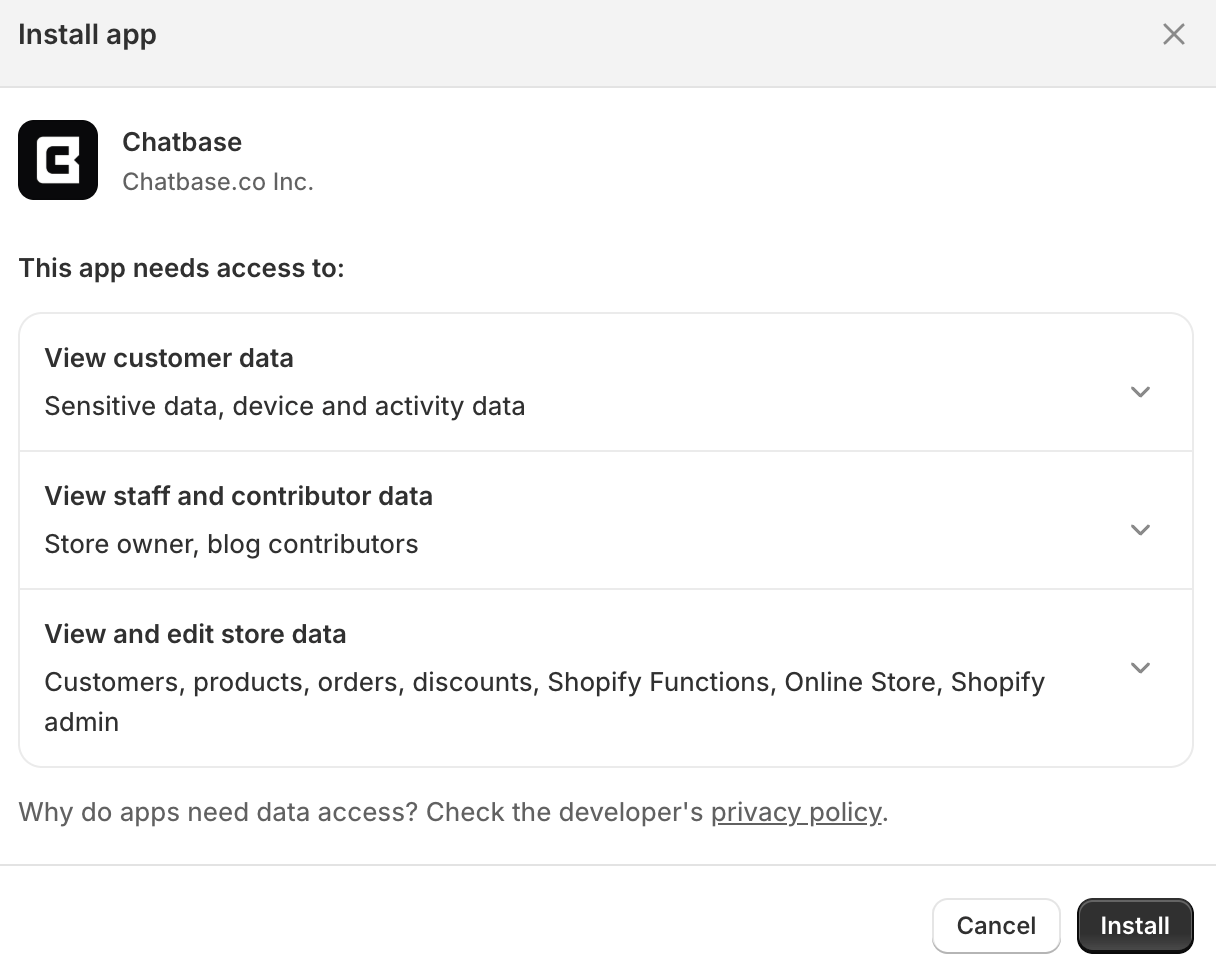
3. Shopify will ask you to authorize Chatbase. Review the requested permissions and click **Install**.
4. Once authorized, you'll be redirected back to Chatbase with a confirmation message.
On the Channels page, click **Manage** on the Shopify card.
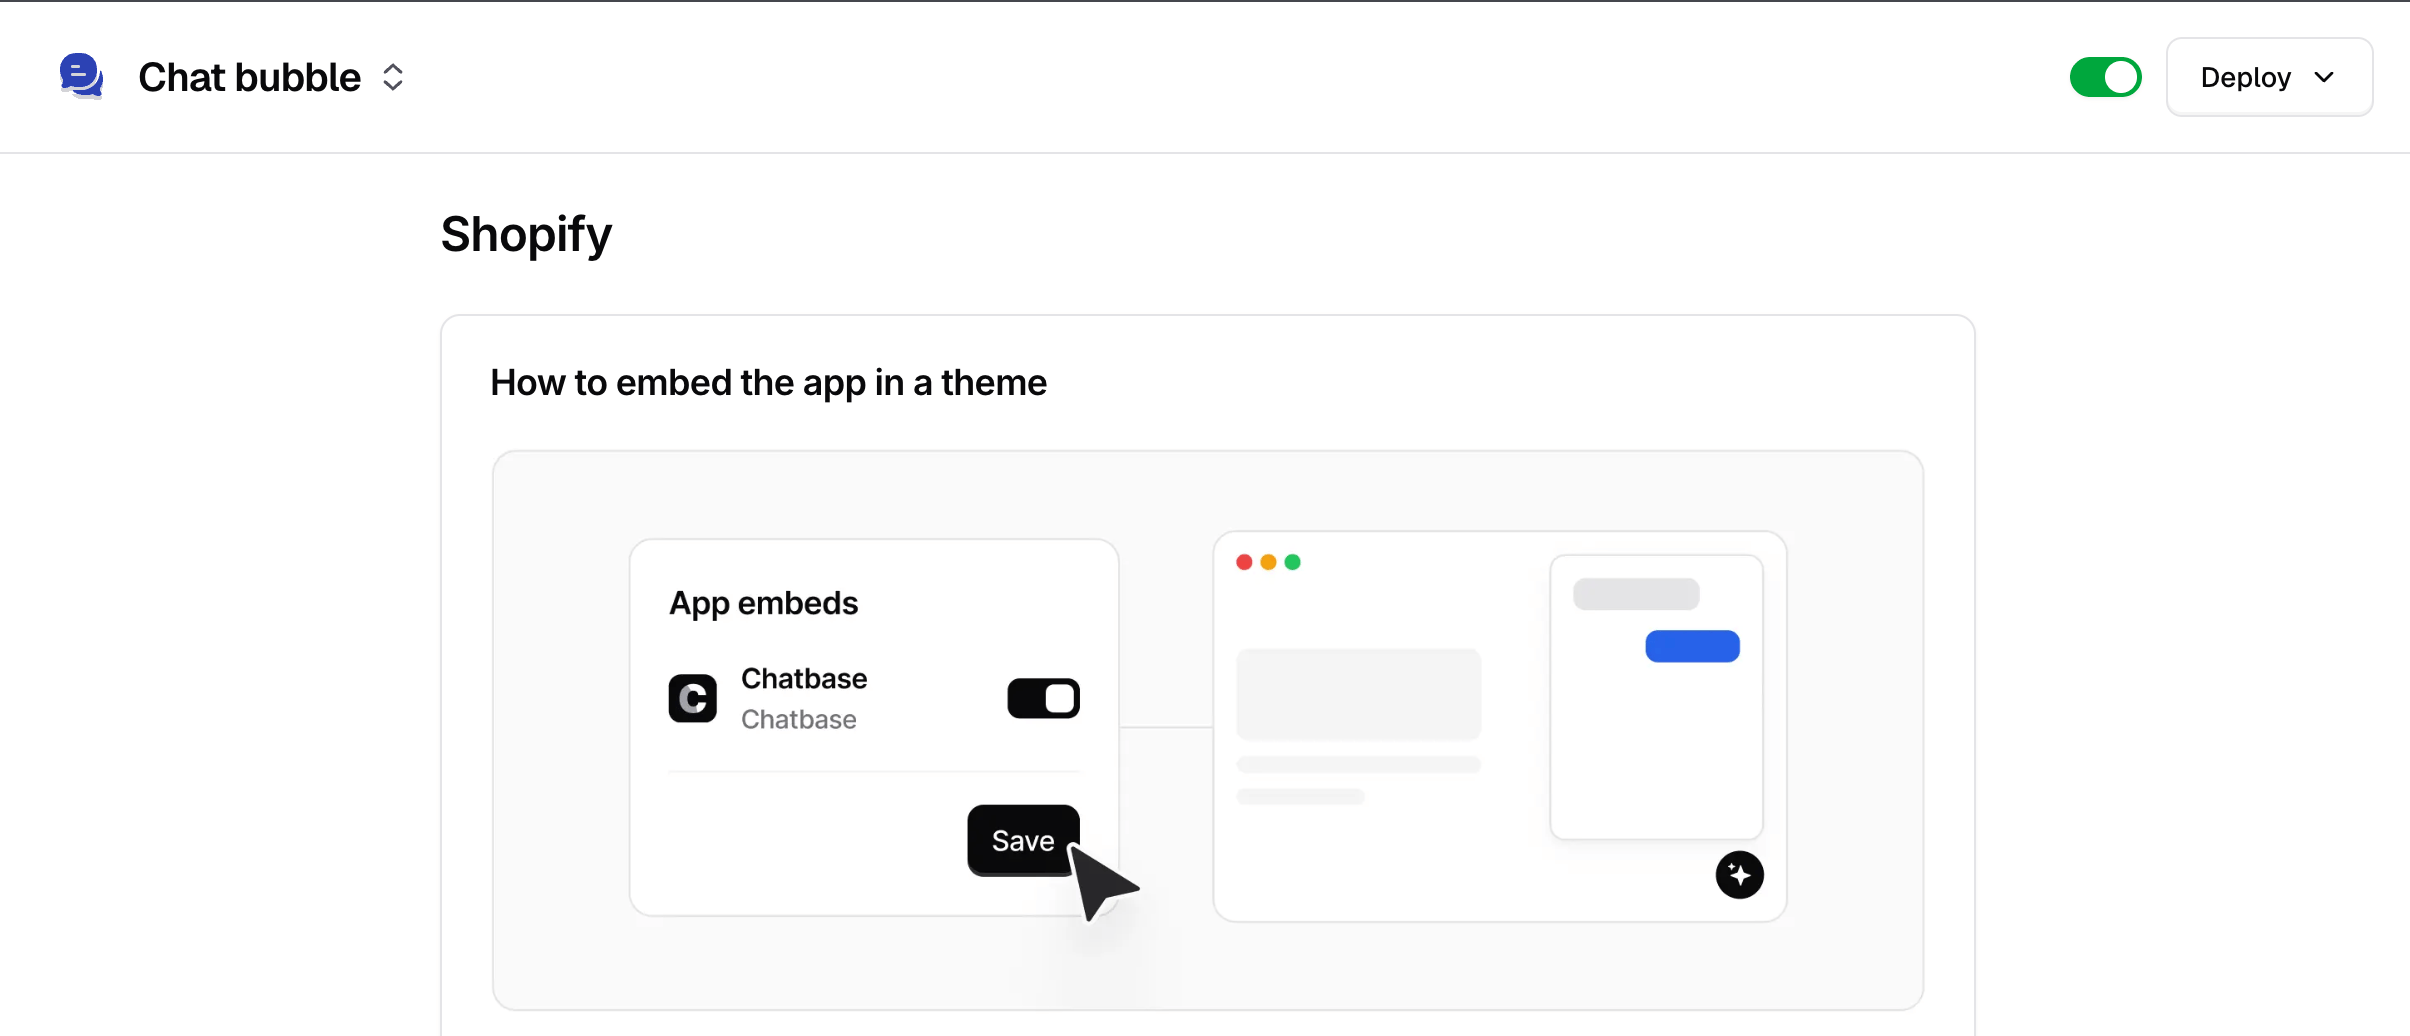
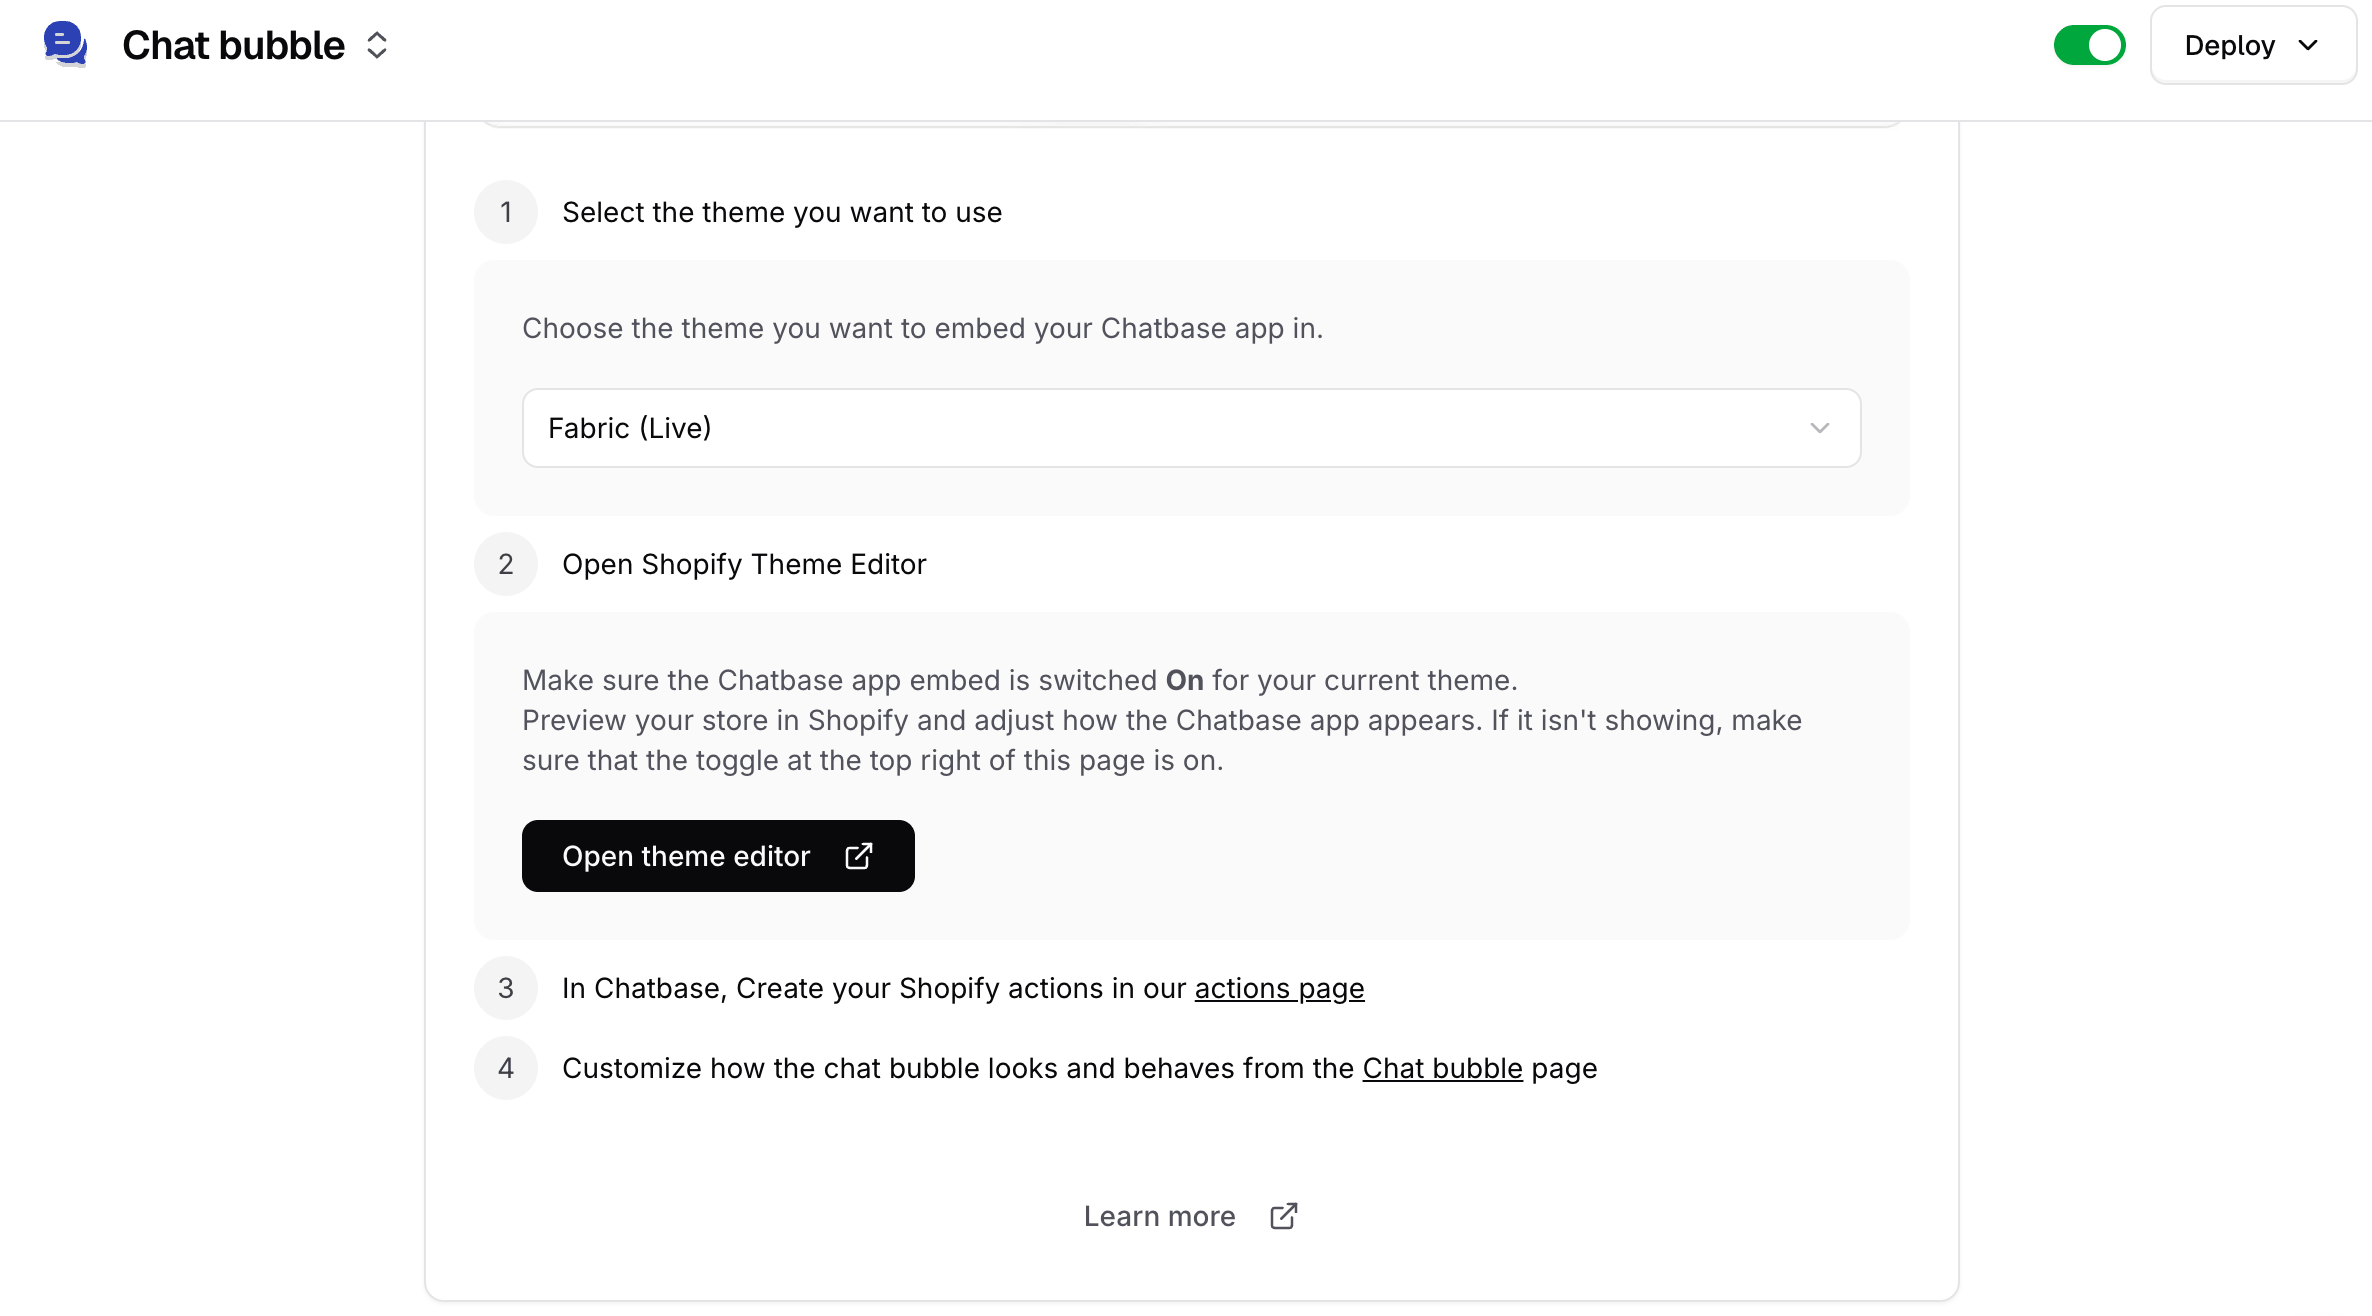
Make sure the toggle at the top right of the page is on. Then choose the theme your website is currently using, open your Shopify theme editor, and make sure the **Chatbase** app toggle is on.
***
## Method 2: Connect via Shopify Marketplace
Choose this method if you prefer to manage billing through Shopify. This option has limited add-ons, allows only a single AI agent, and does not include the 7-day free trial.
1. Go to the **Chatbase** app listing on the [Shopify App Store](https://apps.shopify.com/chatbase).
2. Click **Install**.
3. Review the permissions Chatbase requires and click **Install** to approve.
1. After installation, you'll be redirected to the Chatbase onboarding process to finish setting up your account.
2. Follow the prompts to configure your AI agent.
On the Channels page, click **Manage** on the Shopify card.
Make sure the toggle at the top right of the page is on. Then choose the theme your website is currently using, open your Shopify theme editor, and make sure the **Chatbase** app toggle is on.
Accounts created through the Shopify Marketplace are limited to a single AI agent and do not include the 7-day Chatbase free trial. For multiple AI agents, additional add-ons, or the free trial, use Method 1 instead.
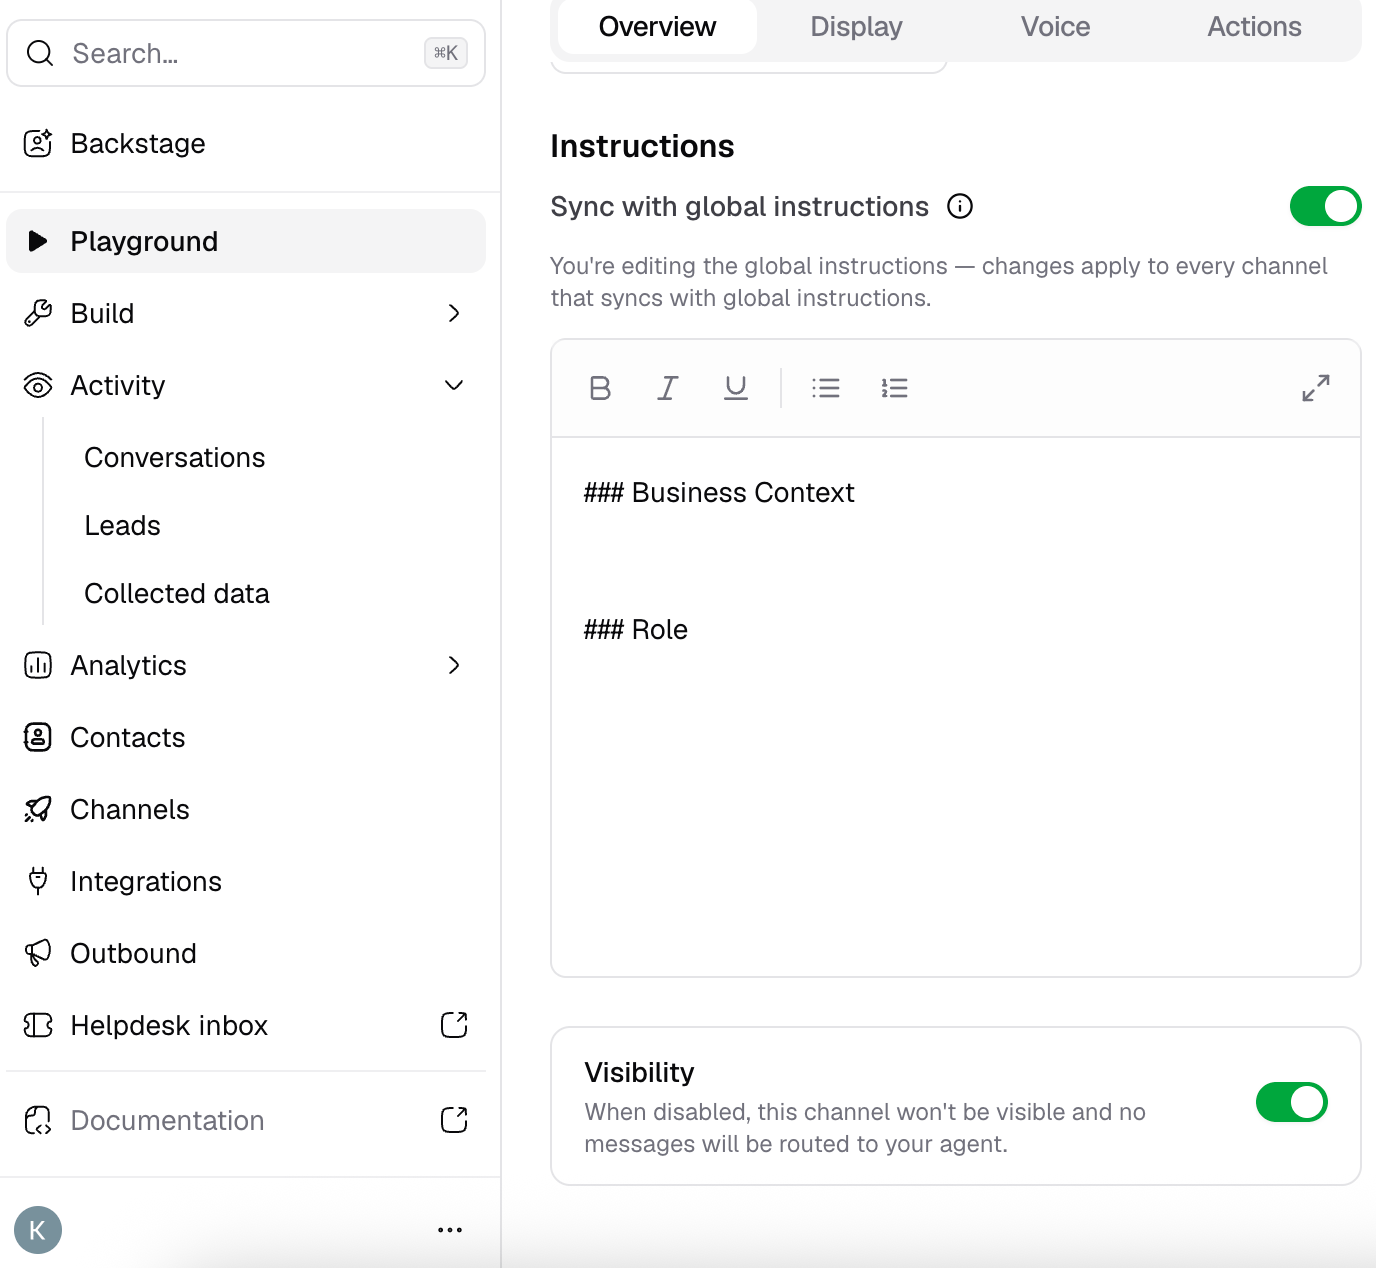
Open your storefront and confirm the chat bubble appears and your AI agent responds. If you can't see the AI agent on your website, check the toggle in either of these places:
* Click **Channels** from the sidebar and open **Chat bubble**. In the **Overview** tab, make sure the **Visibility** toggle is switched on.
* Or, on the **Channels** page, click **Manage** on the Shopify card and make sure the toggle at the top right of the page is on.
## Limitations
* **One AI agent per store.** Even on the Chatbase method, where you can have multiple AI agents, only a single AI agent connects to the Shopify store.
* **Marketplace accounts are capped at one AI agent**, have access to auto recharge credits only, and do not include the 7-day free trial.
## Next steps
Once your store is connected, enable the **actions** that let your AI agent help customers with product search, order lookups, cart management, and more.
Configure and use Shopify actions to help customers browse products, manage their cart, place orders, return and exchange items, track deliveries, and update their account information.
 Make sure the toggle at the top right of the page is on. Then choose the theme your website is currently using, open your Shopify theme editor, and make sure the **Chatbase** app toggle is on.
 ## Limitations
* **One AI agent per store.** Even on the Chatbase method, where you can have multiple AI agents, only a single AI agent connects to the Shopify store.
* **Marketplace accounts are capped at one AI agent**, have access to auto recharge credits only, and do not include the 7-day free trial.
## Next steps
Once your store is connected, enable the **actions** that let your AI agent help customers with product search, order lookups, cart management, and more.
## Limitations
* **One AI agent per store.** Even on the Chatbase method, where you can have multiple AI agents, only a single AI agent connects to the Shopify store.
* **Marketplace accounts are capped at one AI agent**, have access to auto recharge credits only, and do not include the 7-day free trial.
## Next steps
Once your store is connected, enable the **actions** that let your AI agent help customers with product search, order lookups, cart management, and more.